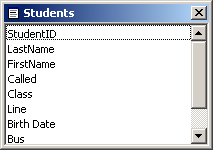
Form Design
![]()
![]() Click a button to jump to its description or just scroll the page.
Click a button to jump to its description or just scroll the page.
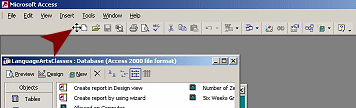
Button: Handle


At the left end of a toolbar is an area called
the handle, which looks a bit different in different versions of MS
Access. Hover over this area and the mouse pointer changes to the
Move shape ![]() .
Drag while in the Move shape and the toolbar will move. If you drag
perpendicular to the bar, it will undock and float. Drag to another edge
of the window and the toolbar will dock there.
.
Drag while in the Move shape and the toolbar will move. If you drag
perpendicular to the bar, it will undock and float. Drag to another edge
of the window and the toolbar will dock there.
Toolbar dragged to the right
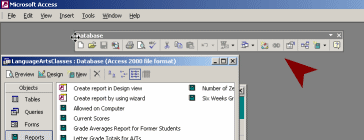
Toolbar floating
Toolbar docked at left
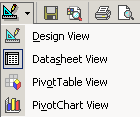
Button: Views


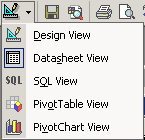
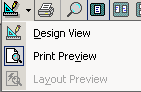
The Views button toggles between Datasheet and Design or Print Preview and Design. The arrow opens a list of all of the available views.
 |
 |
| Table | Query |
 |
 |
| Form | Report |
Button: Save

The Save button is used to save the current object that is open for editing.
It does not save the whole database. It
does not save a record.
The button is grayed out
![]() in
the Database bar since there is no object selected to be saved.
in
the Database bar since there is no object selected to be saved.
Saving records automatically: By default, MS Access automatically saves a record when you switch to a new record, or when you close the active object where you were adding or editing records, or when you close the database or Access itself.
Save immediately: The menu command | will save the current record before you leave it. SHIFT + ENTER is the key combo to save a record immediately.
Saving database with new name: To make a copy of a database with a new name is rather awkward.
- Close the database, copy and paste it in an Explorer window, and then rename the copy. Awkward!
 Access 2003: Save a backup
copy with File | Backup Database...
Access 2003: Save a backup
copy with File | Backup Database...
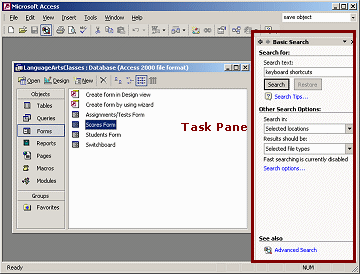
Button: Search

The Search button opens the Basic Search task pane. In this pane you can search your computer or network locations for files, especially Office documents.
Button: Print

The Print button prints the selected object immediately.
![]() The Print dialog
does NOT appear. Do not use this button unless you are SURE that
the print settings are what you want. Be sure that you want to
print the whole thing!!
The Print dialog
does NOT appear. Do not use this button unless you are SURE that
the print settings are what you want. Be sure that you want to
print the whole thing!!
Button: Print Preview

The Print Preview button changes the view to show how the current object will look if printed.

Buttons: Cut, Copy, Paste

The Cut, Copy, and Paste buttons work as usual for database objects, the contents of fields, and design elements for forms and reports.
![]() Cut removes the selected
item and copies it to the Windows Clipboard.
Cut removes the selected
item and copies it to the Windows Clipboard.
Keyboard shortcut CTRL + X
![]() Copy leaves the selected
item in place and copies it to the Windows Clipboard.
Copy leaves the selected
item in place and copies it to the Windows Clipboard.
Keyboard shortcut CTRL + C
![]() Paste inserts the
contents of the Windows Clipboard.
Paste inserts the
contents of the Windows Clipboard.
Keyboard shortcut CTRL + V.
The Windows Clipboard can only remember one thing at a time, but the Office Clipboard task pane can remember the last 24 items copied from MS Office programs.
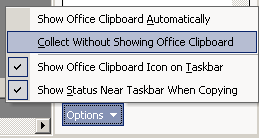 The
Office Clipboard task pane has to be active, either by being displayed on
screen or the
Collect Without Showing Office Clipboard option must be on, at the
bottom of the Clipboard task pane.
The
Office Clipboard task pane has to be active, either by being displayed on
screen or the
Collect Without Showing Office Clipboard option must be on, at the
bottom of the Clipboard task pane.
Button: Format Painter

The Format Painter button offers an easy way to copy a whole set of formatting choices from one object to another of similar type.
How it works: Click the Format Painter button and the
mouse pointer changes to the Format Painter shape![]() and the button gains a thin, blue border
and the button gains a thin, blue border
![]() .
Click on the object that you want to format. The pointer changes back to the Select
shape
.
Click on the object that you want to format. The pointer changes back to the Select
shape
![]() and
the button loses its border.
and
the button loses its border.
![]() The
mouse pointer has bar across it
The
mouse pointer has bar across it![]() when Format Painter is turned on but the pointer is not over an object that you
can format.
when Format Painter is turned on but the pointer is not over an object that you
can format.
![]() Double-click the Format
Painter button to format several objects. The pointer
will not go back to the Select shape until you click the button again.
Double-click the Format
Painter button to format several objects. The pointer
will not go back to the Select shape until you click the button again.
Buttons: Undo/Redo

The Undo and Redo buttons let you change your
mind about what you just did. These buttons are gray when there is
nothing in the action list.
![]()
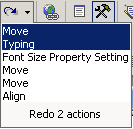 Design view: Undo
or redo the 20 most recent actions.
Design view: Undo
or redo the 20 most recent actions.
The down arrow opens the full list of actions. All actions above the
one you pick will be undone or redone. The list of actions is cleared
when you leave Design view.
Editing Records: You can undo actions only for the current
record. The Redo button does not show.
![]()
There is no list of actions, but clicking the Undo button repeatedly will back up
through the changes you made for this record. You cannot redo what you
have undone for records. The Undo list is cleared when you move to a new record
or apply a filter or switch to a different window.
Undo with menu:
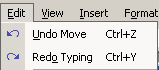 | The Edit menu will show
at the top of the menu list the last action, like Undo Move or Undo Property Setting. The
last action that you did with Undo will show as .
| The Edit menu will show
at the top of the menu list the last action, like Undo Move or Undo Property Setting. The
last action that you did with Undo will show as .
If you leave a record, you can Undo Saved Record only if you have not made a change in another record.
Editing Form/Report - Revert with menu: For a form or report, you can revert to the last saved version after making changes to the form/report. Use the menu |. You cannot redo those changes. This is handy for dumping a whole set of changes that you made since the last save.
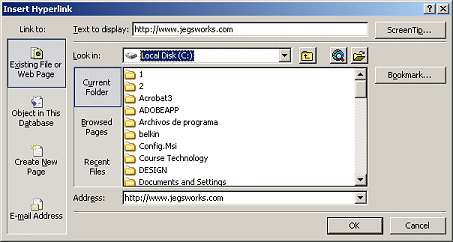
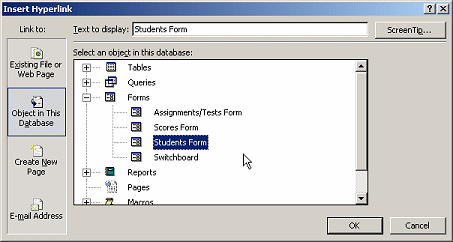
Button: Insert Hyperlink

The Hyperlink button opens the Insert Hyperlink dialog. You can create a text link to a web site or a document on your intranet or to an object in the database.
Button: Field List

 The
Field List button opens a list of the fields in the source for the
current form or report. The source can be a table or query.
The
Field List button opens a list of the fields in the source for the
current form or report. The source can be a table or query.
You can drag a field from the list and drop it onto the design view of
your form or report.
Button: Toolbox

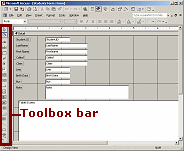 The
Toolbox button toggles on and off the display of the
Toolbox Bar. The
bar holds a number of buttons for adding and formatting controls on a
form or report.
The
Toolbox button toggles on and off the display of the
Toolbox Bar. The
bar holds a number of buttons for adding and formatting controls on a
form or report.
Button: AutoFormat

The AutoFormat button applies one of several formatting schemes to your form or report. You can adjust or change any or all the formats afterwards.
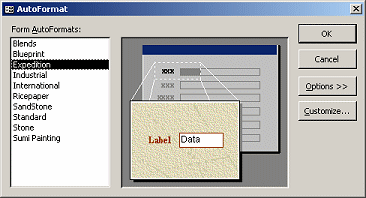
Choices for a Form
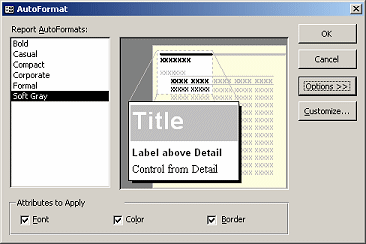
Choices for a Report
Button: Code

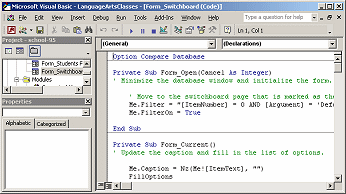
The Code button opens the window for Microsoft Visual Basic where you can see and edit any Visual Basic code that is associated with the selected object. Database programmers write a lot of code but ordinary users do not!
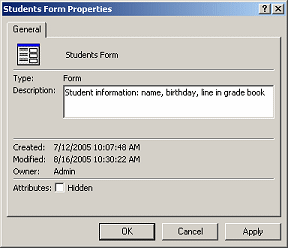
Button: Properties

The Properties buttons opens a dialog of the various properties available for the selected object. Objects in the Database window do not have many properties. But objects in the Design view of a form or report often have dozens of properties that can be changed from the defaults. These properties include formatting choices as well as event procedures that control what shows or is hidden and what is calculated.
Button: Build

The Build button opens a wizard for creating an expression.
An expression is used to calculate a value for a control or for a criteria or a validation rule. The calculated value can be either a number or a combination of text values.
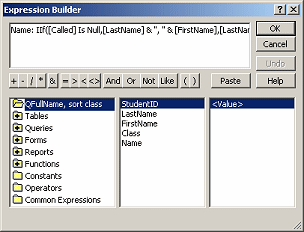
An expression is a combination of identifiers, operators, functions, and values.
identifiers like [Bonus Points]![StudentID]
where the first identifier is the table name and the second is the field
name.
operators like + - * / >
< = &
functions like Average, Max, LCase,
IsNull
values
Examples of expressions:
Field names are in square brackets, like [Tax]
Numbers: To calculate the price after adding tax and shipping:=[Subtotal] + [Shipping] + [Tax]
Text: To concatenante text or text
and values into a single string:
=[LastName] & ", " & [FirstName] & " "& [MiddleName]
="Total Number of scores for A/T " & [A/T ID]
Expressions get messy easily! But they are very powerful and useful.
Button: Database Window 
The Database Window button brings that window to the top. The Database window remains open as long as the database is open. You can minimize it or cover it with other windows.
A database programmer can hide the Database window and this button to keep users from interfering in the careful work he has done.
Button: New Object

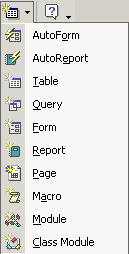 The
New Object button shows the icon for what you chose the last time. The
arrow opens a list of links.
The
New Object button shows the icon for what you chose the last time. The
arrow opens a list of links.
The AutoForm and AutoReport choices will create a basic form or report for the table or query that is currently selected. You can, of course, change the layout and the formatting afterwards.
The remaining choices open the New dialog for the object type or the
Design view for macros and modules.
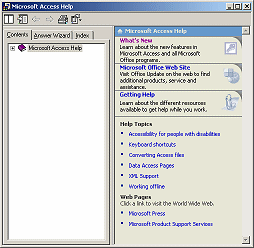
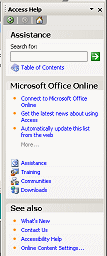
Button: Help


The Help button looks and behaves differently in Access 2002 than in Access 2003.
|
|
|
Button: Toolbar Options


![]() The
down arrow at the far right of a toolbar opens a cascading menu: Add or
Remove Buttons. You can customize the toolbar by
adding or removing buttons.
The
down arrow at the far right of a toolbar opens a cascading menu: Add or
Remove Buttons. You can customize the toolbar by
adding or removing buttons.
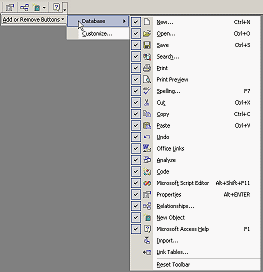
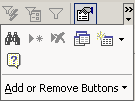
![]() A double arrow above the down arrow tells you that the window is too narrow to show
all of the buttons on the bar. Clicking the arrow in this case will open a palette of
the hidden buttons, in addition to the menu Add or Remove Buttons.
A double arrow above the down arrow tells you that the window is too narrow to show
all of the buttons on the bar. Clicking the arrow in this case will open a palette of
the hidden buttons, in addition to the menu Add or Remove Buttons.
All Office programs display the most recently used buttons when there
is not room for all of them.
As you continue to work in a small window, which buttons are showing will change.
This can be confusing!
|
Teachers: Request permission to use this site with your class Copyright © 1997-2012 Jan Smith <jegs1@jegsworks.com> All Rights Reserved |
~~ 1 Cor. 10:31 ...whatever you do, do it all for the glory of God. ~~