
Jan's Working with Numbers
Excel Basics: Getting Started: Appearance
It can be confusing if your worksheet doesn't look quite like what you see in these lessons. It helps if your Excel window has the same parts showing and is the same size. Unfortunately even if all your settings are the same as mine, the size of your monitor and the resolution that you use can still make your documents look a bit different from the illustrations. Don' t let it make you too crazy!
Sample looks:
Standard look: Excel window with workbook window maximized
Window is wide enough to show all parts of Home ribbon tab.

Small window: Home ribbon tab must compress to fit window
Excel 2007, 2010: Small workbook window and a minimized workbook window.
Two task panes showing
| |
Step-by-Step: Appearance |
|
| What you will learn: | to match window appearance - window size document window size view used zoom amount |
Start with: ![]() (a blank
workbook)
(a blank
workbook)
- If necessary, open Excel to a blank workbook.


 Excel Window
Maximized or Not:
Excel Window
Maximized or Not:
If necessary, click the Maximize button

 in the Title bar of the Excel window to make it take up the whole Desktop area.
You usually need all of the display space you can get for spreadsheets!-
Click the Restore button

 on the Title bar of the Excel window to return the window to
its previous size. Drag the
edges of the window to a convenient size.
on the Title bar of the Excel window to return the window to
its previous size. Drag the
edges of the window to a convenient size.

 Excel 2007, 2010: These versions allow multiple worksheet windows inside the Excel window. Each of those windows has its own control buttons. Be careful to click the one you mean to click.
Your window may have different proportions than the illustrations and may show more or fewer ribbon buttons. Illustrations in the lessons sometimes show a window that is smaller than would be comfortable to work with to save space on the lesson page.
-
 Excel 2007, 2010: Workbook
Window Maximized
Excel 2007, 2010: Workbook
Window Maximized
within the Excel window:
If necessary, click the Maximize button in the workbook title bar to see only one open workbook.
The window control buttons when the workbook is maximized are underneath the control buttons for the overall Excel window, beside the Help button.
Later, when you wish, you can use the Restore button in the workbook title bar to return the workbook window to its
previous size so you can see more than one open workbook in
the same window.
in the workbook title bar to return the workbook window to its
previous size so you can see more than one open workbook in
the same window. -
 Use Normal view
  .
.
The view button on the Status bar is highlighted in color for the current view.
- Set Zoom = 100% (the default) on the Status Bar.
Excel window is not maximized; worksheet window is not maximized.
Excel 2007 and 2010 put each workbook into a window inside the Excel window.
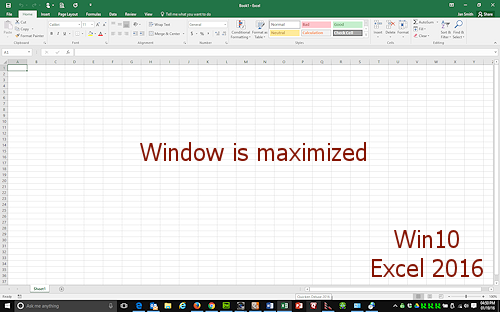
Excel window maximized
Excel 2013 and 2016 use separate windows for each workbook.
|
|
| © 1997-2017 Jan Smith All Rights Reserved |
Site Map What's New |
Privacy Policy Terms of Service Copyright Acknowledgements |
~~ 1 Cor. 10:31 ...whatever you do, do it all for the glory of God. ~~
Last updated: March 22, 2017