
Jan's Working with Presentations
Basics: Printing: Print Preview
PowerPoint offer more choices for printing than most programs. There are several layout options, but that makes it easy to print the wrong one.
Print Preview is your friend! Use it!!!
![]() PowerPoint 2007: Uses the old style Print Preview window with a
toolbar at the top. The Print button on the toolbar opens a Print dialog.
PowerPoint 2007: Uses the old style Print Preview window with a
toolbar at the top. The Print button on the toolbar opens a Print dialog.
![]()
![]()
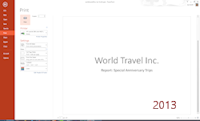
![]() PowerPoint 2010, 2013, 2016: Preview and
printing choices are on the Print page of the Backstage View.
PowerPoint 2010, 2013, 2016: Preview and
printing choices are on the Print page of the Backstage View.
File > Print
It's quite a change, but it works well once you start using it.
| |
Step-by-Step: Print Preview |
|
| What you will learn: | to open a recent presentation to switch to Print Preview to pick a print layout to frame slides to create header and footer for handouts to print handouts to print the outline |
Start with: ![]() ,
,![]() worldtraveloffers-Lastname-Firstname.pptx from previous lesson
worldtraveloffers-Lastname-Firstname.pptx from previous lesson
Open Recent Presentation: Recent Presentations
In the last step-by-step lesson, you closed the presentation but did not close PowerPoint.
-
If necessary, open PowerPoint to a blank document.
-
View the list of recent documents and click on worldtraveloffers-Lastname-Firstname.pptx to open it. Remember that you used your own lastname and firstname.
(Your list of recent documents will of course be different from the illustrations.)
The presentation opens. PowerPoint 2007:
Office button
PowerPoint 2007:
Office button 
 PowerPoint 2010: File tab > Recent
 PowerPoint 2013: File tab > Open > Recent Presentations
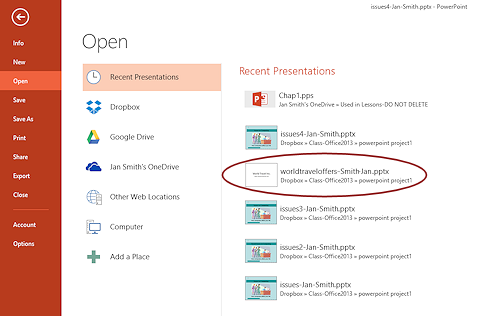
 PowerPoint 2016: File tab > Open > Recent
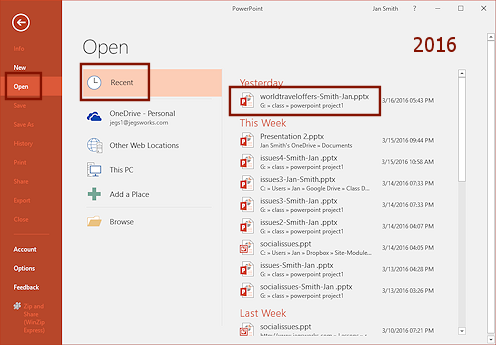
 Problem: Cannot find file in the list
Too many other files have been opened more recently or this computer was never used to open the file.Solution: While still viewing the Recent presentations, navigate in the Open dialog to where you saved your Class files.
PowerPoint 2007, 2010: Click on Open
PowerPoint 2013, 2016: Open > Computer or This PC > Browse
Open Print Preview
-
Click on


 the Print Preview button that you added to the Quick Access Toolbar
earlier.
the Print Preview button that you added to the Quick Access Toolbar
earlier.The preview opens with the default print layout, Slides, which has each slide take up a whole page.
-
View the other pages of the print-out:
PowerPoint 2007: Use the Next Page button on the toolbar or you can use
the scrollbar. PowerPoint 2010, 2013 2016: Use the arrows below the preview or use the scrollbar.Lots of wasted space on these pages.
Pick a Print Layout
-
Open list of layouts:
 PowerPoint 2007: On the
Preview toolbar, click the Options... button.
PowerPoint 2007: On the
Preview toolbar, click the Options... button.
A menu of options appears.
 PowerPoint 2010, 2013, 2016: Click the button for slide layouts in the middle pane, which shows Full Page Slides right
now.
PowerPoint 2010, 2013, 2016: Click the button for slide layouts in the middle pane, which shows Full Page Slides right
now.
A palette of options appears.
-
 Experiment: Options for printing
- Inspect the items on this list to see what can be changed from here.
PowerPoint 2010, 2013, 2016: Also look at options in other controls beside the preview. - Try out various options besides layouts.
Which ones make a difference in the preview? Which do not seem to make a difference?
Some options apply only to the printing process, not to the layout. - Undo your changes.
- Inspect the items on this list to see what can be changed from here.
 In
the list of options, click on Frame Slides.
In
the list of options, click on Frame Slides.
Now each slide has a border. Very helpful since these slides don't yet have a background.
- Scroll through all of the slides again to see what adding a frame
looks like.
Print Layout: Handouts
PowerPoint has a variety of layouts for handouts, pages to give to your audience. Only you can decide which layout will work best for your presentation.
-
To see the choices for layouts:
 PowerPoint 2007: In Print Preview, click the arrow at the end of the Print What: control
A list of layouts appears. PowerPoint 2010, 2013, 2016: In the Print Preview page, click the button for slide layouts, which
still shows Full Page Slides.
PowerPoint 2010, 2013, 2016: In the Print Preview page, click the button for slide layouts, which
still shows Full Page Slides.
A palette of layouts appears.
Live Preview does NOT work for this palette.
- Select each layout in turn and scroll through the
pages to see how the slides fit on the page.
-
 Finally, click on Handouts: 3 slides per page.
This layout is the only one with lines for your audience to use for their own notes. When giving a presentation, be
sure to give the pages out before you start!
When giving a presentation, be
sure to give the pages out before you start!
Headers/Footers: Notes and Handouts
You can create a header and a footer that is just for Notes and Handouts.
- Open Header/Footer dialog:
 PowerPoint 2007: Click
the Options button again and click on Header and Footer....
PowerPoint 2007: Click
the Options button again and click on Header and Footer....
 PowerPoint 2010, 2013, 2016: On the Print Preview page, click the link Edit
Header & Footer.
PowerPoint 2010, 2013, 2016: On the Print Preview page, click the link Edit
Header & Footer.
The Header and Footer dialog appears.
Since you are previewing a Handout layout, the Notes and Handouts tab is on top.
- If necessary, click on the tab Notes and Handouts.
-
 Click the box by Date and time to put a
check mark in it.
Click the box by Date and time to put a
check mark in it.
Notice what part of the preview in the dialog turns bold. That is where the date/time will be printed.
- Click the box by Header and in the text
box below it, type in your name.
The information in this box will appear at the top left of the printed page.
- Verify that there is a check in the box beside Page number.
- Click the box beside Footer and in the text box below it
type the name of your file, worldtraveloffers-Lastname-Firstname-pptx, of course using your own
first and last names.
Other programs often have a way to automatically enter this kind of information with a field, but PowerPoint does not.
- Click the button Apply to All.
The dialog closes.
- View each page of the print layout to see that your new header
info is there.
Print Preview: 3 Slides per page
-
 Click the Print button. PowerPoint 2007: The
Print dialog opens. Click OK to accept the default settings and print. PowerPoint 2010, 2013, 2016: Printing starts immediately using the printer showing on the Printer
button.
Click the Print button. PowerPoint 2007: The
Print dialog opens. Click OK to accept the default settings and print. PowerPoint 2010, 2013, 2016: Printing starts immediately using the printer showing on the Printer
button.The 2 pages of your Handouts print with the header and footer on both pages.
Print Layout: Outline
Collapsed levels of the outline are hidden in the Print Preview, too.
![]() Printed outline
will be formatted like slides, even if your Outline tab hid that formatting.
Printed outline
will be formatted like slides, even if your Outline tab hid that formatting.
-
Switch back to Print Preview.
Choose outline layout:
PowerPoint 2007: From
the Print what: box, select Outline View.
Print Preview opens with a ribbon of tools across the top.
 PowerPoint 2010, 2013, 2016: In the Print Preview page, click the page layout button (currently showing 3
Slides), and then click Outline in the palette of layouts.
PowerPoint 2010, 2013, 2016: In the Print Preview page, click the page layout button (currently showing 3
Slides), and then click Outline in the palette of layouts.
The preview pane changes to show the outline of the presentation.
The outline includes the text table items. The table columns might be a little off. For some reason alignments on the slide may not quite work the same as in print. You may have an extra blank bullet point. The header and footer are as before. Nice!
If you had used a regular table
instead of a text table, none of the table data would be in the outline!-
Fix any issues besides alignment in the table.
-
Print the outline.
It's only 1 page. PowerPoint 2010, 2013, 2016: You are switched to Normal view automatically after the print command is processed. -
 PowerPoint 2007: Close the Preview by clicking the
Close Print Preview button.
PowerPoint 2007: Close the Preview by clicking the
Close Print Preview button.
Your normal PowerPoint window appears.
Save
-
 Save
As worldtraveloffers2-Lastname-Firstname.pptx to the powerpoint project1 folder on your
Class disk.
Save
As worldtraveloffers2-Lastname-Firstname.pptx to the powerpoint project1 folder on your
Class disk. -
Close the presentation.
|
|
| © 1997-2017 Jan Smith All Rights Reserved |
Site Map What's New |
Privacy Policy Terms of Service Copyright Acknowledgements |
~~ 1 Cor. 10:31 ...whatever you do, do it all for the glory of God. ~~
Last updated: March 22, 2017
The dialog settings can apply to all or to just the selected slides.