
Jan's Working with Windows:
Control Mouse
There are several things that you can adjust about the way the mouse behaves using the Mouse Properties dialog. You should experiment until you find settings that let you use it comfortably.
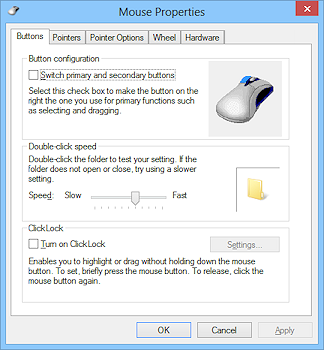
Mouse Properties dialog (Win8)
Your favorite pointing device may have more features than a standard mouse has. For example, you may be able to adjust the pressure sensitivity of a glidepad. Your device may have extra buttons that can be programmed. Your properties dialog may look different from the standard one used in the illustrations.
Older mice that use a roller ball to sense the motion of the mouse need to be placed on a mouse pad. Such a pad has the right amount of texture to let the roller ball roll smoothly without sliding. The disadvantage to this old type of mouse is that is needs to be cleaned regular to keep the ball rolling smoothly.
An optical mouse uses a laser instead of a roller ball. It does not usually need to be on a pad. But it does need a surface with a visual 'texture'.
Customizing and User Accounts: Any customizing that you do applies only to the current user. So, if you have your own logon account, you can rearrange and customize all day and other users won't be affected at all!
| |
Step-by-Step: The Mouse |
|
| What you will learn: | to move mouse pointer to click, double-click, right click, and drag to adjust mouse settings using the Mouse Properties dialog |
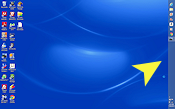
Start with: ![]() Desktop and Taskbar showing
Desktop and Taskbar showing
Move the Pointer
This lesson assumes that you are using a normal mouse that you move in order to move the mouse pointer on the screen. If you are using another type of pointing device (trackball, glidepad, touchpad, or touch screen), you will need to interpret the directions to make sense for your device.
- Turn on your computer if it is not
already on.
[Hmm. If you are reading this on the screen, I guess your computer is definitely on!]
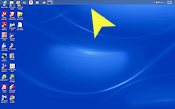
- Experiment with moving your mouse pointer around on the screen.
Get a feel how what you do with the mouse itself affects the mouse pointer motion on the screen. - Move the mouse slowly and then quickly.
With a quick motion, the mouse may accelerate faster than your hand moved. This is helpful when moving all the way across the screen, especially large screens.
Click and Right Click
 Move the pointer over the time, displayed at the far right of the Taskbar.
As you hover over the time, the day and date pop up.-
 Without shifting the pointer position, click the right mouse button.
A context menu appears. Read through the choices. Many of these change the look of your Desktop.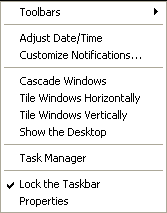
Context menu from Taskbar: WinXP, Vista & Win8 & Win8.1, Windows 7
You can lock the Taskbar so that it cannot be moved around. This also keeps areas like Quick Launch and the Notification Area from being resized.
For the next section you need a movable Taskbar.
-
If there is a check mark beside the menu command Lock the Taskbar
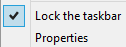 ,
,
 click on the command with the left mouse button, to unlock the Taskbar.
The menu will close immediately.
Click and Drag
Be sure that the Taskbar is not locked. (See step above)
The illustrations for this section were taken from Windows 8. But it works the same in the all recent versions.
- Slowly move the pointer to the top edge of the Taskbar.
It will change to the Vertical Resize shape . If you move too fast, you may
miss the change.
. If you move too fast, you may
miss the change.

-
 While the pointer shows this shape, hold the left mouse button down and
  drag upwards.
The Taskbar expands upwards. - Now drag back down to the bottom of the screen and release the mouse button.
Does the Taskbar vanish? It may in some versions! When this happens accidentally, it can be quite a shock. "Where's my Taskbar???!!"
- If necessary, recover the Taskbar: Move your pointer to the bottom of the screen until it turns into the Vertical Resize shape again and then drag upwards until the Taskbar pops back into
view.
What was lost is now found! - Point to the Taskbar in a blank area.
- While the pointer
 has its normal shape, drag the Taskbar again over to the right of the screen.
Wow! Suddenly the whole thing moves! Keep dragging to the top and over to the left of the screen. There is a position to make everyone happy!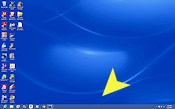

Bottom Right Top Left Now, you have seen the pointer change shape; you have clicked and dragged. What skills you have!
If you wish, you can lock the Taskbar back again now.
Mouse Dialog
You need to open the Control Panel to get to the Mouse Properties dialog.
-
Open the Control Panel:
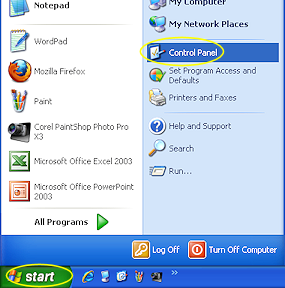


 WinXP, Vista, Win7:
- Click on the Start button.
The Start menu will appear above the button. - Move your mouse pointer to
Control Panel and
click.
 Vanishing menu: If your pointer goes off
the menu too far, the menu will vanish!
Vanishing menu: If your pointer goes off
the menu too far, the menu will vanish!

 Win8, Win8.1:
The Search pane is part of the Metro/Modern interface. It may not be able to actually list ALL of the results. If necessary, switch to the Start Screen.
- Method 1- Keyboard: Press the key with the Windows logo, similar to one of these:


 .
. - Method 2- Charms: Open the Charms menu by swiping from the right or pointing to the top right or bottom left corner of the screen.
Click on Start. 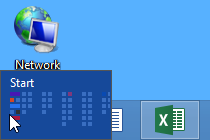 Method 3- Win8: Mouse: Move your mouse pointer to the bottom left corner of the screen until a thumbnail of the Start screen appears.
Click with the left mouse key.- Method 4 - Win8.1- Start button:
At the far left of the Task bar, click the Windows icon,
- Method 1- Keyboard: Press the key with the Windows logo, similar to one of these:
-
While in the Start Screen, start typing the words control panel.
The screen changes to show search results.Win 8 and Win 8.1 show the results a bit differently. Neither one seem to be able to list more than about 260 items, even if they give a larger number of items 'found'.
Win8: Search results start showing while you are typing. Below the search box you can see the number of items found by category: Apps, Settings, and Files. The numbers change as you type. To the left of the Search panel are icons for the selected category.
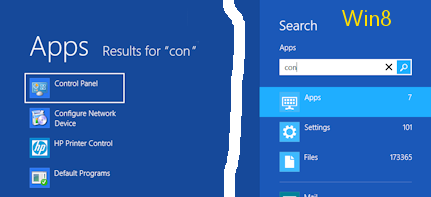
The category Apps is selected by default. If you click on Settings or Files, you will see a longer list of results in that category. Files is further broken down into Documents, Videos, Music, etc.
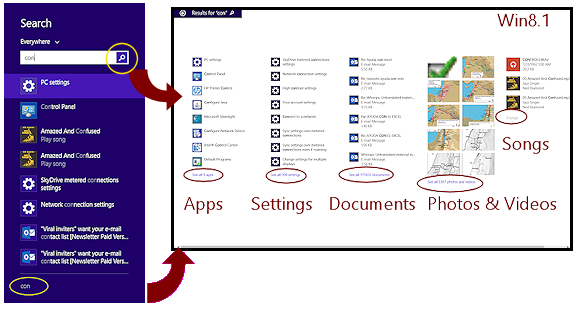
Win8.1: A short combined list of search results appears directly below the search box. To see a longer list, click the magnifying glass at the right of the search box or the copy of your search word(s) at the bottom of the list. (This does not look like a link!)
- Click on the item Control Panel, or with Control Panel selected in the results list, press the ENTER key.
The Control Panel window will open on the Desktop. This window contains icons that open dialog boxes for managing different aspects of Windows. There may also be icons for programs that are installed on the computer, especially for hardware attached to your computer. Your window may have different icons than the illustrations, of course, depending on your exact version of Windows and what programs and hardware you have.
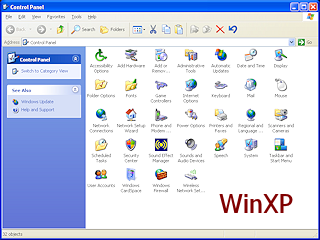
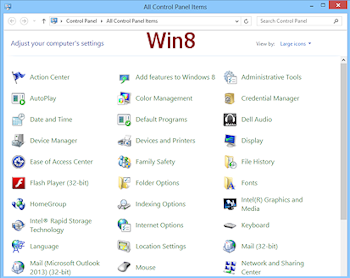
- Move your mouse pointer to the Mouse icon


 until the pointer changes to the Hand shape
  and
left click.
and
left click.
The icon image may be different if your mouse has its own software.
 WinXP:
  Double-click.
A window will open that lets you change some of the behaviors of the mouse.
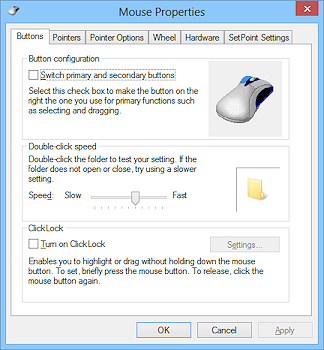 Click on the Buttons tab, if it is not already on top.
The Mouse Properties dialog box allows you to set several characteristics about your mouse's behavior.
Using a Check Box: On the Buttons tab you can switch the default functions of the buttons by clicking the little box, called a check box, labeled ""Switch primary and secondary buttons". A check mark appears in the box, which turns on the feature. This is very helpful to people who are left-handed.
Double-Click
You can control the speed required to get a double-click by using another type of dialog box input, the slide bar.
- Test your ability to double-click in the Test area in the
dialog.
If you succeed in double-clicking, the image will change!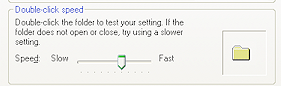
Your pointing device may use its own dialog. You may have to look around to find the test area.
- Move the slide control by pointing to the slide with your mouse and dragging.
- Double-click in the test area
again.
Is this easier or harder? Find a double-click speed that is comfortable for you.
[Note: if you are on a network or shared computer, you may not be able to keep your changes for your next session.]
Motion Settings
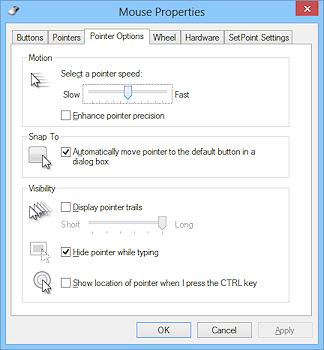 Click on the tab labeled Pointer Options.
Here is where you can change how fast the pointer moves across the screen.- Move the slide, then click the Apply button.
The changes are saved without closing the dialog.
- Test your mouse's motion.
Try different settings until you find a comfortable pointer speed. - Click on the check box labeled "Show pointer trails". Move your mouse around. Try different trail lengths by moving the slide
from "Short" to "Long".
Do you like pointer trails? Turn them off if you don't.
- Close the Mouse Properties dialog box:
- Click on the OK button if you made changes that you want
to keep.
OR - Click on the Cancel button if you do not want to keep the
changes.
Leave the Control Panel open for the next Step-by-Step.
|
|
| © 1997-2017 Jan Smith All Rights Reserved |
Site Map What's New |
Privacy Policy Terms of Service Copyright Acknowledgements |
~~ 1 Cor. 10:31 ...whatever you do, do it all for the glory of God. ~~
Last updated: March 22, 2017