
Jan's Working with Databases
Basics: Interface: Navigation Pane
The Navigation Pane holds a list of all of the objects in the database: Tables, Queries, Forms, Reports, Macros, and Modules. This pane replaces the database window that was used in earlier versions of Access.
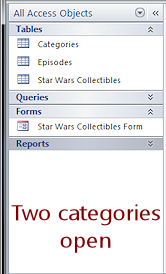
The pane comes with several different ways to display the objects in the database. The illustration below shows the default - showing all Access objects in groups of the same object type.
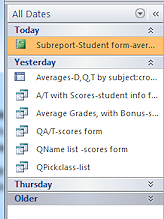
Example Navigation Pane:
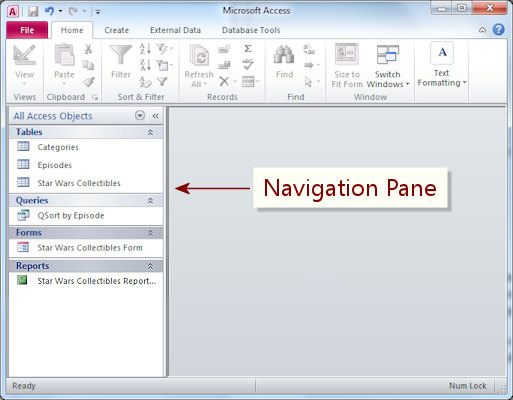
All Object categories are open in the Navigation Pane. (Access 2010)
This database has 3 tables, 1 query, 1 form, and 1 report.
No macros and no modules.
The Star Wars Collectibles database in your resource files has many more objects than the version in the illustration has.
Managing the Navigation Pane
[If you'd like to follow along with the databases used in the illustrations, open starwars.accdb and LanguageArtsClasses.accdb, which are in your resource files. Some illustrations are from earlier versions or reduced versions to keep the illustrations a reasonable size.]
Sample database from Microsoft: Northwind Traders database
The sample database Northwind Traders is quite complex. It is offered as a downloadable template from inside Access.
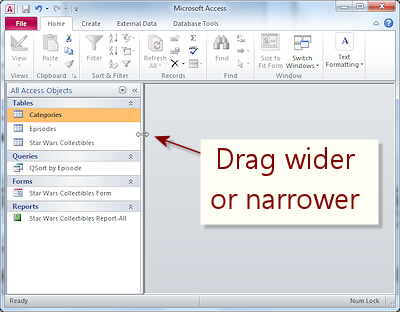
Open/Close or Resize Pane:
 At the top of the Navigation Pane is a shutter bar, which has a chevron button to close up the pane when you want more space to work. Just click on the left-pointing chevron << button at the top of the pane to close it up. The chevron reverses direction >>. Click on it again to open the full pane back up.
To resize the pane just drag the right border out or in.

Open/Close Category:
The category bars in the pane are also shutter bars, with chevrons that point up or down. Just click the chevron button at the right end of the bar ![]() to open or close that category list. You can open or close them in any combination that you wish.
to open or close that category list. You can open or close them in any combination that you wish.
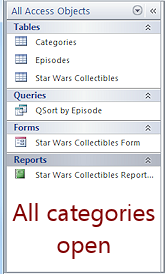
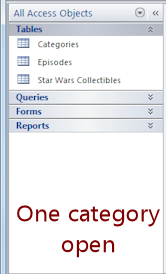
The Navigation Pane can show or hide category lists in any combination.
Category, Groups, and Filters:
![]() The text on the shutter bar at the top of the Navigation Pane shows the current filter. The down arrow opens a menu of category schemes and filters.
The text on the shutter bar at the top of the Navigation Pane shows the current filter. The down arrow opens a menu of category schemes and filters.
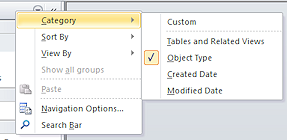 You can also right click on the pane's title bar or a group's title and choose Category to open a list of the same choices for Category.
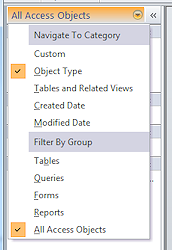 The menu (shown at the right) has two sections: Navigate to Category and Filter by Group. You must make a choice in each section, which will then show a check mark.
The illustration shows the default choices: show a category for each Object Type and filter by showing All Access Objects. This combination shows all of the objects in the list and puts all tables together, all queries together, etc., like the illustrations above. (Yes, it's still called a 'filter' even though nothing is left out.)
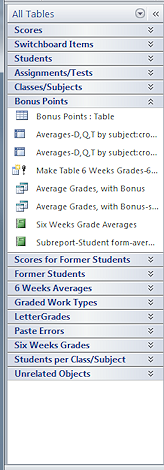
A database with only a few objects is easy to work with when all objects are shown in the pane. But it is easy to build up a large number of objects, especially queries and reports. The Language Arts Classes example database has 17 tables, 48 queries, 21 forms and subforms, 31 reports, and 2 macros. You really cannot see all of these at once!
Category Schemes:
- Object Type: (default) Puts the tables together and the queries together, etc. as the illustration at the top of the page shows.
 Tables and Related Views: Puts together all of the objects that use the same table. Since some objects use more than one table, an object can appear in more than one category in this view. This view helps you to find out what objects will be affected if you make a change to a table.
Example: In the Language Arts Classes database, the Bonus Points table is used by five queries and two reports, as shown in the illustration. The report Current Scores shows in four different categories because it uses data from four different tables: Scores, Students, Assignments/Tests, and Classes/Subjects.
-
 By Date - Created or Modified: Sometimes you need to look at everything you modified recently or else objects that were created last month. One of these two category schemes can make that an easy task.
 All items will show in a category "Older" for this example database.
-
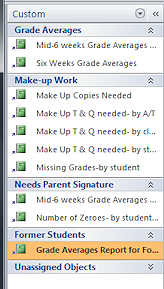 Custom Category: You can create up to 10 of your own custom categories with your own names and then create groups to go in them. Custom categories can only hold shortcuts to the actual database objects.
 The illustration shows a custom category that still has the default name, Custom. It has four custom groups. Access automatically created the group Unassigned Objects to hold the objects that do not fit into the custom groups. These custom groups help the teacher (me!) find the reports for which I had trouble remembering the exact names. It also pulls together items that were needed frequently, like the report about make-up work.
How Custom Groups Help:
- Ease of use: Pull together the objects that you or other users will use the most often.
- Efficiency: Quick way to find the objects that you have a hard time finding when you need them.
- Safety: Create a custom category and groups for objects that users will actually need to open and then hide the other views and objects to keep users from accidentally making changes that break the database.
Context Menu:
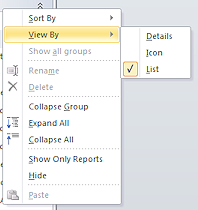
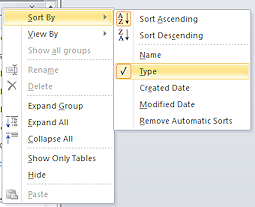 You can change how the objects display in the pane. Right click on a shutter bar for the pane or a category. The context menu has several commands about what shows in the Navigation pane. It also has submenus for Sort By and View By.
Sort By: Pick Sort Ascending (the default) or Sort Descending and then pick what property you are sorting on - Name, Type (the default), Created Date, or Modified Date.
View By:
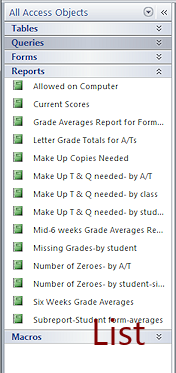
- List - (the default) Shows a list of object names with a small icon for object type.
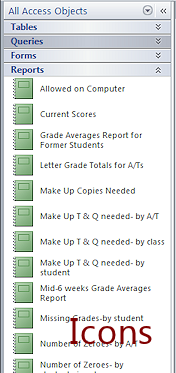
The names are cut off if the pane is too narrow. - Icons - List of names which wrap to the pane with large icons.
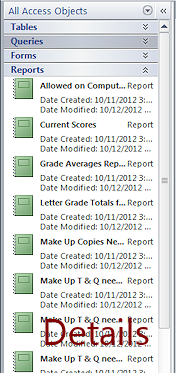
Very useful when names are long. - Details - Uses a medium size icon and includes the date and time created and the date and time modified.
The object's name will be cut off if the pane is too narrow.
 Warning: Hiding objects is easier than unhiding!
Did you notice? The right click menu for an object in the Navigation Pane includes the command Hide. But once you have hidden an object, you can no longer see the object to unhide it! Instead, to unhide, right click on the title bar of the Navigation pane and choose Navigation Options. That opens a dialog with a box to Show Hidden Objects. Anything that was hidden shows now, but is grayed out. Now you can right click and select Unhide. Whew. That's not an obvious method!
Why hide: Database designers don't want users to change or delete their hard work and thus break the database. Or they might just hide the 'behind-the-scenes' parts so that the users can more easily see the parts that they need to use.
Access itself hides 'system objects', which are tables that it creates to manage the database.
|
|
| © 1997-2017 Jan Smith All Rights Reserved |
Site Map What's New |
Privacy Policy Terms of Service Copyright Acknowledgements |
~~ 1 Cor. 10:31 ...whatever you do, do it all for the glory of God. ~~
Last updated: March 22, 2017