
Jan's Working with Databases
Basics: Access Objects: Print Report
Printing in Access most often means printing a report. The features discussed for printing forms also apply to reports. The Page Setup dialog, the Property Sheet, and the Print dialog control what will print and how it will print.
The most common error in printing reports is failing to look at Print Preview carefully before printing! Looking first will save you a lot of paper, ink/toner, and time.
Check that no extra pages are printing and that your fields show all of their contents. You have to inspect records with lots of data in Memo/Long Text fields to be sure that they are growing properly.
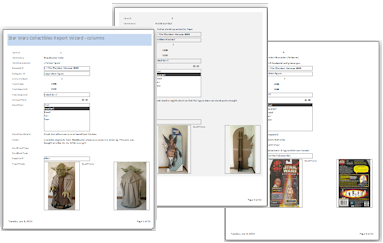
Pages from a printed report from the Star Wars Collectibles database
You can make the same type of changes to reports as you just did for a form. The Property Sheet is full of choices!
| |
Step-by-Step: Print Report |
|
| What you will learn: | to use Error Checking and Property Sheet to add a label to print a specific page of a report |
Start with: mytrips-Lastname-Firstname.accdb from a previous lesson
Report: Error Checking Options
First you need to look at the Print Preview to see if anything needs fixing.
Getting to Print Preview is a lot easier for a report. It's a view listed with all methods.
For practice, you are going to create a problem that may not be there at the moment.
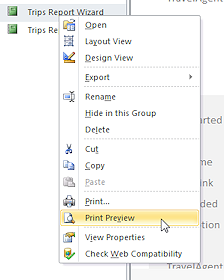 In the Navigation Pane, right click on Trips Report Wizard.
A menu appears that includes the commands Print and Print Preview. You don't ever want to click Print unless you are very, very sure of what will print. Always look at the print preview before you print! This will save you many wasted pages.
 From the context menu select .
Inspect your report for things that need to be fixed.
Especially check to be sure your records fit in the width of one piece of paper.
-
 Switch to Design View.
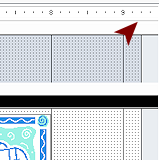
 - If necessary, drag the right edge of the report to the right to about 9.25". This will create a problem if your report did not already have one.
Normal letter paper is only 8.5" wide. The default left and right margins are ¼" . That leaves 8" for the report's contents. A report can easily wind up wider than 8" when inserting, moving, and resizing images or controls. The width automatically expands. You must pay attention to the ruler!
 Inspect the upper left corner of the report.
If the Select Report box has a green triangle in the corner, then there is an error message. The triangle shows even when the report itself is not selected. Now you just have to remember to look for it!-
Click the Select Report box.
An error Smart Tag appears. -
Hover over the Error Checking Options tag.
A down arrow appears. -
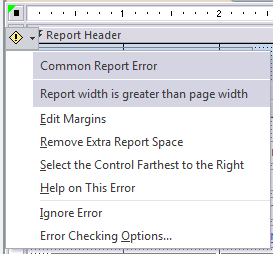
Click the down arrow in the Error Checking Options tag.
A menu appears.
The top part tells you what is wrong. The bottom part provides shortcuts to things you might want to do to fix the problem.In this case you don't know yet what you want to do. This first thing to figure out is how wide the margins are. You might be able to make them smaller.
-
 Click on Edit Margins.
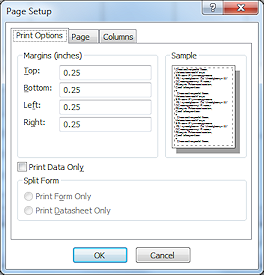
The Page Setup dialog opens to the Print Options tabs. The left and right margins are 0.25". Most printers cannot print any closer to the edge of the page than this, so you should not make the margins smaller.Left margin + Right Margin = 0.5" and the paper is 8.5" wide.
That leaves 8" for the report itself on the page. Before you can change the Width property, you must move or resize any controls that wound up on the second page.
- Click on OK to close the Page Setup dialog.
This problem cannot be fixed by changing the margins.
-
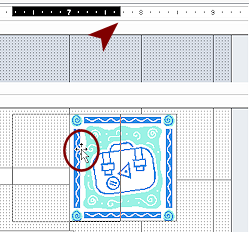 If necessary, drag the image to the left. Drop when its right edge is at 7.75" on the horizontal ruler.
 You should not need to adjust the vertical position of the image.
As you drag, an outline shows where the image will be if you drop. Both rulers shows in black where the image will fit.
- Inspect the Design View.
Are any controls extending to the right past the 8" grid line?
There shouldn't be any. -
In the Property Sheet with Report showing as Selected, change the Width property to 8" and press ENTER.
If you positioned everything correctly, your new value was accepted. If something is still too far to the right, the old width reappears.
 Verify Changes: Always look to see if a value you entered in the Property Sheet was accepted. You do not get a warning if your change was rejected. It just resets to the previous value.
 Check Lines: If a report or form is stubborn about its width and you cannot see a reason, look in Form or Report view for a horizontal line that is at the bottom or top of a section in Design View. These lines blend into the section bars and can be impossible to see in Design View. You may have to enlarge the section so you can select the line to resize it and then reduce the section size again.
 - If necessary, drag the bottom edge of the Detail section up to just below the control Diary.
This reduces the space each record needs.  Save the report with a new name - Trips Report Wizard - for print.
Report: Add Label
Just like for the form you printed, you need to have your name on this document, too. You will put your name in a new label in the footer. This time there are two controls already there. Not to worry!
-
Switch to Design View.
In the Page Footer there are two controls. The control on the left creates the date and aligns the date to the left. The control on the right creates the page number and aligns its result to the right. That leaves a lot of space in the middle for your name, even though the two controls are very wide in Design View.
- On the Report Design Tools: Design tab in the gallery of controls, click on Label

 .
.
- Move the mouse pointer over the Page Footer in between the two existing controls.
The shape of the pointer changes shape to the Add Label shape .
. 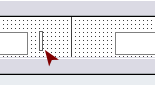 Click in between the controls.
A very narrow text box appears.- Type your name.
The text box expands to hold what you type.
If your name is long, the text box will overlap the control on the right. That's OK. 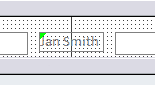 Click out in a blank area to deselect your new label.
A green error triangle appears at the top left of the label.- Click the control to select it and make the Error Options Tag appear.
- Hover over the Error Options Tag to make the down arrow appear.
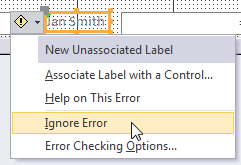 Click on the arrow to make the menu appear.
Access likes labels to be bound to controls, but some labels are just words you want to see on the page.- Click on Ignore Error.
The triangle vanishes. -
If necessary, drag the new label to center it in the Page Footer horizontally and to line it up with the other two controls.
(There is no command that will center a control horizontally on the page.)
If your name is long, the label may need to overlap the controls to get it centered on the page. That's OK. The actual values that show on the page are far to the sides. You won't overlap the text.Centering Control: The grid lines are there to help you position objects. The report is 8" wide, so the middle of the width is the grid line at 4". The resizing handle in the middle of the top edge of the label should be lined up with the 4" grid line. That will center the control on the 4" line.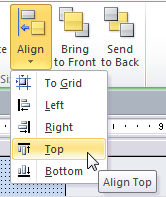 Aligning with other controls: To get several controls lined up, you must select them all. Then you can use choices on the Align button on the Report Design Tools: Arrange tab or on the right click menu.
 - Open Print Preview again and make sure your change(s) worked as expected.
Fix any problems that you find.
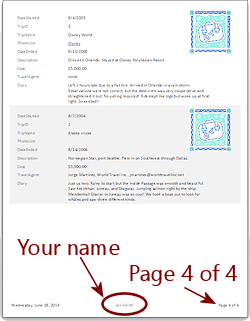
Your report should take 4 pages to print now.  Save the report.
[Trips Report Wizard - for print]
Report: Print Specific Page
 While in Print Preview, click the Print button
 on the Print Preview ribbon tab to open the Print dialog.
- Pick your printer.
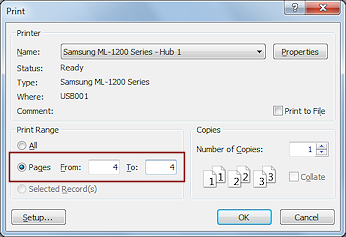
- Change the Print Range to print page 4 only by entering Pages From: 4 To: 4.
 Click on OK to print.
Your report may have a different image.- Close the report.
|
|
| © 1997-2017 Jan Smith All Rights Reserved |
Site Map What's New |
Privacy Policy Terms of Service Copyright Acknowledgements |
~~ 1 Cor. 10:31 ...whatever you do, do it all for the glory of God. ~~
Last updated: March 22, 2017