
Jan's Working with Databases
Basics: Access Objects: Manage Table
As you work with the tables that you create, you will find that you need to make changes. You may want to change the order of the columns. You may need to increase the field size for a text field like LastName or for a number field like NumberOnHand. You will certainly want to add new records and remove records from time to time.
This lesson covers a lot of ground, but we are really only getting a taste for the various features that you can control for a table. You will do more in later lessons.
So we have three categories of changes to make:
-
Layout - Datasheet View: Change appearance of datasheet
-
Data - Datasheet View: Add/remove records; edit data
-
Fields - Design View: Add/remove fields, edit field names, data types, and properties
Changing Datasheet Layout
In the Datasheet View you can change the appearance of the datasheet (the layout) in a number of ways. Undo does not track these changes!
Save layout changes: Any time you save the table, layout changes are saved.
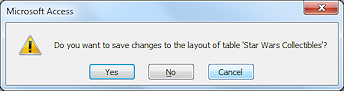 Dump all layout changes: If you try to close the table that has unsaved layout changes,
you will get a message asking if you want to save your layout. Choose No to get rid of all layout changes since the last time you saved.
Dump all layout changes: If you try to close the table that has unsaved layout changes,
you will get a message asking if you want to save your layout. Choose No to get rid of all layout changes since the last time you saved.
Layout (Datasheet View):
-
Row height
All rows must be the same height.
Standard height is 14.25 points when the default font is used, Calibri 11pts.How to change: Drag divider between record selectors or right click a record selector at the left end of the row and select Row Height...

-
Column width
Standard width is 1", which is 11.75 characters when the default font is used, Calibri 11pts.
Columns do not have to be all the same width.
Best Fit widens the column to fit the widest item currently visible in the column.
How to change: Drag right edge of column selector or right click column selector at the top of the column and select Field Width...

Best Fit: Double-click the right edge of a column selector to make the column width enough for the widest item in the column. Or choose Best Fit in the Field Width dialog.
Don't do this with fields that have lots of text! -
Rearrange order of columns
Does not change order of fields in Table Design view.How to change: Drag the column selector. A black bar appears between columns for the new location.
-
Cell formatting: Font, font color, font size, grid lines, background color for alternating rows
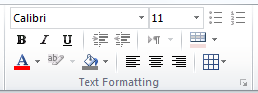 How to change: Home ribbon tab > Text Formatting tab group.
All text formatting applies to the whole datasheet.
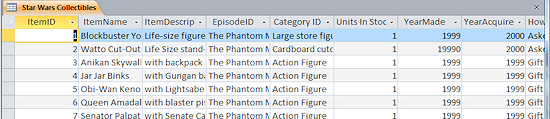
Datasheet with default formatting (Access 2010)
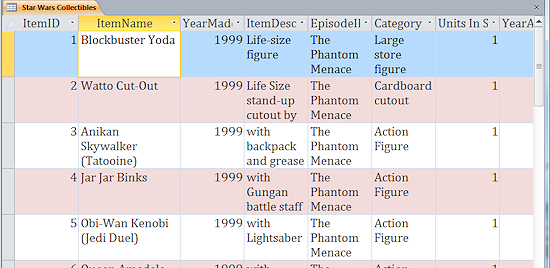
Datasheet with new formatting for:
row height, column width, font, font size, color for alternating rows, column order
-
Hide/Show Field
Sometimes you don't really want to see all of the information in a table. You can hide fields and show them again later.How to hide a field: Drag the right edge of the column to the left until the width of the column is zero OR right click the field and select Hide Fields from the context menu.
How to show a hidden field: Right click on any field and select Unhide Fields from the context menu. A list of all the fields appears with a check mark beside each one that is currently showing. Click the box for any hidden field you want to show and then click on OK.
Sort to rearrange rows: Unlike in a spreadsheet, you cannot rearrange
the order of the rows by dragging or cut and paste. You must sort the rows into a different order. In a table's datasheet view, you can click the column label to get a menu of sorting choices. But you can only sort based on one column. A query enables you to sort on multiple fields at once and also to combine fields together to create new values. We will cover queries in a later lesson.
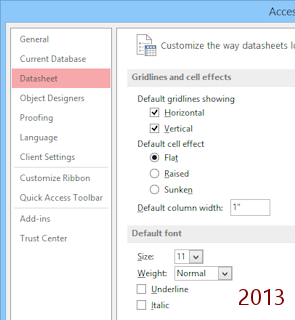 Change default datasheet layout: You can change many defaults for
all data sheets in the Options dialog on the Datasheet tab.
Change default datasheet layout: You can change many defaults for
all data sheets in the Options dialog on the Datasheet tab.
If a datasheet is open, you will have to close it and reopen it for your
changes to be applied.
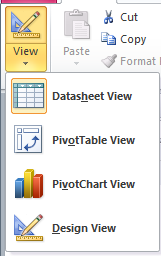
Three Methods to Change View:
You have used two views for a table so far: Design and Datasheet. There are others. Different objects have different possible views. The table below shows the methods for a Table object.
| Change Table Views: | ||
|---|---|---|
| Button on Home ribbon tab | Button on Status Bar | Context Menu: title tab |
|
Click the button icon to change to the view shown or click the arrow to open the list of all views for the current object. |
|
Right click on the object's title tab to open the context menu. |
| |
Step-by-Step: Manage a Table |
|
| What you will learn: | to open an existing database from the Open dialog to backup a database to resize columns with Best Fit to resize column with dialog to rearrange columns to change views to resize rows - drag and dialog to edit an existing record to undo changes to save a changed record to delete a record to add a new field to enter data in a new field: Hyperlink to change field properties: Hyperlink |
Start with :![]() ,
,![]() , Access open but no database open, mytrips-Lastname-Firstname.accdb from previous lesson
, Access open but no database open, mytrips-Lastname-Firstname.accdb from previous lesson
Backups: You should develop the habit of creating a Back Up for your database before making significant changes. Of course as your databases get larger, the backup process starts taking more and more time. But for our lessons, it won't take much time to create a backup. Having one can save you a LOT of time if you find you need to start the lesson over.
Open an Existing Database: Open Dialog
You can use a normal Open dialog to navigate to a database to open it. Your mytrips database is probably in the Recent list but you need to practice opening a database when it is not in the list.
- If necessary, open Access.
(It was left open in the last lesson but with no database open.) -
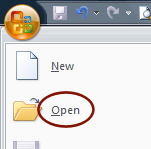
With Access open, open the Open dialog.
 Access 2007:
Office button > Open
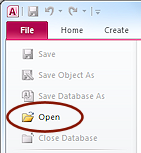
 Access 2010:
File tab > Open
 Access 2013:
File tab > Open > Computer > Browse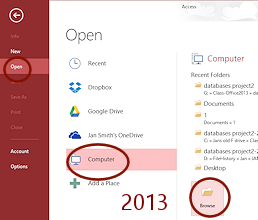
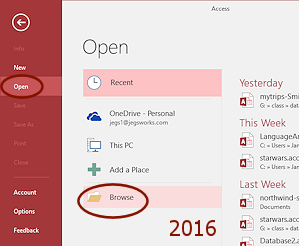
 Access 2016:
File tab > Open > Browse
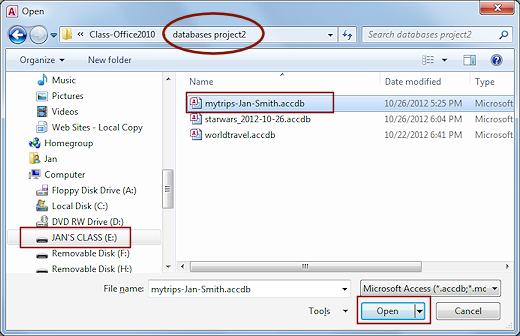 Navigate to your Class disk to the folder databases project2.
- Select the database that you have been working on, mytrips-Lastname-Firstname.accdb, where your own first and last names are part of the file name.
- Click on Open to open the database.
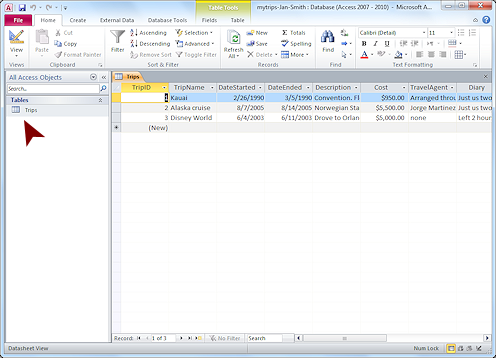
 Double-click the Trips table in the Navigation Pane to open it.
Datasheet view is using the default layout because you did not save the changes in the last lesson.
The Trips table has 3 records.
 Backup Database
To would certainly be handy to have a good copy of the current database to use if you need to start over. Access has an internal command to create a backup copy without disturbing the file you are currently using. Other programs like Word and Excel will let you use Save As to save a separate copy but then they load the new copy!
-
Back up this database now.
Pick a convenient location to save the Back Up. It does not have to be on your Class disk if you are short on space. Just be sure to remember where you put it!
Access 2007:  > Manage > Back Up Database Access 2010: File > Save and Publish > Back Up Database > Save As button Access 2013, 2016: File > Save As > Back Up Database > Save As button
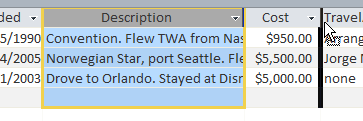
Datasheet Layout: Resize Columns to Best Fit with Mouse
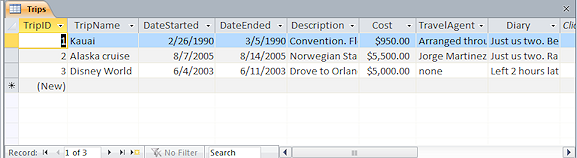
Some of your columns are wider than needed and some are far too narrow to show everything.
Memo/Long Text fields like Description and Diary often contain far more text than the datasheet can display. Depending on where the text gets cut off in the display, you might not even realize that there is more text there.
You will
tinker with the columns widths and (in the next section) the row heights to
show more of the text in fields with Memo/Long Text data type. A better solution is to use a form, which you will do in a later lesson ![]() .
.
![]() No Undo for Layout changes: If you make a mistake or change your mind about a layout change in Datasheet view, you will have
to recreate the layout yourself.
No Undo for Layout changes: If you make a mistake or change your mind about a layout change in Datasheet view, you will have
to recreate the layout yourself.
-
 Move your mouse pointer over the right edge of the column heading TripID until the
pointer shape changes to the Resize Column shape
Move your mouse pointer over the right edge of the column heading TripID until the
pointer shape changes to the Resize Column shape  .
.
-
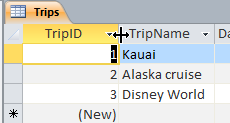
 Double-click.
The column resizes to fit the widest item in the column, even if it is not in view. This is called Best Fit. In this case the heading itself is the widest item.
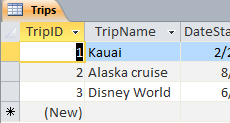
- Repeat for the columns TripName, DateStarted, DateEnded, and Cost.
Do not use Best Fit on a field with data type Memo/Long Text.
Datasheet Layout: Resize Column with Dialog
 The
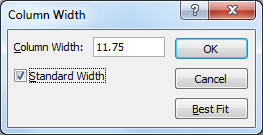
Column Width dialog lets you set the width of the selected column(s) to either a specific size in 'characters', the Standard width (which is 1 inch), or to use Best Fit to make each column wide enough to show the widest item in the column. One 'character' is the average width of characters in the current font and font size.
The
Column Width dialog lets you set the width of the selected column(s) to either a specific size in 'characters', the Standard width (which is 1 inch), or to use Best Fit to make each column wide enough to show the widest item in the column. One 'character' is the average width of characters in the current font and font size.
Be careful when choosing Best Fit. How wide is the widest item? A Text/Short Text or Memo/Long Text field may suddenly be very, very wide!
-
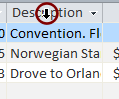 Move your mouse over the column selector Description.
The pointer changes to the
Select Column shape.
the
Select Column shape.
-
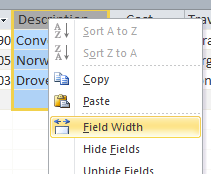 Right
click on the selected column.
Right
click on the selected column.
The column is selected and a context menu appears.
-
Select The Column Width dialog appears.
 Point of Confusion: The menu command was Field Width but the dialog is titled Column Width.
-
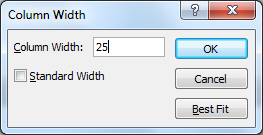 Change the Column Width to 25 and click on OK.

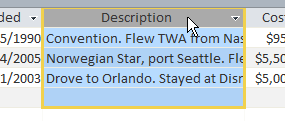
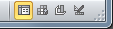
 Click on

 the Save button
in the Quick Access Toolbar to save the current object (the table) and its layout changes.
the Save button
in the Quick Access Toolbar to save the current object (the table) and its layout changes.
Looking at the new layout, it is clear that you are not going to be able to size all of the memo fields wide enough in Datasheet view to see all of the text. Do you think changing the row height would help? You will find out shortly.
Datasheet Layout: Rearrange Columns
Initially, a datasheet shows the columns in the order of the fields in the table's Design View. You can drag columns to rearrange them. This does not change the order in the Design View.
- If necessary, select the Description column again.
-
 Move the mouse over the selected column until it shows the
Select shape .
.
-
 Drag to the right until a black bar appears at the right edge of the
Cost column and drop.
Drag to the right until a black bar appears at the right edge of the
Cost column and drop.
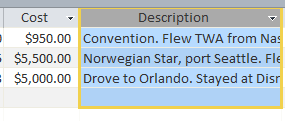 The whole column moves to the new position, to the right of the Cost
column.
The whole column moves to the new position, to the right of the Cost
column.
Switch Views
 Click the Design View button
  on the Home or Table Tools: Design ribbon tab to switch to the Table Design View.
The View button changes to show the Datasheet icon and the table's Design View shows in the work area.- Verify that the
fields remain in the original order.
Changing the position in the datasheet did not change the order of fields in the Design View. - Click the Datasheet View button
 on the ribbon to switch back to Datasheet View.
 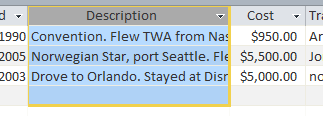 Drag the Description column back to the left of the Cost
column.
Drag the Description column back to the left of the Cost
column. Experiment: Switch Views
- Status Bar buttons: Use the Views buttons on the Status Bar
 to switch between Design and Datasheet views.
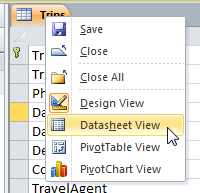
 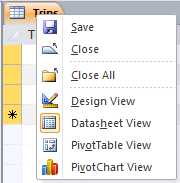 Context Menu: Right click on the Trips title tab and use the context menu to switch between Design and Datasheet views.
- When you are ready to continue, leave the table in Datasheet view.
- Status Bar buttons: Use the Views buttons on the Status Bar
The Pivot Table and Pivot Chart views are more advanced views. We will not work with these in Working with Databases. There is a lesson in Working with Numbers about Pivot Tables and Pivot Charts![]() .
.
Datasheet Layout: Resize Rows by Dragging
Making each row taller will let you see more text in each field since the text will automatically wrap to the cell size. You can drag with the mouse or use the Row Height dialog.
Remember, the Undo feature does not apply to layout changes.
- Move your mouse pointer over the bottom edge of the row heading until
the pointer changes to the Resize Row shape
 .
.
- Drag downward and release the mouse button.
All rows change height when you release the mouse button. This is not at all like Excel or Word tables!
Live Preview of how the table will change at this row height would be very helpful here!
More of the memo fields can now be seen.
Did your rows get tall enough to show all of the text in the Description field? The Diary text is even longer.
We will manage this better by creating a form in a later lesson .
. - Move the mouse pointer over the bottom edge of the row heading
again until it changes again to the Resize Row shape .
- Double-click.
Nothing happens! Unlike in Excel, there is no Best Fit for rows and your resizing is not in the Undo list.
-
Drag the bottom edge of the row header upward to show exactly two lines of text and drop.
You may have to try several times.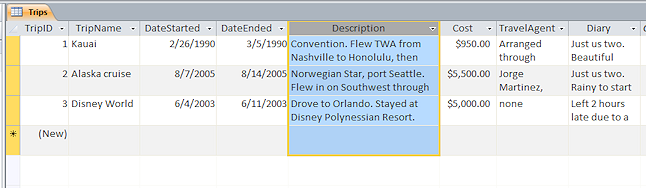
Datasheet Layout: Resize Rows with Dialog
-
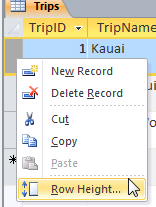 Move the mouse pointer over the first row heading until the pointer changes to
  the Select Row shape.
- Right click.
The row is selected and a context menu appears. - Select
The Row Height dialog appears.
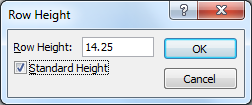 Click in the box Standard Height.
The height number changes to 14.25 pts.
- Click on OK.
All rows resize to 14.25 pts. tall.
Your table should be back to the original layout but if it is not, don't worry. The next step will take care of it!
-
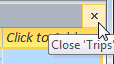 Click on
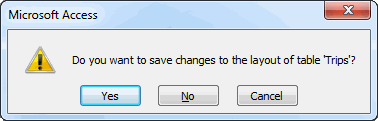
  the Close button in the Title bar of the datasheet.
A message box appears asking if you want to save the changes in the layout of the table. - Click on NO to discard all of the changes since you last saved and continue to close the table.
Do not close the database.
Datasheet Data: Edit Existing Record
Mistakes happen! Happily, it is easy to edit database records. Many of your usual editing methods will work, such as Backspace and Delete keys, Copy and Paste.
Later you will create a form based on this table. We will wait until then to edit those Memo type fields.
Sometimes the hard part is selecting what you want to change.
Retype the whole cell:
- Double-click the Table Trips in the Navigation Pane to open it.
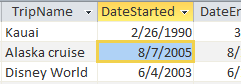
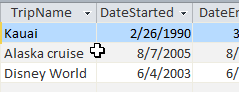 Move your mouse pointer to the right edge of the cell DateStarted for the Alaska cruise until the pointer
changes to the white cross
Move your mouse pointer to the right edge of the cell DateStarted for the Alaska cruise until the pointer
changes to the white cross  , the Select
Cell shape.
, the Select
Cell shape.
-
 Click.
The clicked cell has a wide colored border, showing that it is the active cell.
The whole cell is highlighted to show that the whole cell is selected. Problem: TripName is selected instead of DateStarted
The Select Cell shape was too far to the left.
Solution: Try again, moving the mouse pointer to the dividing line on the right of the cell or the dividing line at the bottom of the cell.
Start typing the date as 8/7/2004.
Your typing replaces the existing cell contents.-
Press the TAB key to enter the change.
The next cell to the right becomes the active cell.There are several formatting changes going on here. Some depend on exactly what you just did, so yours may not quite match the illustration.
- Colored border marks the active cell.
- Black highlight shows that only the text is selected rather than the whole cell.
(Yes, it is a subtle difference, but when copying and pasting it can be an important difference.) - Blue background is the color for a selected row.
Unexpectedly, the first two cells in the row did not get this background color. - White or gray background are the normal colors for alternating rows in the datasheet.
Edit existing data:
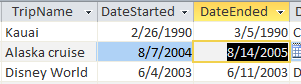
 In the DateEnded cell, click between the 0 and the 5 in 2005.
-
 Press the Delete key to remove the 5
and then type a 4 and press ENTER.
Press the Delete key to remove the 5
and then type a 4 and press ENTER.
You have edited the DateEnded to 8/14/2004.
The active cell is now the Description cell for the Alaska trip.
Datasheet Data: Undo Changes
Changes to records can be undone only until you change to a different record.
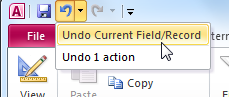 Click the arrow beside the Undo button on the Quick Access Toolbar.
Instead of a list of several actions, there is only one - Undo Current Field/Record.-
Click on Undo Current Field Record.
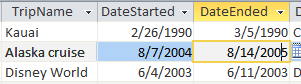
The data changes to the two cells are undone.
[Depending on exactly what you have done, you may be able to undo only the last cell changed instead of the whole record.]The Redo button did not light up! You cannot redo data changes. Did you expect that?
- Change the dates back to 2004 dates with the method of your choice - retyping the whole date or editing the year.
Datasheet: Save Changes to Record
To save the changes from your editing, all you have to do is move to another record. You can TAB or use arrow keys or just click in another record

With the active cell still Description in the Alaska trip row, watch the Status Bar while you press the down arrow key.
The selection moves into the next record below.
When you leave a record, all of your data changes are automatically saved!!The Status bar shows the message Calculating...
 while it is saving the record. Did you see it? Maybe not. For small tables on a fast computer the process
could be too fast to show the message.
while it is saving the record. Did you see it? Maybe not. For small tables on a fast computer the process
could be too fast to show the message.
![]() Warning: A
database programmer can change this behavior so that records are not automatically saved. You would likely have a special button to click or a key combo to use to deliberately save the record. You must know your database!!
Warning: A
database programmer can change this behavior so that records are not automatically saved. You would likely have a special button to click or a key combo to use to deliberately save the record. You must know your database!!
![]() To
save data changes without leaving the record:
To
save data changes without leaving the record:
-
 SHIFT + ENTER
 - Button: Save Record

 on Home ribbon tab in Records tab group.
Datasheet Data: Delete a Record
To remove a record from the database is easy enough.
 The DELETE key deletes what is selected, including a whole record.
 - Button:
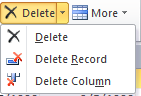 On the Home ribbon tab. Delete offers choices, depending on what is selected.
To restore a deleted record is not usually possible. Be sure you want to delete! For this lesson you will practice deleting, but please do not actually delete any of these lovely records.
Follow the directions below very carefully or you will have to re-enter data and, even then, the ID numbers will be off for the rest of the lessons. That is not a horrible problem, if you understand where the difference came from.
- Click on the record selector for the third trip to select the record.

-
 Press the DELETE key.
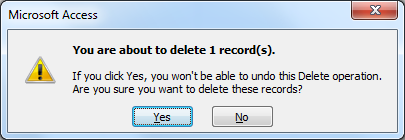
A Confirmation message window appears, pointing out that you are about to delete a record and that you will not be able to undo this action!
-
Important: Click on No.
We need all the records we can get for this exercise!
![]() Problem:
Clicked Yes and deleted the record
Problem:
Clicked Yes and deleted the record
Whoops indeed. You cannot get the deleted record back. You must create a
new record with the
same information ![]() . The TripID value will be 4 for
the new record.
. The TripID value will be 4 for
the new record. ![]() AutoNumber
fields do not reuse a number even though the record was deleted. The only way
around this is to create a new table and copy or re-enter the records into it. Awkward!
AutoNumber
fields do not reuse a number even though the record was deleted. The only way
around this is to create a new table and copy or re-enter the records into it. Awkward!
Table Design: Inspect Values
Table Design includes the fields with their data types and properties. After you create a table, you may find that you need an additional field. Or perhaps you need to increase the field size or change its data type.


Click on the Design View button


 on the
Status Bar to switch to Design view.
on the
Status Bar to switch to Design view. The Table Design view opens to show the list of fields. The first field is
selected, so its properties are listed in the bottom of the window.
The Table Design view opens to show the list of fields. The first field is
selected, so its properties are listed in the bottom of the window. -
In the lower pane, click in the Field Size box, where it says Long Integer.
An arrow

 appears at the right of the
property.
appears at the right of the
property.
-
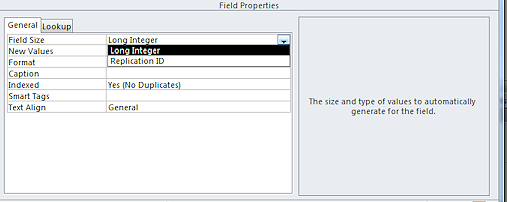 Click on the new arrow.
A list of possible values opens. An AutoNumber has only 2 choices.At the right of the properties, there is a brief description of the selected property.
-
Click in each property at the bottom in turn.
If a down arrow
appears, click on it to see what the choices are. When a button with 3 dots 
 appears,
click on it to see the dialog for the property.
appears,
click on it to see the dialog for the property. Property = Indexed: The more records in your database, the more important it is to index the fields that you use to sort or filter. This will greatly speed up those actions. It is really, really important that a field that is a primary key be indexed and not allow duplicates.
- In the upper section, click each of the other fields and inspect the properties and the possible values for each
property for each data type in the table. Be sure to read the text at the right for each property.
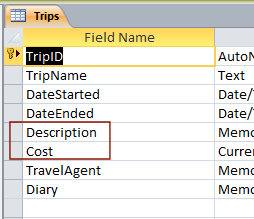
Table Design: Add Field
Many people are taking digital photos now and storing their vacation pictures on their computer or online. It would be useful to have the link to the pictures right here in the Trips table. Adding the photos themselves would balloon the size of the database tremendously! Let's add a field for such a link.
-
 Click on the field DateStarted.
-
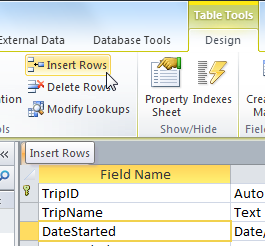
On the Table Tools: Design ribbon tab, click on the Insert Rows button.
A new blank row appears above DateStarted.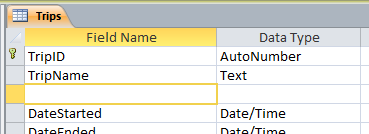
 Inserting Multiple Rows: If you select a number of rows and
then click on the Insert Rows button,
you will get the same number of blank rows.
Inserting Multiple Rows: If you select a number of rows and
then click on the Insert Rows button,
you will get the same number of blank rows.
-
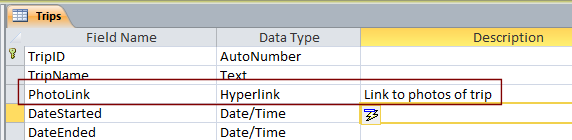
Type the field name PhotoLink as the Field Name.
-
Select the data type Hyperlink.
-
Type as the Description: Link to photos of trip .
-
Press the TAB key to move out of the cell.
The Options button appears just below your typing after you exit the property.
Note: If you select this property later, the Options button will not appear unless you have edited the text.
-
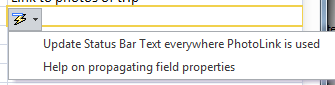 Click the button.
A list appears with options for the action you just performed. In this case, there are just two. -
Click on 'Update Status Bar Text everywhere PhotoLink is used'.
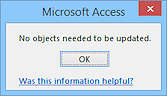 You will see a message box, 'No objects need to be updated.' That's because you do not have any forms at all yet.
 Apparently Access copies the Description to the form when the form has a control for this field. When you edit the Description property, Access kindly offers to update all of the forms that used it. Sweet!
Datasheet: Add Data for New Field - Hyperlink
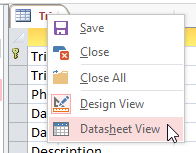
 Right click on the title tab for the Trips table.
A context menu appears.- Click on Datasheet View.
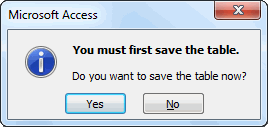 A message box appears
telling you that you must save the
table before you can switch to datasheet view.
A message box appears
telling you that you must save the
table before you can switch to datasheet view.
-
Click on Yes to save the changes to the table's design.
The datasheet opens. Its window is the same size as the design view window, if you adjusted the window size.
-
Drag the border of the window wider or maximize the window, if you like.
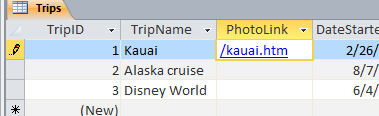
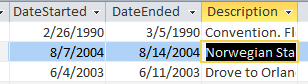
In the record of the Kauai trip, in the PhotoLink field, type (or copy and paste):
http://jegsworks.com/Lessons/images/trips/kauai/kauai.htm
Once again we have a field that is too narrow to show its contents.
 Click in another cell to enter the hyperlink into the table.
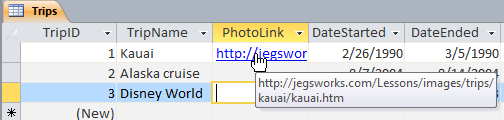
- Hover over the link.
The mouse pointer changes to the pointing hand shape and a screen tip shows the full URL (web address). 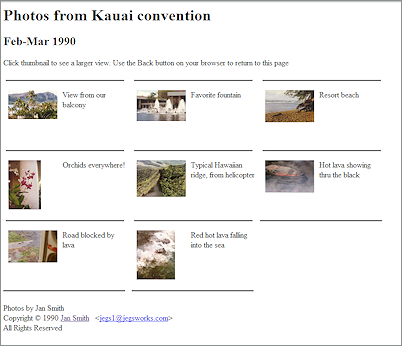 Click the link.
(You must be connected to the Internet).
A page of thumbnail photos should open in your browser.
Problem: Link fails
Solution: Check your typing. If you copied and pasted, right click on the link in the datasheet and select Edit Hyperlink from the popup menu. The Edit Hyperlink dialog appears. The hyperlink is in the text box at the bottom. Verify that it is correct or make any needed changes. Once it looks correct, close the dialog. Hover over the link. The popup tip shows the URL. Does it have a line break? If so, delete the link, and type it in. (This link break showed up when my daughter did the lessons on a freshly installed copy of Access. Did not happen for me. I have not found a reason for it!)

Press the down arrow on the keyboard twice. Your cursor should now be in the PhotoLink field for the Disney World trip.
-
Type (or copy and paste from here):
http://jegsworks.com/Lessons/images/trips/disney/disney.htm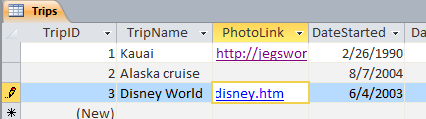 Link colors: The link
will be blue if you have not visited the page and purple if you have opened
it.
Link colors: The link
will be blue if you have not visited the page and purple if you have opened
it. - Click in another cell to enter the new URL.
Table Design View: Change Properties of Hyperlink Field
Did you notice how long the hyperlink is and how small the column is? Happily there is a way to change what is showing in the PhotoLink column to make it more manageable.
 Right click on the hyperlink for Kauai.
-
From the context menu select .
A submenu cascades into view.Notice the various handy commands here. It is hard to edit a hyperlink in a datasheet directly. The Edit Hyperlink dialog is the best place for editing.
-
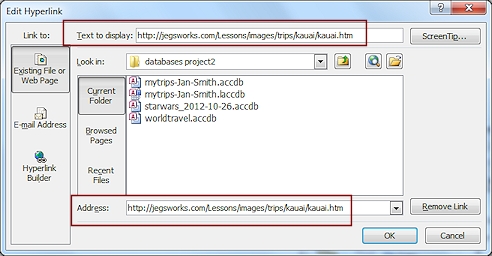 Click on .
 The dialog Edit Hyperlink opens.
It shows the Address at the bottom of the dialog and the text that will show in the datasheet at the top, Text to display. These do NOT have to match!
-
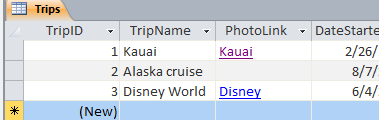 Type Kauai in the box Text to display.
Now the link will show in the datasheet as Kauai but clicking on it will still take you to correct URL.
- Repeat for the other hyperlink, and use Disney as the text.
-
Click the Save button in the Quick Access Toolbar to save your table.
Your changes to records are saved immediately when you leave the record. Your changes to the table's layout are saved only when you save the table.
|
|
| © 1997-2017 Jan Smith All Rights Reserved |
Site Map What's New |
Privacy Policy Terms of Service Copyright Acknowledgements |
~~ 1 Cor. 10:31 ...whatever you do, do it all for the glory of God. ~~
Last updated: March 22, 2017