
Jan's Working with Databases
Forms & Reports: Forms: Images
A picture that you see on a form or report is one of the following:
-
background, underneath all controls
-
decoration on the form or report
-
part of a record
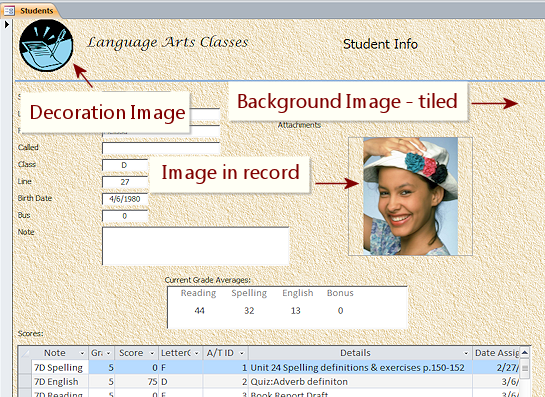
Examples of images in Detail section on form.
No form header.
Background Image:
A background image is under all of
the controls and sections that make up the form or report.
Texture: Repeats a small image across the whole window, called tiling. This type of background is called a texture, since it is usually used to create the effect of a textured surface. (Not recommended for printing since it adds a lot of time and ink to the print job!)
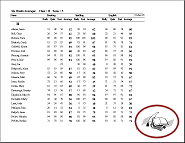
Watermark: A single image remains in place in the background, even if the form is scrolled. For reports, a watermark appears on every page, underneath the report controls. Watermarks can be small or large. You must be careful that your watermark does not make your data hard to read, as the example shows.
Image
on the form/report: Image control
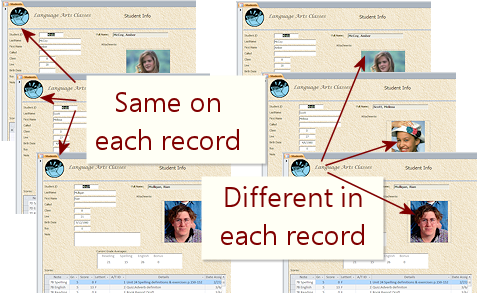 An image that is part of the form
is the same with every record.
An image that is part of the form
is the same with every record.
This might be a company logo or an image of fancy text or just a decoration, as in the example.
Image in a record: Attachment control
An image that is part of a record
will usually be different for each record.
These might be pictures of employees or students or products or houses for sale or team logos or thumbnail images of documents. Your table design needs an Attachment data type field to hold an image that will be different for each record.
Older versions of Access use OLE object data type to display images and other files in records, but that is not recommended any more. Working with OLE objects is much more complicated that with Attachment controls. Plus, the images are converted to bitmap format as OLE objects and other files get a bitmap image also. These bitmaps are large and puff up the size of the database very, very quickly.
Image File Formats
An Image control (decorative image on form/report) or background image can accept many different image file formats.

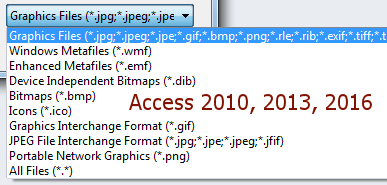
An Attachment control can accept any kind of file at all. It will display an image (if it is in one of the accepted formats) but will only show an icon for other file types, like Word documents or PowerPoint presentations.
A command button control ![]() can show a picture instead of text or along with text, but it will only accept BMP and ICO formats.
can show a picture instead of text or along with text, but it will only accept BMP and ICO formats.
Creating Controls for Images
The ribbon tab Form Design Tools: Design is the home for adding new controls, including images.
-
Image Control: Decorative images
An image control does not show a label, by default. Its name is like Image61.
Do you want to place the image first or browse to find it first?Method 1: Image Tool
 Click on the Image tool in the Controls gallery. The mouse pointer changes to the Create Image shape,
 . Click or drag on the form/report to create a small placeholder for the image. The Insert Picture dialog
opens. Browse to find your image. The frame will resize automatically to fit the image.
. Click or drag on the form/report to create a small placeholder for the image. The Insert Picture dialog
opens. Browse to find your image. The frame will resize automatically to fit the image.


 Access 2010, 2013, 2016: Method 2: Image Gallery
  Click the button Insert Image which is to the right of the Controls gallery. Select an image from the Image Gallery or browse to find the image you want. The mouse pointer changes to the Create Image shape,
. Click on the form and the image appears at full size. Or, drag to create the size you want. The Size property for the control is Zoom by default, which makes the image resize to fit inside the control.
Click the button Insert Image which is to the right of the Controls gallery. Select an image from the Image Gallery or browse to find the image you want. The mouse pointer changes to the Create Image shape,
. Click on the form and the image appears at full size. Or, drag to create the size you want. The Size property for the control is Zoom by default, which makes the image resize to fit inside the control.The Image Gallery was new starting with Access 2010. When the property Picture Type for an image is set to Shared, the image is stored in the Image Gallery so it can quickly be used in other places and other objects. This is a great way to handle company logos or decorative images that you expect to use in several forms or reports.
Any image that you insert with the Image Gallery's Browse button is automatically stored in the Image Gallery.
- Attachment Control: Images in records
Best choice for images that are in records.
Method 1: Field List
 Show the Field List. Drag a field with Attachment data type
from the Field List and drop it on the form/report.
Show the Field List. Drag a field with Attachment data type
from the Field List and drop it on the form/report.
Method 2: Attachment Tool
 Click the Attachment tool in the Controls gallery. The mouse pointer changes to the Create Rectangle shape
 . Click or drag in the form/report. A control and label appears on the form/report. Next set the Control Source to a table field with the Attachment data type. If you use a different tool and set the control source as an attachment field, the control does not change its type and your attached files will not show.
 -

 Unbound Object Frame or
 Bound Object Frame: Not recommended.
The OLE method is a glitchy and awkward. An Attachment field is better.
Embed, Link, or Shared?
All decorative images can be either embedded, linked, or shared.
- Embedded - Copied into the database.
Advantage: Image cannot get lost!
Disadvantage: Adds to the size of the database. An embedded image is saved with each form or report that uses it.- Linked - Access creates an internal
bitmap for linked images also but will update the image if the original
changes.
Advantage: Adds somewhat less to the size of the database than embedding - maybe. If the image changes, you can update the link in Access, just like a linked table.
Disadvantage: If you move the database or move the image or rename the image, then Access cannot see it. You can update the links if you know where the image is. If the image was on the form or was a background and is no longer available, you will see an error message when Access opens the form. Records will show the internal bitmap that Access made. This may be of much lower quality than the image you linked.
- Linked - Access creates an internal
bitmap for linked images also but will update the image if the original
changes.
- Access 2010, 2013, 2016: Shared - Image added from the database's Image Gallery.
Advantage: Image is quickly available to use in other database documents. Image can be updated to a different image and all places where it was used are updated, too. Image is saved only once to the database, no matter how many forms or reports use it.
Disadvantage: Can't think of any!
Images and Database File Size
A few images scattered around for decoration on forms and reports will not affect the database's file size much, especially if you put those images in the Image Gallery. However, including images with in a field with each record in a table can quickly enlarge the database immensely! Access has a limit of 2 GB for the entire database including all of the hidden objects that Access creates itself to do its work.
![]() Problem:
Images increase database size
Problem:
Images increase database size
When you embed an image, the whole image is copied to
the database, even if the image is displayed at a small size. Even for a linked image Access records a lot of information. The
larger the image, the more data is recorded. Images taken with today's digital cameras are often
several megabytes in size! That adds up quickly!!!
Solution: Resize images before adding them to the database.
![]() Problem:
Access refuses to accept a file format
Problem:
Access refuses to accept a file format
Solution: Convert images with graphics software.
You will have to have graphics software that can open the original image (!)
and then save it in one of the accepted formats.
![]() Problem: Images in record slow down the database
Problem: Images in record slow down the database
Images in each record can make the database slow to show a report that displays those images.
Solution: Resize images before adding them to the database.
|
|
| © 1997-2017 Jan Smith All Rights Reserved |
Site Map What's New |
Privacy Policy Terms of Service Copyright Acknowledgements |
~~ 1 Cor. 10:31 ...whatever you do, do it all for the glory of God. ~~
Last updated: March 22, 2017
An Experiment in File Size with Language Arts Classes database from the resource files:
(after compacting)
36 of 92 records (compacted)