
Jan's Working with Databases
Tables & Queries: Tables: Import Objects
You can import Access database objects like tables, queries, forms, and reports from another Access database. Even if the source for the form or report will be different in the new database, the design elements will still be there, saving you a lot of time and effort.
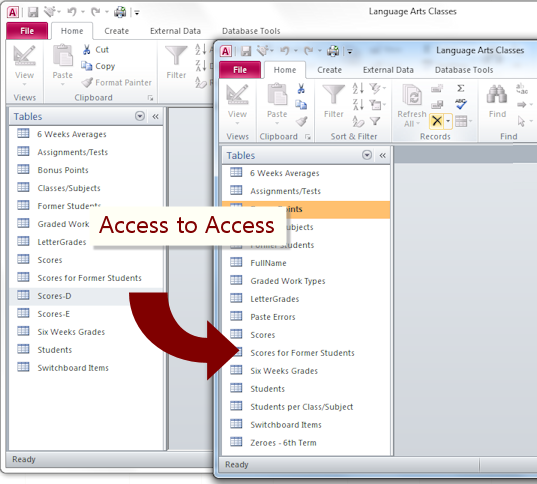
Access can import tables and other
database
objects from another Access database.
Methods of Importing from Access Database
You import from inside the database where you want the new data/object.
 Copy and Paste Objects:
With both databases open, copy an object from the Navigation Pane in one database and paste into the other.
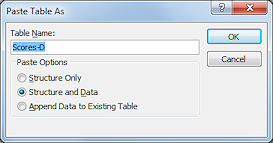
A dialog will give you some options: keep just the structure of the table, keep both structure and the data, append the data to an existing table. Of course you have the same issues with field names and data types as with importing spreadsheet or text data.- Copy and Paste Data:
Copy cells from one Access datasheet and paste into another. If you are appending (adding new records) to an existing table, the data must match the existing field order and the data types. If you are creating a new table, you can name and configure the fields after pasting.
-
 Import Wizard:
Ribbon tab External Data > Button for Access
In the File Open dialog, browse to select a file. Then pick whether you want to import an object or link to a table.
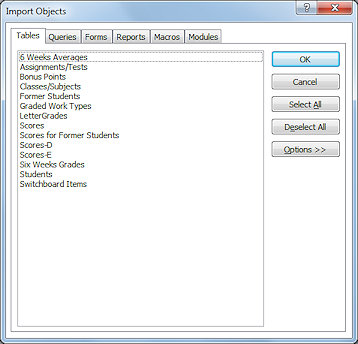
For importing, the dialog Import Objects appears, in which you can choose multiple objects to import. You can select items in each of the tabbed pages before clicking on OK.
Import Errors: If some or all of the records fail to import properly, they will be saved in a new table called Paste Errors. You should look at the records to see which ones caused a problem. You may be able to tell what the problem was just by inspecting the records.
Common Causes of Paste Errors:
- Different table structure: Missing or extra fields
Example: Source might have a person's name in 1 field while the destination table use 3 fields - Mismatched data types:
Example: Source may have zip codes in a Number field while the destination table uses a text field. - Different field names:
Example: Source may use FirstName, without a space, while destination uses First Name, with a space. - Field order: If the first row of imported data does not contain the field names, then the fields must be in the same order as in the Access table.
- Duplicates in primary key: Imported data may have duplicate values in the field that is the destination table's primary key.
| |
Step-by-Step: Import Access Objects |
|
| What you will learn: | to import tables and queries from another Access database to correct import errors/inconsistencies to create lookup fields from imported objects |
Start with: ![]() , worldtravel-Lastname-Firstname.accdb from previous lesson, resource files
, worldtravel-Lastname-Firstname.accdb from previous lesson, resource files
Import Objects: Tables and Queries
You can import what you need from another Access database instead of having to recreate it. Sometimes you want just the structure and properties of a table without the actual data.
In this section you will import some tables and queries. In the next section you will learn how to create your own queries. You will use this database in the next project, Forms & Reports, so don't lose it!
- If necessary, open worldtravel-Lastname-Firstname.accdb from your Class disk.
 Have you been creating a backup copy regularly? Make one now.
 -
From the ribbon tab External Data in the Import & Link tab group, click on the Access button
.
The Get External Data - access Database dialog appears.
-
Browse to the folder where you saved your resource files and select the file worldtravel-forimport.mdb.
 Problem:
You do not see the file worldtravel-forimport.mdb
Problem:
You do not see the file worldtravel-forimport.mdb
Either you did not download the resource files or you are not looking in the folder where you put the resource files. If necessary, download the resource files again or the file worldtravelforimport.mdb .
.
- Verify that the option chosen is "Import tables, queries, forms, reports, macros, and modules into the current database."
- Click on OK.
The Import Objects dialog appears.
- On
the Tables tab, click the button Select All. All of the
objects on this tab are selected for import.
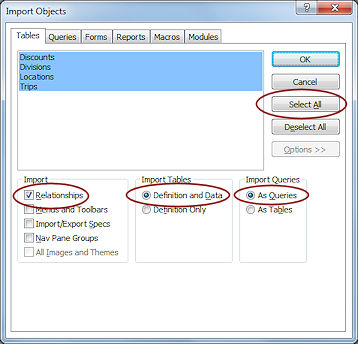
- Click on the Options tab and inspect the choices. The default choices are good for this lesson - Relationships, Definitions and Data, As Queries.
- Keep the Options choices at the defaults, as in the illustration.
-
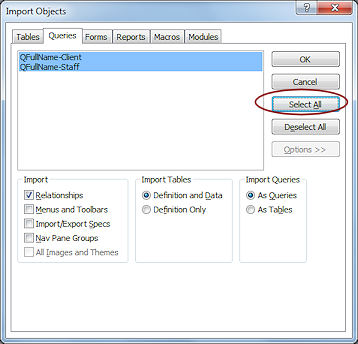 Click on the Queries tab.
- Click the button Select All.
-
Click on OK.
The selected objects are imported into worldtravel-Lastname-Firstname.accdb.The dialog will show what object is currently being imported but you have to have a quick eye!
- Click on OK to close the final dialog page.
The Navigation Pane updates with the new objects.
-
 In the Navigation Pane, inspect the Tables and Queries to verify that you imported all the objects that you
intended to import.
In the Navigation Pane, inspect the Tables and Queries to verify that you imported all the objects that you
intended to import.The database worldtravel-Lastname-Firstname.accdb now has 6 tables and 2 queries.
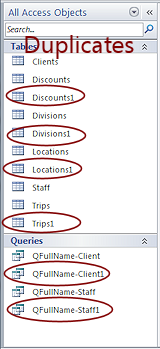
![]() Problem: Imported
Twice
Problem: Imported
Twice
If you slip up and import the same object twice, Access does not
warn you or overwrite the existing object. It creates a new object with the same
name but with a number at the end, which will increase for each time that
you import the object.
Solution: Delete the duplicates from the Navigation Pane. You will
see one or two messages before the object will be deleted.
 A
confirmation message appears. You have to click on Yes to continue with
the deletion.
A
confirmation message appears. You have to click on Yes to continue with
the deletion.
 If
relationships were imported with a table, another message appears. You
must delete the relationship before you can delete the table. But Access
kindly offers to do that for you in the warning message box that pops up
when a relationship exists. Clicking Yes deletes the relationship and then
the table.
If
relationships were imported with a table, another message appears. You
must delete the relationship before you can delete the table. But Access
kindly offers to do that for you in the warning message box that pops up
when a relationship exists. Clicking Yes deletes the relationship and then
the table.
Correct Errors or Inconsistencies
When you import data, the new data may not fit quite right with the tables and queries you already had. You may need to create the proper relationships. Access will not import AutoNumber fields from another Access database. Paste errors can create some numbering gaps, like what happened for the ClientID field in the Clients table. So some records may not match up correctly.
The tables you have created do not have many records, so you could look at the records yourself and make correction. But the Query Wizard can help you create a Find Unmatched query that will search ANY number of records in the imported Trips table that do not match up with the existing tables in the database.
- Open the imported table Trips.
The table includes three ID fields that must have matches in tables in your database, AgentID, ClientID, and DiscountID. You must make sure that all of the ID values actually exist and that they match with the correct records. This can be difficult! You will create three queries to check on these three ID fields. - Close the table.
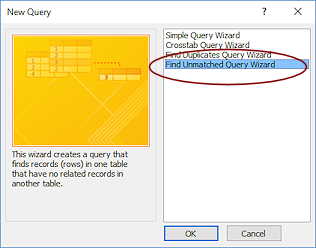 On the Create ribbon tab, click the Query Wizard button
  to start a new query.
- Click on Find Unmatched Query Wizard and then click on OK.
The wizard for finding unmatched records starts.
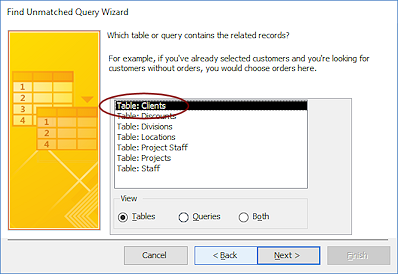
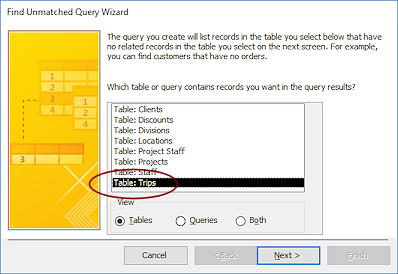 Select the table Trips and click on Next >.
This is the table that has the records. Next you will pick the table to compare to those records.
-
 Select the table Clients and click on Next >.
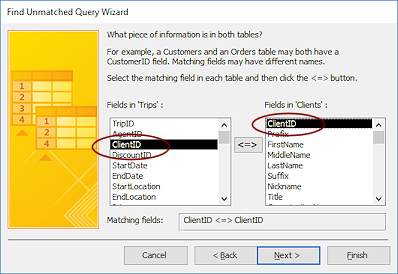 Accept the default choice of field that should be the same, ClientID, and click on Next >.
Access was smart and selected the correct fields for you.
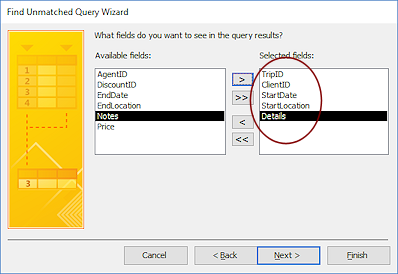 Select the following fields to show in the query results:
TripID
ClientID
StartDate
StartLocation
Details
These fields might help you figure out whose trip the unmatched trip is.- Click on Next >.
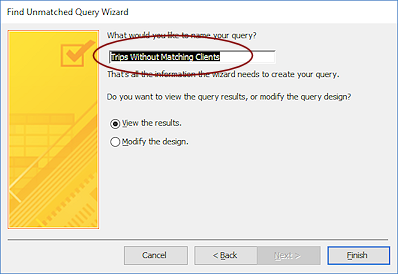 Accept the default name for this query, Trips Without Matching Clients.
-
Click on Finish.
 The query runs and shows the datasheet of results. There are two trips.
 Import Error: One unmatched trip has a ClientID of 12 but there is no client with that ID number. Remember the skipped numbers in the AutoNumbers when there were Paste Errors. So this error might be an import error. Or it could be a data entry error where the wrong client was selected.
Input Error: The second trip has a ClientID of 0. That could happen when the Trip record was entered BEFORE the matching Client record was created and the Trip record was never updated. That is not supposed to happen!
Now that you have found unmatched trips the problem to solve is which client does each trip go with.
- Open the Clients table and look for clients whose home address matches the StartLocation for the trip - Memphis and Birmingham.
That could be a big clue, but it is not a guarantee.
Happily, there is only one client in Memphis and one in Birmingham. You can see that there might not be enough information to repair this kind of error without looking at the original database.  In the datasheet for the query, edit ClientID for the Memphis trip to the ClientID for Guiseppe Macaroni and for the Birmingham trip to the value for Jackson Carter.
Your ClientID number might be different from the illustrations if you tried multiple times to get the new records pasted or appended to the table.- Close the query and view the Clients table again.
The records are updated only after you close the query.
Similar queries can be created for the AgentID and DiscountID fields. Those do not have unmatched records this time, so you won't have to go through the process again.
Create Lookup Fields from Imported Objects
Now that you have all of the tables needed, you can make some of the table fields into lookup fields. That lets your users pick from a list and see the list choices instead of the ID codes that are actually saved in the fields.
 Open the table Staff in Design View.
- Change the DivisionID field's data type to Lookup by selecting Lookup Wizard in the drop list.
- Choose the table Divisions as the source for the lookup list.
- Move the field DivisionName to the right column as the field you want to see.
- Do not sort.
Let the list display in the order the division names were entered into the table. - Accept the default to hide the primary key.
 Use the name Division as the label for the field instead of DivisionID.
- Click on Finish.
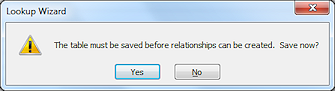
A message reminds you that the table must be saved before the Lookup Wizard can create the relationship needed to make the lookup list work.
 Delete Relationship First: If a relationship exists to the Divisions table, you would have to delete the relationship first, create the Lookup field, and then recreate the relationship.)
 -
Click on Yes.

Another message tells you that some data may be lost. The field size will be changed for the field.
- Click on Yes.
- Similarly, change the LocationID field using the Lookup Wizard to use a list from the Locations table.
- Use the table Locations and show the field Location.
- Sort ascending on Location.
- Use the name Location instead of LocationID.
Relationships Not Updated if Open: If you had to delete relationships and you left the Relationships window open, the new relationships you just created with the Lookup Wizard do not show automatically. Click the button All Relationships to see the new joins. -
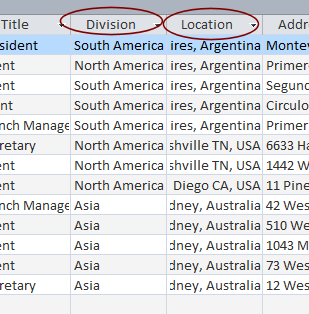
 Open the table Staff in Datasheet View and verify that the two fields now show text instead of ID numbers.
Clearly the width and alignment of the Location column needs some work. In the next project you will create a data entry form for this table. So the layout in Datasheet View does not really matter.
|
|
| © 1997-2017 Jan Smith All Rights Reserved |
Site Map What's New |
Privacy Policy Terms of Service Copyright Acknowledgements |
~~ 1 Cor. 10:31 ...whatever you do, do it all for the glory of God. ~~
Last updated: March 27, 2017