
Jan's Working with Databases
Tables & Queries:Tables: Import Spreadsheet
When you have some data already entered somewhere, it can be useful to import it directly into Access. It saves a lot of work and avoids the errors that may occur when re-entering data.
Access has a wizard to help you import from a spreadsheet, like Microsoft Excel. Each row in the spreadsheet must be one complete record for this to work.

Access imports a spreadsheet as a table IF
each row is a separate record.
Methods of Importing Data from a Spreadsheet
You import from inside the database where you want the new data/object.
- Copy and Paste from spreadsheet - maybe:
Copy cells from a spreadsheet and paste into a Access datasheet.
If you are appending (adding new records) to an existing table, the data must match the existing field order and the data types. If you are creating a new table, you can paste directly into a blank table datasheet and then name and configure the fields. Some field names are not acceptable. Some data makes Access think it is corrupted. In these cases the paste action will fail.
- Import Wizard:
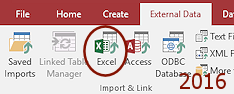
Ribbon tab External Data > Button for Excel spreadsheet
A dialog opens where you can navigate to the file. Only files of the chosen format will show in the folder tree. Choose whether to import the data as a new table or append it to an existing table. To append, the field names, data types, and field sizes must match up well.
The Import Spreadsheet Wizard starts. You can choose to import a whole sheet from the workbook or a named range. You can configure the fields for a new table in the wizard.
Import Errors = Paste Errors
If some or all of the records fail to import properly, they will be saved in a new table called Paste Errors. A message box will tell you how many records failed. Most errors occur when appending records to an existing table. You may be able to tell what the problem was just by inspecting the records in the Paste Errors table.
Common Causes of Paste Errors:
- Different table structure: Missing or extra fields
Example: Source might have a person's name in one field while the destination table use 3 fields - Mismatched data types:
Example: Source may have zip codes in a Number field while the destination table uses a Text field. - Different field names:
Example: Source may use FirstName, without a space, while destination uses First Name, with a space, or some other name entirely. - Field order: If the first row of imported data does not contain the field names, then the fields must be in the same order as in the existing Access table.
- Duplicates in primary key: Imported data may have duplicate values in the field that is the destination table's primary key or for a field that does not allow duplications.
Appending Data to Existing Table
The Import Spreadsheet Wizard appears to let you append records to an existing table, but it is not as easy as it looks. The data that you are appending must include the headings as the first row. Normally your new data is at the bottom of a set of records, not up at the top underneath the column headings. This is a problem! Excel will let you create a named range with these nonadjacent cells, but Access won't import such a range! Frustrating!
Methods for Appending Spreadsheet Data:
- Method 1: Import a named range or a sheet as a new temporary table, create an append
query or copy and paste to append the records to another table, then delete the temporary
table.
- Method 2: Create a separate sheet in the Excel workbook that holds only the column headings and the data to import. Let the Import Spreadsheet Wizard append the data to an existing table.
 For Your Information:
How to name a range in Excel:
Select the range of cells
and in the Name box at the upper left of all the cells, type the name you
want. The name can use only letters, numbers, periods and underscore
characters. It must start with a letter. No spaces!
How to delete a name from the list: (It's not obvious!)
From the Excel Formulas ribbon tab, click on Name Manager. Select the name and click the Delete button.
| |
Step-by-Step: Import Spreadsheet Data |
|
| What you will learn: | to import spreadsheet data: new table with wizard to modify table design: field sizes, data types, Attachment field to import spreadsheet data: Named range to append data with copy and paste |
Start with: ![]() , resource files
, resource files
You will create a new database for World Travel Inc. Previously you created a database of just the work projects for this company. This time you will create a database that includes information on staff, clients, and trips. (This database will not be nearly as complex as a commercial database for such a purpose!) You will use this database in the Forms and Reports project, too.
Create New Database
 Create a new blank database and name it worldtravel-Lastname-Firstname.accdb (using your own first and last names) and save it to your Class disk in the databases project3 folder.
Import Spreadsheet Data: New Table
There is a handy wizard for importing spreadsheet data. It walks you
through a number of choices. Happily your resource files ![]() have a
spreadsheet that is ready to be imported. In the real world you might need
to do some rearranging in the spreadsheet first.
have a
spreadsheet that is ready to be imported. In the real world you might need
to do some rearranging in the spreadsheet first.
-
From the External Data ribbon tab in the Import and Link tab group, click the Excel button.
A dialog opens, Get External Data - Excel Spreadsheet.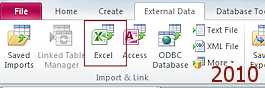
-
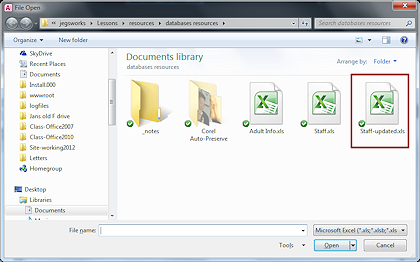
Click the Browse button and navigate to where you stored the resource files.
Only Excel files will show in the File Open dialog.
Select the file Staff.xls or download it. (Pay attention to where you save it!)
 Problem:
You do not see the file Staff.xls
Problem:
You do not see the file Staff.xls
Either you did not download the resource files or you are not looking in the correct folder. If necessary, download the resource files again or the single file Staff.xls. - Verify that the radio button is selected for "Import the source data into a new table in the current database."
This is the default choice.
-
Click on the button OK.
The Import Spreadsheet Wizard appears.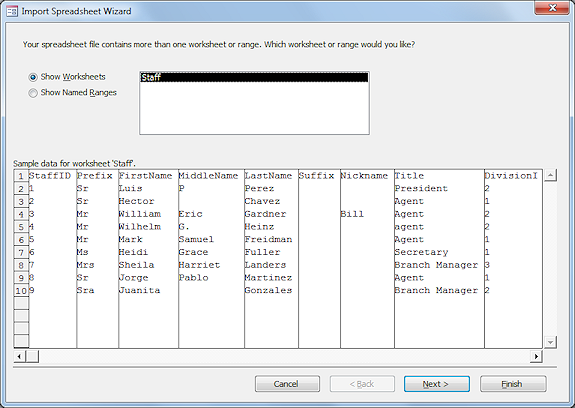
Notice that you can choose to import any sheet that is in the workbook or any named range. Flexibility!
This spreadsheet only has one sheet and no named ranges.
- Click the button Next >.
-
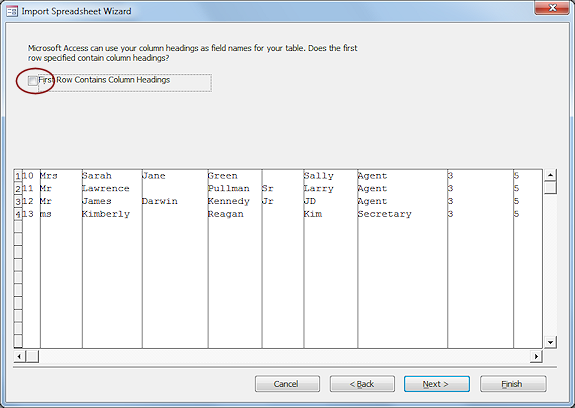
In the second step of the wizard, check the box "First Row Contains Column Headings".
The dialog display changes to put the column headings as headings instead of as record 1.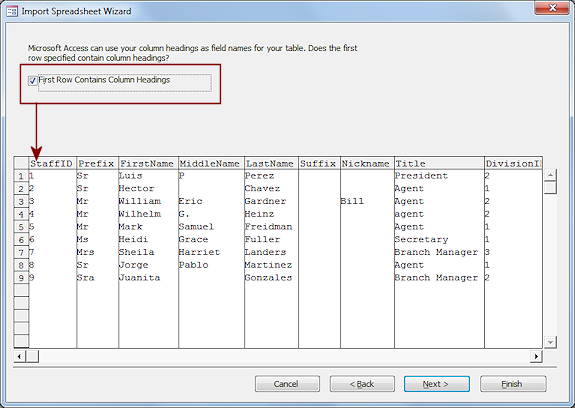
 Arrange BEFORE importing: For some spreadsheets the column
headings may not be in the row directly above the data that you are
importing. Or you may not want to import the whole sheet. Before importing, you should create a copy or a linked sheet that has only the data that you want and has the column headings in the first row with no blank rows.
Arrange BEFORE importing: For some spreadsheets the column
headings may not be in the row directly above the data that you are
importing. Or you may not want to import the whole sheet. Before importing, you should create a copy or a linked sheet that has only the data that you want and has the column headings in the first row with no blank rows. - Click the button Next >.
In the third step of the wizard you can select a field and change some of the field properties: field name, data type, index, or to not import the field at all.
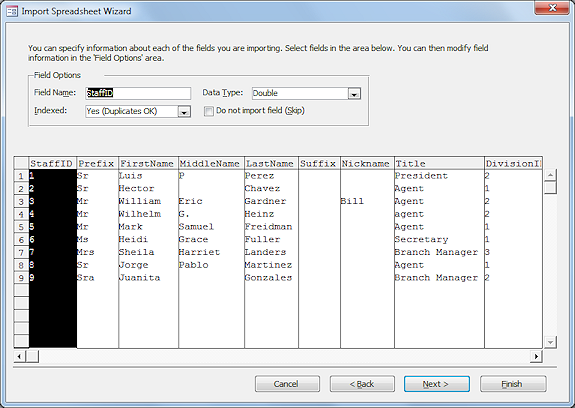
You could also wait and change the properties inside Access after the import is done.
The first field is already selected for you. - Change the form to show the following:
StaffID - Indexed = Yes (No Duplicates)
This field will be the primary key for the new table so duplicates cannot be allowed.
- Click the button Next >.
-
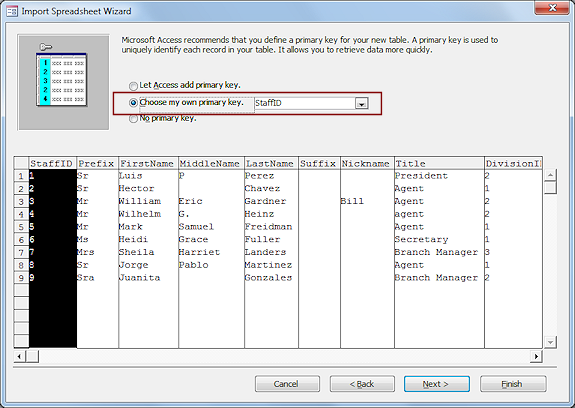
In the fourth step of the wizard, select to "Choose my own primary key, StaffID".
- Click the button Next.
-
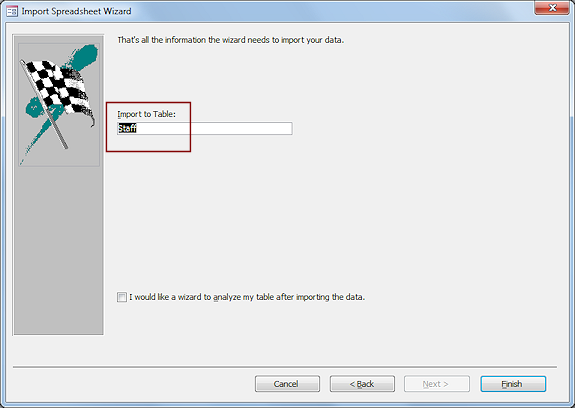
In the sixth step of the wizard, name the table Staff, which is the default name.
-
Click the button Finish.
A final step appears that tells you that the wizard has finished importing.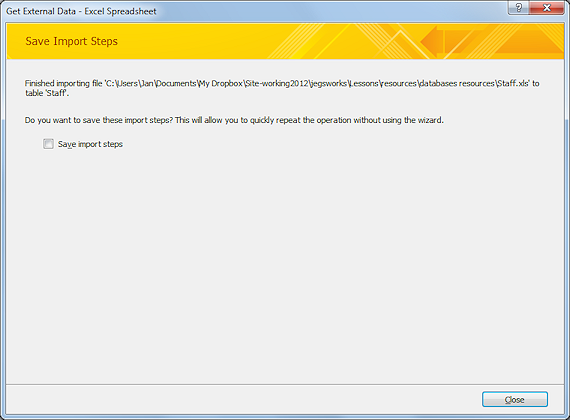
If you plan to import this data regularly, you can save these step so that it will be faster the next time. You won't be doing this one again.
- Click on Close.
The new table was created but it does not open automatically. Your database lists two tables - Staff and Table1.
Modify Table Design: Field Sizes, Data Types, Attachment Field
The Import Spreadsheet Wizard did a good job of bringing over the data, but the table it creates uses far more disk space than necessary! There are also some other properties that you should modify.
-
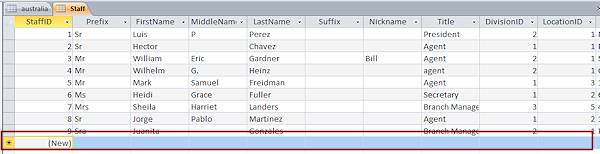
 Open the table Staff in Table
Datasheet View and scroll to view the fields.
Open the table Staff in Table
Datasheet View and scroll to view the fields.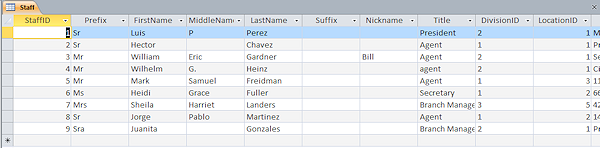
There are a lot of fields, but the table looks good!
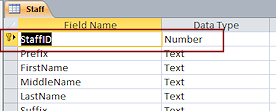
 Switch to Table Design View.
Whoops. The StaffID field is the primary key but the data type is Number instead of AutoNumber. That is not always bad but this time an AutoNumber is exactly what you need.
-
Change the Data Type for the field StaffID to AutoNumber.
Whoops. Did you remember that we cannot do this? A message box appears.
Access won't let you change an existing field to AutoNumber. Even if there were no values in this field, Access would balk.
Of course a primary key does not HAVE to be an AutoNumber data type. It just has to have unique values. But in this case, it really should be.
Skip AutoNumber fields when importing: You are going to
have to recreate the field anyway.
- Click on OK to close the message.
 Select the StaffID field and delete it.
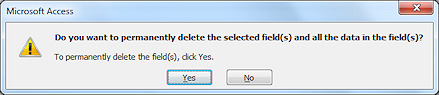
A message asks if you really want to delete this.
- Click Yes.
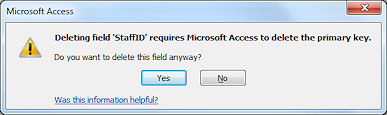 Another message points out that you are trying to delete the primary key.
 - Click Yes.
 Save the table since you deleted a field.
Access can get confused if you delete a field and then create a new one with the same name, which you are about to do. Access thinks you have tried to name two fields with the same name. Ouch!- Add a new field named StaffID to the top of the list with the Add Row or Insert Row button.
- Select AutoNumber as the data type and make it the primary key.
- Save the table.
-
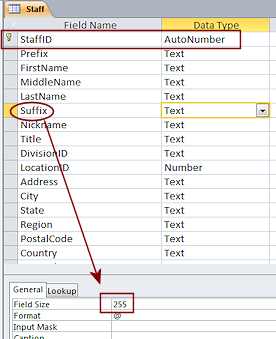 Inspect the field properties for the remaining fields.
All of the text fields are set to a field size of 255! Far too large!! We can make better guesses than that for how large the values are likely to be. For this database we will need to allow enough space for international phone numbers and postal codes and also for long last names with hyphens, like Rastonkowsky-Michaelson
(People are just not thinking about the comfort and ease of database programmers when they choose such names!)
-
Change the following field sizes and/or data types:
Save your table along the way! Don't wait until you have made all of the changes.You will get a warning message about reducing the field sizes. It's OK. The sizes are larger than the current data. (Rats! I could have included another error here for your education. Ah well. Perhaps later! )
Prefix and Suffix: 5
FirstName, MiddleName, Nickname: 20
LastName: 30
Title: 20
DivisionID and Location ID: Number data type with field size Integer.
Address: 50
City: 30
State: 20
Region: 20
PostalCode: 15
Country: 30
HomePhone, WorkPhone, MobilePhone, FaxNumber, AlternativePhone: 20
EmailName: 20
EmailExtension: 50
Birthday - no changes!
Nationality: 50
EmrgcyContactName: 50
EmrgcyContactPhone: 20
DateUpdated - no change
DateHired - no change
Hobbies - no change
HealthIssues: Memo or Long Text data type
Notes: Memo or Long Text data type - Save.
- Delete the Photograph field and recreate it on the row above the Notes field as an Attachment data type.
Access will not let you change a field to an Attachment data type. No photographs were imported anyway. - Save and close the table.
![]() Problem: Message says you cannot use the same name for two fields
Problem: Message says you cannot use the same name for two fields
You did not save after deleting a field. Access gets confused when you delete a field and create a new one with the same name unless you saved after deleting.
Solution:
Close the table and reopen. Make the changes that were not saved. Be sure to save the table after deleting a field.
Import Spreadsheet Data: Named Range
Our spreadsheet has been updated with some new data for the Australia office. You need to append those new records to the existing Staff table.
You will import a named range as a new temporary table and then, in the next section, you will use Copy and Paste to append the records to the Staff table.
Why not use the Append choice in the Import Wizard? The named range does not include the field names, so the import will fail.
- In Access, from
the ribbon tab External Data in the Import & Link tab group, click on the button Excel
 .The Get External Data dialog appears.
 Select Staff-updated.xls in the resource files you downloaded and click the OK button.
The Import Spreadsheet Wizard opens.
- Choose to import as a new table.
-
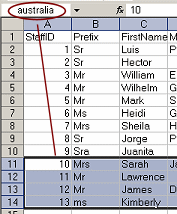
In step 1 of the wizard, select Show Named Ranges and select australia.
The grid shows 4 records and no column headings.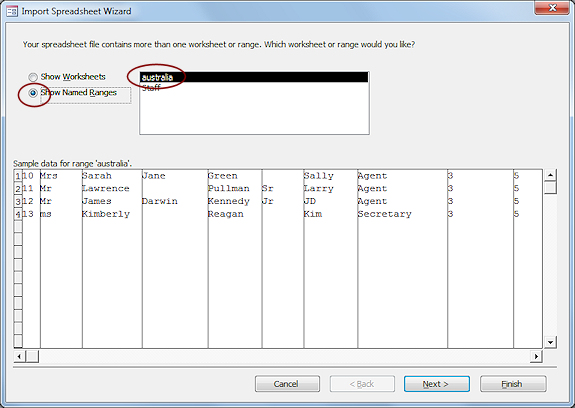
- Click the Next > button.
-
In step 2 of the wizard, do NOT check the box for First Rows Contains Headings, since that is not true this time.
- Click the Next > button.
-
In step 3, select the first column and click the box 'Do not import field (Skip)'.
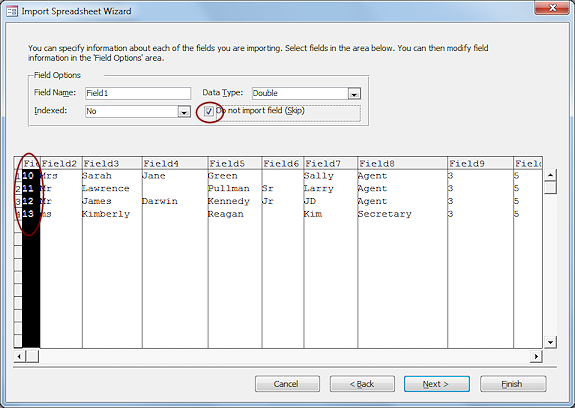
These values will not be used when you append these records to the Staff table, which already has an AutoNumber field as the primary key.
This is actually going to be a bad choice, but we need to see what happens when the fields do not fit together right.
-
Click the Next > button.
-
In step 4 of the wizard, choose "No primary key."
The temporary table does not need a primary key.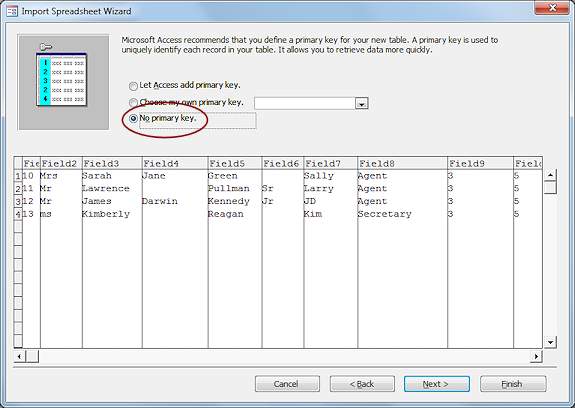
 Field1 is still showing even though you told Access not to import it. Confusing!
- Click the Next > button.
-
In step 5 of the wizard, accept the name "australia" for the temporary table.
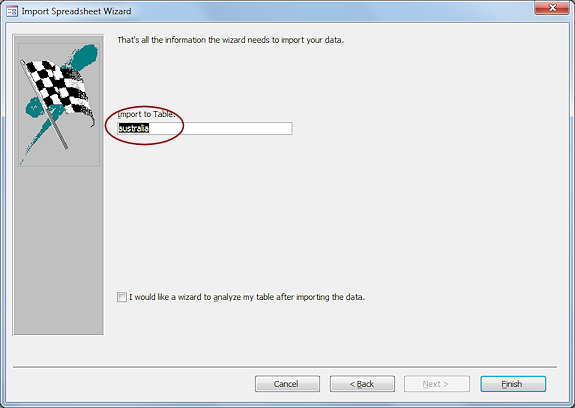
- Click on Finish.
- Click on OK to close the import wizard without saving the steps.
-
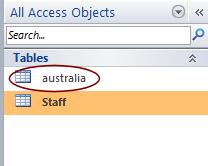 Inspect the Navigation Pane.
You have a new table.
So far, so good!
Append Data: Copy and Paste
The easiest way to append data is to copy and paste. The fields must be in the same order and the data types must match.
A common problem is pasting with the fields not in the same order, resulting in a mismatch of data types. Worse would be a paste that is apparently successful but actually put data into the wrong fields! You must check the order of fields carefully!
First you will try pasting data without a matching AutoNumber field so you can see what paste error messages look like. There are a lot of them!
-
Open the table australia in
Datasheet View.

- Select the 4 records by dragging down the record selector
boxes at the left.
- Copy.
(CTRL + C or Copy button on the Home ribbon tab)
-
Open the table Staff in
Datasheet View.
-
Select the bottom row, by clicking the * at the left.
If you don't select the whole row, the paste will always fail.
-
Paste.
(CTRL + V or button on the Home ribbon tab)
Whoops. An message appears that says the value is not valid for this field.
The problem is the first field, which is an AutoNumber field. Your pasting is trying to put the text values from the first field (Prefix) there.
The easiest solution is to modify the table australia to have its own AutoNumber field.
(You would not have had a problem if you have imported the StaffID field from the spreadsheet even though there was data in that field. Go figure!)
-
 Click on OK.
Another message appears that asks if you want to suppress any more error messages. There will be at least one for each record in this case.Error messages: It is a good
idea to see what the error messages say about the first record that
failed to paste. But it gets old very quickly when there are many
messages for many records!
-
Click on Yes.
Another message appears, telling you that records that could not be pasted will be put into a new table called Paste Errors.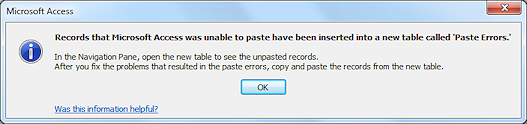 Paste Errors table: Each time
you have paste errors, the Paste Errors table is deleted and re-created.
Paste Errors table: Each time
you have paste errors, the Paste Errors table is deleted and re-created.
- Click on OK.
Number
of Errors: There are often multiple errors. One field that is out
of order can cause a whole cascade of errors. You may have to go through several repair steps. Checking Errors: Read the
messages carefully! They won't tell you exactly what went wrong,
but they do offer some clues. Open the Paste Errors table and inspect those
records for common problems. Mismatched fields, data types, and data
sizes are most often the problem.
When importing data from other sources, you may find that some records have been mistyped so that data was entered in the wrong fields. So confusing! Perhaps the State was skipped and the postal code was entered in that field instead. If you are appending data, the destination table may have validation rules that block the pasted data in such a case. Sometimes you can repair the data before importing. For example you could figure out what the missing State was from the postal code.
- Open the table australia in Table
Design View.
If you get a message about a lot of data on the clipboard, you can let Access erase it.
- Add a new row at the top of the list of fields.
- Name this new field ID and make it an AutoNumber field.
- Save the table.
- Switch to Table Datasheet View.
- Select all four records and Copy.
- Switch to the Staff table in Datasheet View and select the whole bottom row by clicking the * at the left.
 Paste.
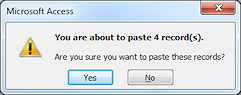
A message tells you how many records you are about to paste.
-
 Click on Yes.
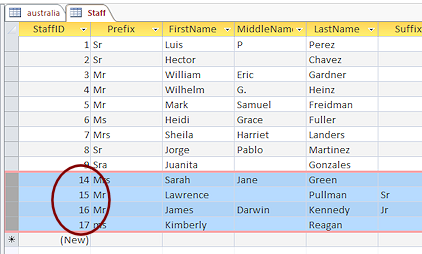
Success!But wait! The StaffID numbers skipped some numbers.
Gaps in ID numbers: If you try to paste records and the paste fails, the numbers that should have been used for an AutoNumber field are treated as 'used'. When you add a new record later, there will be a gap in the numbers. - Close all of the tables.
A message box appears asking if you want to keep the Clipboard contents. You can choose No. You pasted that already. -
In the Navigation Pane, delete the tables australia, Paste Errors, and Table1.
You are left with the Staff table in the database worldtravel-Lastname-Firstname.accdb. The table now has 13 records, autonumbers 1-9 and 14-17.
![]() Append Query: When
you are appending records that have a different number of fields than the
destination table, you should use an append query instead of copy-and-paste. With
an append query you choose which fields to append and you match them to
the correct destination field. You can omit any incoming fields that do not
have a matching destination field.
Append Query: When
you are appending records that have a different number of fields than the
destination table, you should use an append query instead of copy-and-paste. With
an append query you choose which fields to append and you match them to
the correct destination field. You can omit any incoming fields that do not
have a matching destination field.
|
|
| © 1997-2017 Jan Smith All Rights Reserved |
Site Map What's New |
Privacy Policy Terms of Service Copyright Acknowledgements |
~~ 1 Cor. 10:31 ...whatever you do, do it all for the glory of God. ~~
Last updated: March 27, 2017