
Jan's Working with Presentations
Advanced: Images: Slide Image
Images on your slides can make your presentation much more attractive and interesting
The method for inserting an image onto a single slide is much the same as for inserting an image on a master, in the previous lesson. On a slide, however, PowerPoint might place the image in an empty placeholder for you. That might be OK, but not always!
![]() A PowerPoint text placeholder can also
accept six other types of content: Table, Chart, SmartArt,
Picture, Clip Art, and Video. No need to get to the correct ribbon tab if you click one of these icons. Unfortunately they are only available in placeholders.
A PowerPoint text placeholder can also
accept six other types of content: Table, Chart, SmartArt,
Picture, Clip Art, and Video. No need to get to the correct ribbon tab if you click one of these icons. Unfortunately they are only available in placeholders.
Insert Image: Where does the image land?
What happens when you insert an image onto a slide depends on:
-
 Empty text placeholder > Image placed in the placeholder but keeps proportions; placeholder resizes around image
-
 Text placeholder(s) already have content > Image
is centered on the slide; sized to fit the slide but keeps its proportions
Text placeholder(s) already have content > Image
is centered on the slide; sized to fit the slide but keeps its proportions
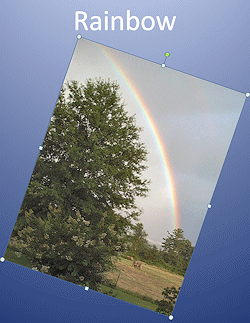
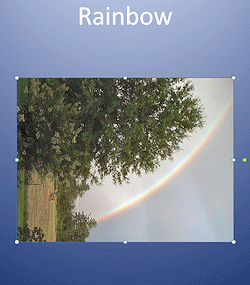
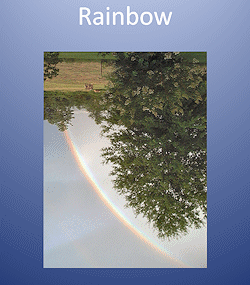
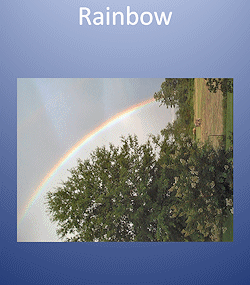
Rotate or Flip an Image
You can rotate or angle an image on a slide or master. Flipping
creates a mirror image, either horizontally or vertically.
Method 1: Drag
The
green circle ![]() or curved arrow
or curved arrow ![]() handle at the top center of a selected image is a rotation handle. Hover over the handle
and the mouse pointer shape changes to a circular
arrow
handle at the top center of a selected image is a rotation handle. Hover over the handle
and the mouse pointer shape changes to a circular
arrow ![]() . Drag the mouse in the
direction you want the image to rotate. While dragging, the mouse pointer
changes to 4 arrows in a circle
. Drag the mouse in the
direction you want the image to rotate. While dragging, the mouse pointer
changes to 4 arrows in a circle ![]() .
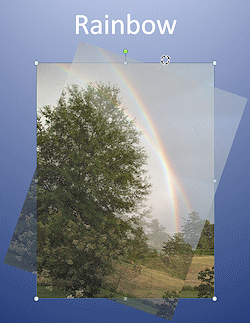
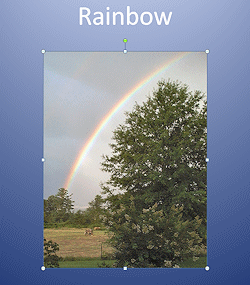
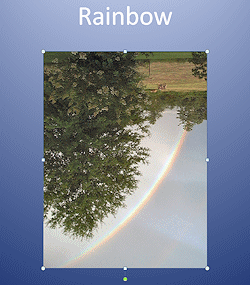
It takes care to use this method to get a 90°rotation or
to turn an image upside down (180°). A semi-transparent image shows the new position while you are dragging.
.
It takes care to use this method to get a 90°rotation or
to turn an image upside down (180°). A semi-transparent image shows the new position while you are dragging.
While Dragging and
After
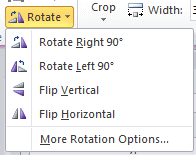 Method 2: Ribbon or Mini-Toolbar
The Rotate button appears on
the Picture Tools: Format ribbon tab.
The menu has commands to rotate 90° right or left and to flip either horizontally or vertically. The icons are very helpful here! Now you can turn an image on its side or upside down without having to guess whether the image is straight yet or not!
For rotating other amounts, you can choose More Rotation Options.., which opens a dialog or pane where you can set the exact number of degrees you want to rotate.
 |
 |
 |
| |
|
which is the same as rotating once Left |
 |
 |
|
| |
|
| |
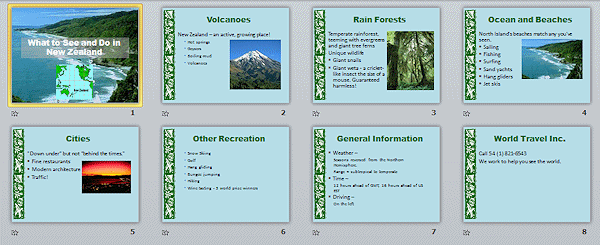
Step-by-Step: Slide Image |
|
| What you will learn: | to insert picture from file onto a slide to resize and position image on the slide to resize placeholder to search for image from Clip Art or Online Pictures to manage overlapping objects to insert an image from Clip Art or Online Pictures to flip and rotate image to recolor image |
Start with: ![]() , nz-bar-Lastname-Firstname.pptx
, nz-bar-Lastname-Firstname.pptx
Slide: Insert Picture From File
- If necessary, open nz-bar-Lastname-Firstname.pptx from your Class disk.
 Save
As nz-pictures-Lastname-Firstname.pptx to your Class
disk in the powerpoint project3 folder.
Save
As nz-pictures-Lastname-Firstname.pptx to your Class
disk in the powerpoint project3 folder.
-
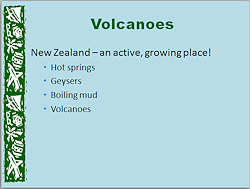 Select the Volcanoes slide so that it displays in the Slide Pane.
- From the Insert ribbon tab, click on Picture.
The Insert Picture dialog appears.
- Navigate, if necessary, to the copy on your hard disk of the resource files.
-
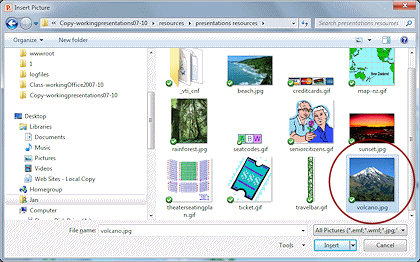 Select the image volcano.jpg and click the Insert button in the dialog.
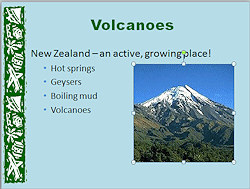
 The
image appears on the slide - centered and large.
The
image appears on the slide - centered and large.
Resize and Position Image
Be careful to position and size your image so that it is clear of all the actual text, even though it overlaps the placeholder. Consider resizing the placeholder itself to make sure any changes you make later will not create unhappy overlaps.
- Click on the picture to select it.
- Drag a corner to make the image smaller.
-
Drag the picture down and right until it is clear of the text.
-
 Experiment: Smart Guides

 PowerPoint 2013, 2016:
Dashed red guide lines appear as you drag. These smart guides are turned on by default. The red color is also by default but you can change that if your background hides red lines.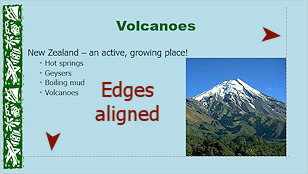
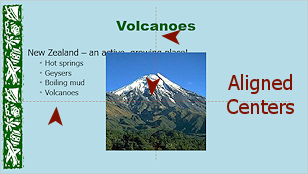
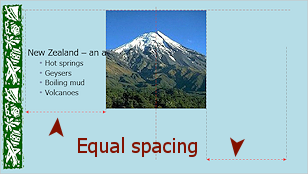
Drag the image around on the slide and see what guides you can make appear. The lines tell you when the object you are dragging is lining up with another object, in this case a placeholder.
-
 Save.
Save.
[nz-pictures-Lastname-Firstname.pptx]
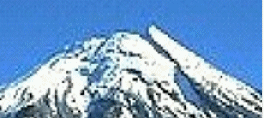
 Fuzzy Photos: This image will look rather fuzzy and jagged when projected. It has been
enlarged from a part of a smaller JPG format photo. The pixels around the
edges of the mountain that create the 'fuzzy' effect are called 'artifacts'.
It is a result of the way photos are compressed in JPG format to make for
smaller files. This is made worse if the picture is 'sharpened' in a graphics
program as this one was.
Fuzzy Photos: This image will look rather fuzzy and jagged when projected. It has been
enlarged from a part of a smaller JPG format photo. The pixels around the
edges of the mountain that create the 'fuzzy' effect are called 'artifacts'.
It is a result of the way photos are compressed in JPG format to make for
smaller files. This is made worse if the picture is 'sharpened' in a graphics
program as this one was.
Insert More Pictures and Adjust Placeholder
-
Similar to the steps above, add the following images from the resource files:
Title slide: map-nz.gif
slide Rain Forests: rainforest.jpg
slide Ocean and Beaches: beach.jpg
slide Cities: sunset.jpg
- As necessary, adjust the placeholder size and image position.
(For example, Slide 3 needs a narrower placeholder.) The handles of the selected object will show on top of any overlapping objects, but they can be hard to see.
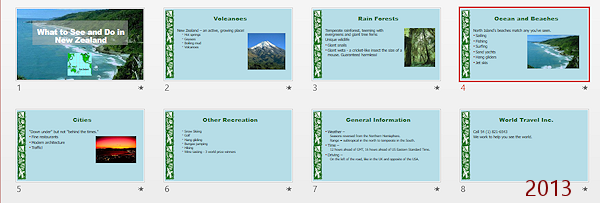
- Save.
[nz-pictures-Lastname-Firstname.pptx]
![]() Enlarge = Fuzzy: Do not enlarge the photos as you are moving them. Photos get
fuzzier when enlarged since they are bitmap images. If you are not sure, check the Size dialog or pane for the current percentages. Keep it under 100%.
Enlarge = Fuzzy: Do not enlarge the photos as you are moving them. Photos get
fuzzier when enlarged since they are bitmap images. If you are not sure, check the Size dialog or pane for the current percentages. Keep it under 100%.
Search for Image: Clip Art or Online Picture
Usually you would want to use either all photos or all clip art in a presentation to keep the same "look". But an occasional slide might need an icon or logo.
- Select the last slide.
-
From the Insert ribbon tab, click on Clip Art or Online Pictures.
The Clip Art pane or search dialog opens.
 PowerPoint 2007, 2010: The Clip Art pane will stay open until you close it. PowerPoint 2013, 2016: The Bing search dialog will close once you click the Insert button. It won't remember your search terms.
- Experiment: Searching for the right image
The search function looks only at the keywords that have been assigned to the image. The results can look random, until you look at the keywords assigned.
-
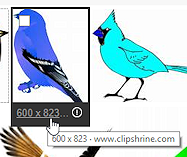
Type in the word bird in the Clip Art search box or the Bing Image Search box and then press the ENTER key.
After a pause, the search results appear as thumbnails.
Both the Clip Art pane and the Bing search results show images with a Creative Commons license, if you have kept your programs updated.Before Office 2013, Office and its programs installed some clip art images. You also had access to more images, free online at Office.microsoft.com. That feature has been removed. So sad.
-
Scroll the list of thumbnails.
The illustrations show that recent updates have changed the options. No more Office.com images for the Clip Art pane. The Bing dialog has gained filters for Size, Type, and Color.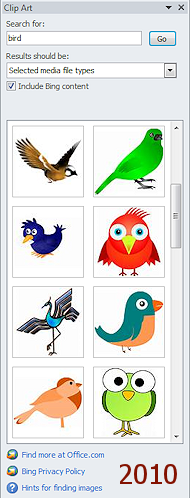
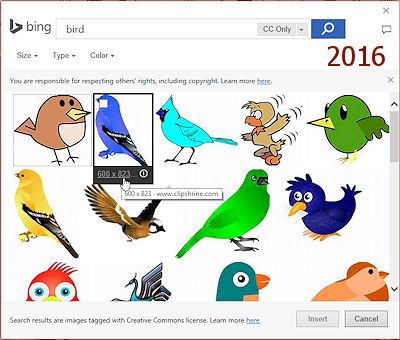
- Hover over the thumbnail of an image, but do
not click on the image itself.
-
PowerPoint 2007, 2010: A down arrow appears by the thumbnail. Click the arrow to open the menu.
Then click on Preview or Properties.
A dialog opens that shows the keywords attached to this image. Are these the words you would assign to the image? - PowerPoint 2013, 2016: Hover over an image.
 A check box appears at the top left of the thumbnail. Clicking the image checks the box. This lets you select several images and insert them in a pile on the slide.
A ScreenTip shows the original file size and a URL to the original web site. Click on the link.
Your browser opens a page with the image. This is often a site that offers free images for download.Can you tell what the keywords are for this image? A site that offer image downloads may call these Tags. The name of the file is certainly a keyword. It is not clear what else Bing considers keywords for the image.
What keywords would YOU pick to describe the image? -
Now type in bird red in the search box and click Go or the search button or press ENTER.
This reduces the number of images a lot.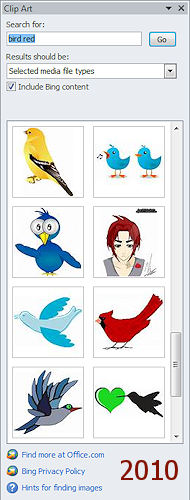
For some thumbnails it is not obvious why they are there. Check the keywords. The word 'bird' and the word 'red' are in there somewhere. Or at least one of them is there.
Can you find an image that does not seem to belong?
In the Clip Art pane illustration, there is a goldfinch, some singing cartoon bluebirds, and a black hummingbird with a green heart. Not much red in any of those.
The Bing search looks good at the start but further down the list were pictures of a bluebird, a red apple, a green cartoon bird, and a red heart.
-
Change the search box to cardinal, which is the official name of what most folks call a "red bird".
A very different set of images!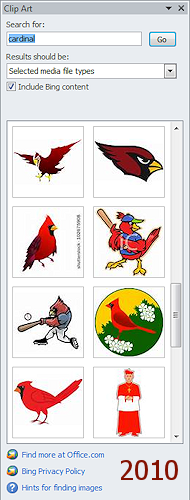
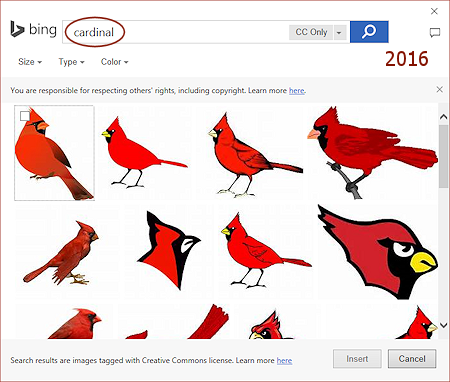
- View the keywords or oringal pages for some of these images.
Some images are birds and some are about a church official whose title is Cardinal and some for a sports team, Cardinals. You can expand your vocabulary and knowledge with this kind of search! 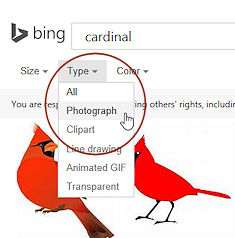 PowerPoint 2013, 2016: Apply a filter with the Size, Type, or Color menus above the thumbnails.
 Problem:
Inserted image by mistake
Problem:
Inserted image by mistake
You clicked on the image in the Clip Art pane or double-clicked the image in the Bing dialog.
Solution: With the image selected in your slide, press the DELETE key. -
Experiment: Handle Overlapping Objects with Selection Pane
- Insert several clip art images of your choice onto
the last slide.
They stack up on top of each other in the middle of the slide! How can you grab one of the images underneath to move it or resize it? The Selection Pane comes to the rescue! -
With a clip art image selected, open the Selection Pane:
Drawing Tools: Format or Picture Tools: Format ribbon tab > Arrange tab group > Selection Pane button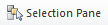
Alternate method: Home ribbon tab > Editing tab group > Select button > Selection pane
 The Selection
Pane appears at the right. It lists all
objects on the slide, including placeholders.
The Selection
Pane appears at the right. It lists all
objects on the slide, including placeholders. -
Click on a name in the list and the object on the slide is selected in the Slide pane. This is very helpful when objects overlap and it is hard to click on the one you want!
In the illustration the green palm tree is on top of the stack of objects. It has a transparent background, so you can see other images underneath it. But if you try to click on the bird or lion or car, you select the palm tree instead. The Selection pane allows you pick from the list even when the object is completely underneath other objects. It would be nice if the list used the file names, but it does not.
The Eye symbol
 beside an item lets you hide or show the item. So if something is completely hidden from view, you can hide the objects that are in the way until you are finished working with the hidden item.
 - Click on each item in the Selection Pane and observe the selection
border and handles that appear on the slide.
If you put large image on top of a smaller one, you may see a selection border without an image inside. It's an odd effect, but very helpful! It shows you plainly that the image is completely hidden underneath other objects in the stack. It would be nice if you could rename the objects in the Selection pane but you are stuck with names like Picture 3 and Text Box 6.
-
Use the arrows on the Selection Pane to change the stacking order or drag an item to a different spot. Items high on the list are closer to the top of the stack of objects.
Why stack objects? You can place several objects in the same spot and use Entrance and Exit animations to reveal and/or hide them one by one. The Selection pane helps you select an object to add or remove or to edit the animations for that object.
- When you are ready to continue, delete all of the images that you were using in your experiment and then close the Selection Pane by clicking its Close button or by clicking the Selection Pane button to toggle it off.
Insert Image: Clip Art or Online Pictures
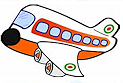
- Enter two new keywords that you think relate to the company, World Travel Inc., like globe plane or ship plane or tickets suitcase.
PowerPoint 2007, 2010: If necessary, change the search options to:
All collections
All media file types
-
Click the Go button
 (Clip Art pane) or the Search button
  (Bing dialog) or press ENTER.
The pane or dialog shows thumbnails of images with matching keywords.


Select an image in the results.
Pick an image that can be reversed (flipped horizontally) and that will look OK in a single color. So do not pick image that includes words or a globe that shows actual continents. Reversing an image like that would look really bad!
- Insert the image.
The image is inserted on the slide in the center on top of the text placeholder.

 Resize, if necessary, and drag the image to the bottom right corner of the slide.
- Center the two text lines on the slide.
- Save.
[nz-pictures-Lastname-Firstname.pptx]
Flip and Rotate Image
For a bit of practice, you will flip and rotate the new image.
- While
the image is selected, from the Picture Tools: Format ribbon tab, click on the Rotate button.
The menu opens.
-
 Select Flip Horizontal.
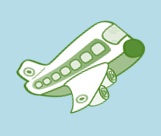
The image changes. The illustration shows that the plane is now pointed right instead of left.
-
 While the
image is still selected, move your mouse over the rotation handle
and drag to the left to put the image at an angle.
While the
image is still selected, move your mouse over the rotation handle
and drag to the left to put the image at an angle. Notice that the line from the center handle to the rotation handle is slanted, a rough measure of how much you have rotated the image.
- Save.
[nz-pictures-Lastname-Firstname.pptx]
Recolor Image
 You probably noticed that the color of the example image (and probably the one you selected) was not a good match for
the colors in the slide. Not to worry! The Picture
Tools: Format ribbon tab includes some helpful features.
You probably noticed that the color of the example image (and probably the one you selected) was not a good match for
the colors in the slide. Not to worry! The Picture
Tools: Format ribbon tab includes some helpful features.
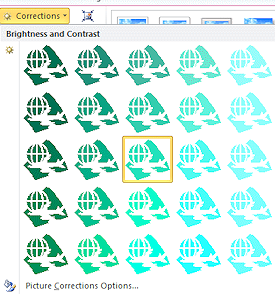
The Corrections button opens the Brightness and Contrast palette.
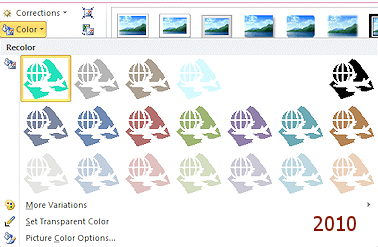 The Color button opens the Recolor palette, which shows how the
picture will look using shades of one of the theme colors AND with
different settings for brightness and contrast.
The Color button opens the Recolor palette, which shows how the
picture will look using shades of one of the theme colors AND with
different settings for brightness and contrast.
Previous versions of PowerPoint allowed more control and more colors
to be changed in an image instead of just one!
- If
necessary, select the clip art image you just inserted.
Picture Tools: Format ribbon tab appears.
-
Experiment: Correcting or Recoloring Image
The current versions make it easy to pick a variation of the current color (Corrections) or one of the theme colors (Color). You cannot change multiple colors in the same image.- Try out choices in the Adjust tab group. These are somewhat different between versions.
- Open the Format Picture dialog or pane with the dialog box launcher
 for
the Picture Styles tab group. Some of the ribbon controls open this
dialog/pane directly to a particular page.
for
the Picture Styles tab group. Some of the ribbon controls open this
dialog/pane directly to a particular page.
Some options may not be available for your image. -
PowerPoint 2016: Select the Eyedropper
 command on the menu Color > More variations > Eyedropper. The pointer changes to the eyedropper shape. Click on the slide on a color. The image takes that as the base color for the recolored image.
 - When you are ready to continue.... Click the Reset Picture button
 to
dump all of your experiments.
to
dump all of your experiments.
This is a great feature!
-
Format image:
 Pick a Color choice that gives you a green color for your image and a Brightness and Contrast
choice that give you a good look for your image.
Pick a Color choice that gives you a green color for your image and a Brightness and Contrast
choice that give you a good look for your image. - Save.
[nz-pictures-Lastname-Firstname.pptx]


Your image may be different!
|
|
| © 1997-2017 Jan Smith All Rights Reserved |
Site Map What's New |
Privacy Policy Terms of Service Copyright Acknowledgements |
~~ 1 Cor. 10:31 ...whatever you do, do it all for the glory of God. ~~
Last updated: March 22, 2017