
Jan's Working with Presentations
Format: Exercise PPT 2-2
 You need to use what you just learned, and maybe learn a little more. Complete all parts of the following exercises. Don't forget to backup your Class disk when you have
completed the exercises or whenever you stop for the day and saved a document
along the way.
You need to use what you just learned, and maybe learn a little more. Complete all parts of the following exercises. Don't forget to backup your Class disk when you have
completed the exercises or whenever you stop for the day and saved a document
along the way.
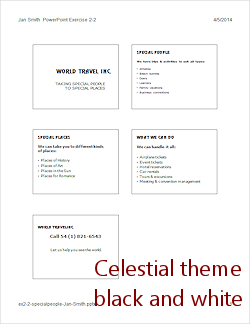
Exercise PowerPoint 2-2: Format & Animate
| What you will do: | Apply a theme to an existing presentation. Change fonts on Slide Master. Resize and reposition textboxes on slides. Apply slide transition that advances automatically. Apply animation. Edit animation. Use Animation Painter to copy animation. Add header to handout. |
Start with: ![]() , people.pptx from the resource files
, people.pptx from the resource files
- Open the presentation people.pptx from the resource files.
There are text boxes on the slides in addition to placeholders. -
 Save with the name ex2-2-specialpeople-Lastname-Firstname.pptx to your Class
disk in the powerpoint project2 folder.
Save with the name ex2-2-specialpeople-Lastname-Firstname.pptx to your Class
disk in the powerpoint project2 folder.
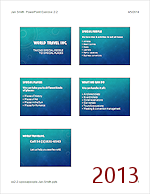
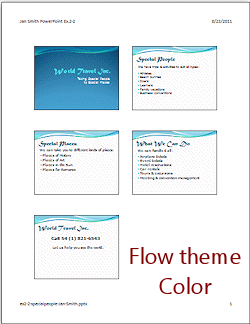
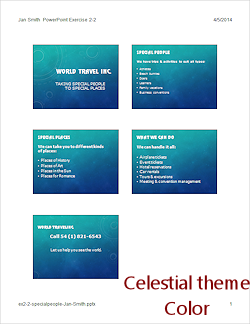
- Theme: Apply a theme that looks good to you, like Flow or Celestial - blue green variant.
The text boxes that are not placeholders do not update.
- Change fonts:
- Slide Master: Change the font for all slide titles to a wide serif font, like Britannic Bold or Renfrew or Broadway.
- Slide Master: Change the font for the bullet
list to Verdana
- Slide Master: Title Layout: Make sure the
fonts match what you chose above.
- Slides: Change the font of the non-placeholder textboxes
to Verdana and Bold.
(These text boxes cannot be formatted from a Master.)
The text boxes will need to be resized and moved (see next step!)
- Resize and move placeholders:
The placeholders and textboxes on some slides are now too close together or are not well shaped for the text. Adjust the size and/or location so that the text lies neatly on the slide.
- Format last slide:
Phone number = Bold
Slogan = centered, not bold
- Transition:
- On the Slide Master, apply transition
 Cover Left or

 Cover - From Right.
 - Advance after 2 seconds.
- Apply to all.
- On the Slide Master, apply transition
- Animation:
- On Slide 2 (not the master), select the placeholder with the bullet list.
- Apply the Entrance animation Wipe - From Left.
Duration remains at 0.5 sec and Delay remains at 0 sec. - Change the Start to After Previous.
- PowerPoint 2007: Repeat steps aboveon Slide 3 and Slide 4.
PowerPoint 2010, 2013, 2016: With the bullet text placeholder still selected, double click the Animation Painter button.
(This keeps the feature on until you turn it off.)
Change to Slide 3.
Click in the bullet list to apply the same animation.
Repeat for Slide 4.
Press the ESC key to turn off the Animation Painter. - On the last slide, select the phone number and slogan text
boxes.
Apply the Entrance effect Grow & Turn, Start = After Previous.
Duration remains at 1 sec. with Delay = 0 sec. - Play the Slide Show and make sure the transitions and animations
are running automatically.
- Use the Pre-Print Checklist.
- In Print Preview, select:
Handout layout with 6 slides per page
Print in your choice of color or black and white
Header that includes your name and
PowerPoint Exercise 2-2 at the top left.
Footer with file name at the bottom left.
ex2-2-specialpeople-Lastname-Firstname.pptx
-
 Print the handout. You may use color if you wish. The previous lesson used black and white. PowerPoint will remember that!
Note: If you switch from color to gray scale or black and white and back to color, the preview will not show the colors. Once you close PowerPoint and open it again, all will be back to normal. This is a known issue with most printers!
- Save
[ex2-2-specialpeople-Lastname-Firstname.pptx]
|
|
| © 1997-2017 Jan Smith All Rights Reserved |
Site Map What's New |
Privacy Policy Terms of Service Copyright Acknowledgements |
~~ 1 Cor. 10:31 ...whatever you do, do it all for the glory of God. ~~
Last updated: March 22, 2017
These exercises may use one or more files from the presentations resource files . Save the changed documents to your Class disk. This
keeps the original resource files intact in case you need to start over or
another student will be using this same computer.
. Save the changed documents to your Class disk. This
keeps the original resource files intact in case you need to start over or
another student will be using this same computer.