
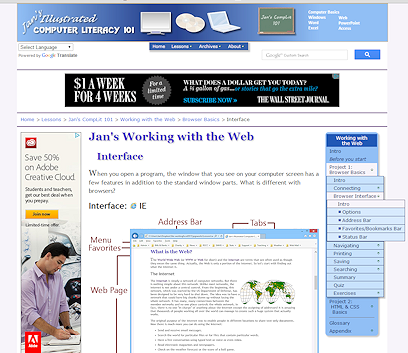
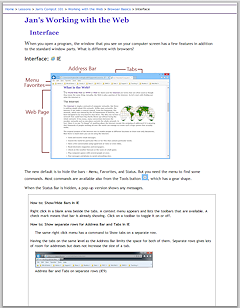
Jan's Working with the Web
Printing Web Documents
Most web pages are not designed with printing in mind.
The printed web page may be surprisingly different from what you saw on the screen. Text may wrap differently on paper than on the screen. Part of a wide page might not print at all. Wide images might be cut off. Under the default settings the background color or graphic will not be printed. This is usually good.
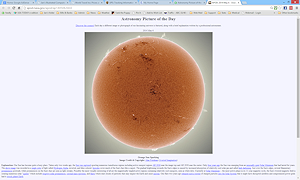
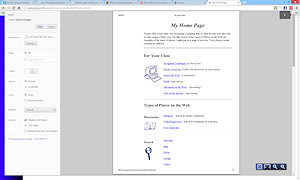
Example: The simple web page below lets the text wrap to the window or (in print) to the page. The overall look is quite different in print.
 |
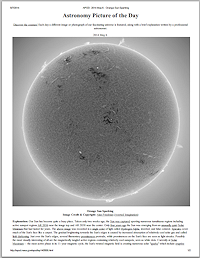 |
| Simple web page | Printed page in black and white |
![]() Lost
information: Printing in black and white or gray scale may
lose information that was conveyed by the colors of the text.
Lost
information: Printing in black and white or gray scale may
lose information that was conveyed by the colors of the text.
Alternate Version for Print?
Some web sites provide a separate file in PDF format or, more commonly, use Cascading Style Sheets to hide parts of the page and to reformat the page for printing. Such a page would leave out ads, menus, navigation bars, and sidebar information. It makes a big difference, as the examples below show.
![]() Print links: A Print link or button on the page might
just use the browser's own Print command or it might re-format the page or it might bring up a separate printer friendly page.
You cannot tell until you try it out.
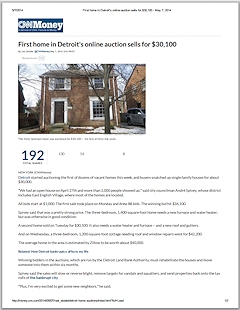
Print links: A Print link or button on the page might
just use the browser's own Print command or it might re-format the page or it might bring up a separate printer friendly page.
You cannot tell until you try it out.
Examples:
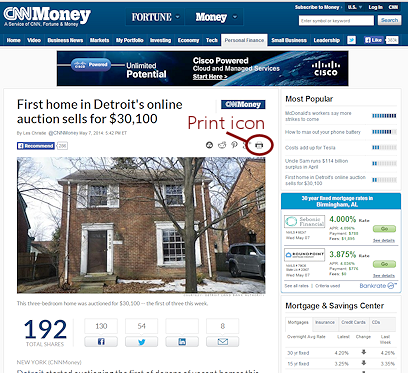 |
 Page printed from icon on page. |
| Web page, which has a Print button (icon)
Credit: money.cnn.com |
Browser's own print command produces a page with no margins! |
 |
 Page printed from browser |
| Web page from these lessons | Style sheet automatically removed ads, menus, header and footer |
Problems with Printing Web Pages
| Page width: |
A web page may be wider than your paper, especially if it is designed for a large screen resolution. When printed, text will wrap to fit the paper, but a large graphic cannot wrap. Neither can a table or other HTML element that has its width set to a large number of pixels. The printer will not print what will not fit on the paper! Solution 1: Print in Landscape orientation. (May still not be wide enough) Solution 2: Save the page or image to your hard disk. Open it in an appropriate application (spreadsheet or word processor for a table, graphics program for an image, HTML editing software for the whole page) and print from there. Solution 3: Copy and paste it to an appropriate document where you can adjust the size. |
| Color loss: |
Most of us print web pages in black and white or gray scale, rather than the more expensive color inks. You will lose information that was shown by the color of the text or images. Light color text on a dark background, when printed in gray scale, may not show up well unless you print the background. But printing a dark background can take a LOT of ink. Some browsers will automatically print light text as black. Solution: Print in color, if you can. |
| Graphic quality: |
Graphics that look really great on the screen may print poorly, especially color graphics printed in black and white. Your printer can show more dots per inch than your screen can. That can result in jagged or muddy pictures. Images may look odd without the background that they were created to go with. Transparent images may print with a background color or have rough edges. Solution 1: Print in color. (The images may still look blurry.) Solution 2: Print the page with its background.
|
| Animated graphics: |
Animations are made up of a number of separate images. Your computer can only print one image (called a cel) out of the set. It might not be a useful image. It could even
be a blank cel! Solution: (If you want to print a particular cel or more than one) Save the animation to your hard drive. (Right click on the image > Save) Open it with an animation program. There are many free ones. Print from this program or save the cel you want. Open the saved cel in a graphics program and print. |
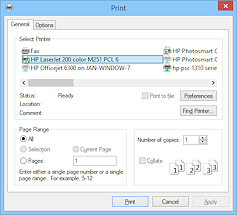
Dialogs for Printing Web Pages
You have a choice of ways to mess up your print job! There are three different dialogs that affect how your print job is handled by the printer: Page Setup, Print, and Printer. Some choices appear in more than one place! Some of these choices are also in the Print Preview, which you will use in the next lesson.
Are you experienced with printing other kinds of documents? Then you will not be surprised by much here.
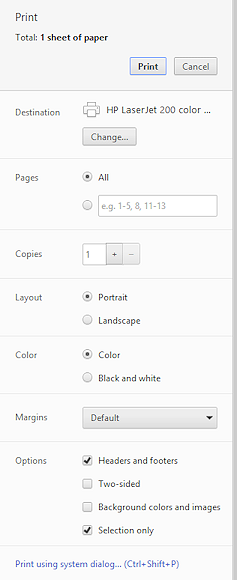
Print Dialog
Which printer? What parts to print? How many copies?
Methods to open the Print dialog:
Method 1: Method 2: File > Print... Method 3: CTRL + P |
Method 2: CTRL + P Method 3: Right click > Print... Method 4: System Print dialog: |
Method 1: Method 2: File > Print... Method 3: CTRL + P |
 |
 |
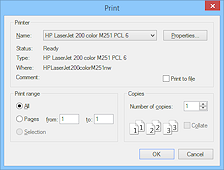 |
Below are explanations of the parts of the dialog.
Printer |
All of the installed printers are shown in the list or drop list. One will be the default printer. It's the one that is selected by default UNLESS you recently chose a different printer for a print job from the browser. This list of printers can include items that aren't physical printers, like a computer fax or a PDF printer that just creates a PDF file. The 'Print to file' check box lets you save a copy of a document that is ready to print on the selected printer. It does not print at this time, but is saved in a file. That used to be a very useful feature when printers were a lot slower and the computer took a long time to format the document for printing. The Preferences or Properties button opens the printer's own dialog, where you have other choices, as shown below. |
||||||
Copies |
Choose how many copies you want to print. For documents with several pages, when you print more than one copy, you can choose whether to collate, that is, to print the whole document through and then go back and print the second copy all the way through. If you do not collate, then all copies of page 1 will print before the printer starts printing the copies of page 2. Collating will save you a lot of paper cuts and time since you won't have to put the pages in order yourself. |
||||||
Print Range |
|

An earlier version of these lessons included a lot of discussion about framed pages. I have dropped this material because few sites use frames anymore. Frames have been deprecated (declared obsolete and dropped) in HTML5 when that standard was finalized in 2014.
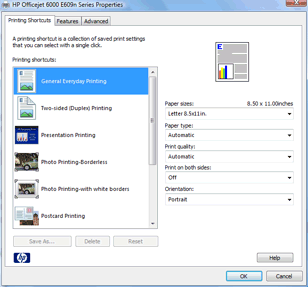
Printer Properties
What quality? What colors? What media?
Each printer has a dialog where you can adjust settings for how the printer prints. Each manufacturer designs its own dialog that offers choices that fit the particular printer. These are wildly different from each other!! You will generally see choices like those listed below somewhere in the printer's dialog.
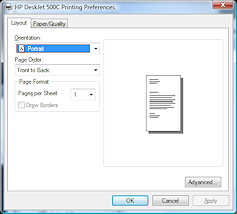
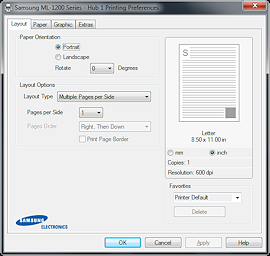
Colors: Black text, gray scale, color photo, or color graphics. Gray scale means all colors will be printed in shades of gray or black.
Quality: normal, draft or fast (less ink, less quality), presentation or high (most ink, best quality)
Orientation: portrait or landscape
Media: plain paper, glossy paper, card stock, transparency, etc. It makes a big difference what you choose here, especially for slick paper or transparencies.
Media Size: The actual size of what you are printing on - letter, legal, normal envelope (No. 10), A4, etc.
Special features: Does your printer have unusual or special features? Look for settings to control those features in this dialog.
Page Setup dialog
What will the page look like?
The Page Setup dialog controls many features of the page layout.
|
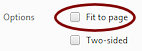
Shown only as needed: 'Selection Only' and 'Fit to page'
|
|
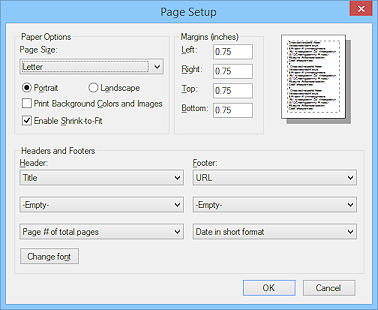
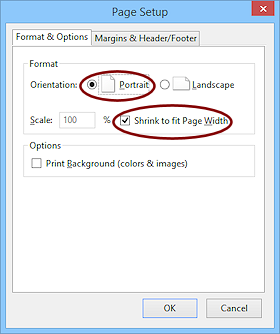
Paper Size - Letter is the default choice.
Paper Orientation - Portrait (vertical) is the default, or Landscape (horizontal)
![]()
![]() Shrink to Fit - Resizes the page to fit the width of the current paper size.
Shrink to Fit - Resizes the page to fit the width of the current paper size.
![]() Chrome automatically shrinks the page.
Chrome automatically shrinks the page.
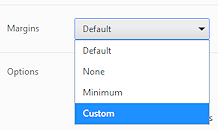
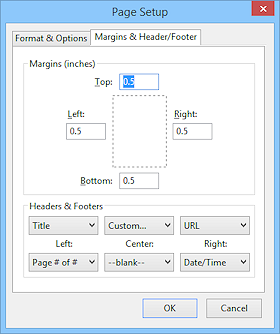
Margins - Left, Right, Top, and Bottom. Most printers
can print with margins of .5" of the top and bottom and of .25"
of the left and right. Many can print closer. Save paper! Use small margins with web pages, which
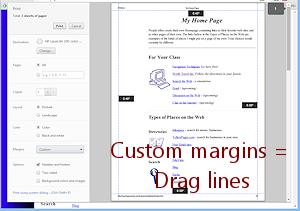
can have a lot of unused space. In Chrome you can set your own margins by choosing Custom from the Margins drop list and then dragging the dashed lines. The current values show in a floating tip.
Header and Footer of the pages - The default settings add text to the top and bottom of the page. Each browser positions the text differently by default.
| |
||
|
|
|
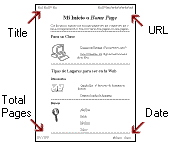 |
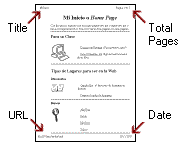
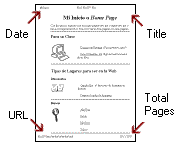
![]()
![]() In IE and Firefox, you
can make your own choices for what is in
the header and footer, or choose Custom and type the text that you want to appear.
In IE and Firefox, you
can make your own choices for what is in
the header and footer, or choose Custom and type the text that you want to appear.
![]() Chrome does not yet [June, 2016] let you change the default header and footer.
You can uncheck the box so that neither the header nor the footer will
print.
Chrome does not yet [June, 2016] let you change the default header and footer.
You can uncheck the box so that neither the header nor the footer will
print.
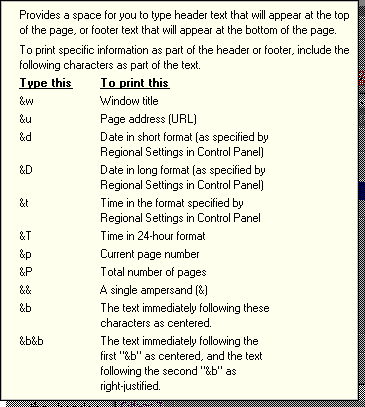
![]() IE: You can create a custom header or footer by entering codes to create exactly what you want to see, automatically. For example, to get the date followed
by the time, you would enter &d &t.
IE: You can create a custom header or footer by entering codes to create exactly what you want to see, automatically. For example, to get the date followed
by the time, you would enter &d &t.
![]() Codes for Header/Footer: Where is the list of codes? In earlier versions
of IE, the list of codes shows as a popup tip but it no longer does. I guess
we are all supposed to just know! Or maybe just settle for the choices
that are provided in the dialog. Boo!
Codes for Header/Footer: Where is the list of codes? In earlier versions
of IE, the list of codes shows as a popup tip but it no longer does. I guess
we are all supposed to just know! Or maybe just settle for the choices
that are provided in the dialog. Boo!
|
|
| © 1997-2017 Jan Smith All Rights Reserved |
Site Map What's New |
Privacy Policy Terms of Service Copyright Acknowledgements |
~~ 1 Cor. 10:31 ...whatever you do, do it all for the glory of God. ~~
Last updated: March 22, 2017