Jan's Working with the Web
HTML & CSS Basics: Exercise Web 2-1
 Now that you have gone through
the Step-by-Step exercises, it's time to practice what you have learned. The
following exercises will not have as much detail in the directions.
Look back at the Step-by-Step pages if you need a refresher on how to do something. There are new methods and information in these exercises. They are not just review!
In the following exercises you will practice your skills by creating some web pages. Include all of the parts and characteristics. The directions assume you are writing in Notepad. You can, of course, create the same pages using another text editor or you could use an HTML editor.
Exercise Web 2-1: Format Text & Images
| What you will do: |
Title the page Create an internal style sheet Format the page Insert an image Create a text link and an image link Apply heading tags Add styles to an internal style sheet Adjust text wrapping Add and style a horizontal rule Insert a timestamp from Notepad Print from Notepad and the browser |
You will format a simple page for Hector's son Ricardo.
Start with: ![]() , Notepad or other text
editor
, Notepad or other text
editor
- In Notepad, open the page ricardo.htm that is
in the folder Exercises on your
Class disk.
<your removable drive>:/class/web/HTML/Exercises/The graphics that you will insert below are also in the folder. These files may also be on your hard disk if you copied the web resource files there. They are also available online at http://www.jegsworks.com/Lessons/resources/web resources/html.
-
 Save as ricardo-Lastname-Firstname.htm to the
folder class/family/ricardo on your Class
disk.
(This folder was created in a previous lesson. Create the folder if it does not exist)
In the lessons you created a link to this page from Hector's page.
-
In File Explorer, verify that the images sasha.jpg and icon-lobos.gif are in the folder ricardo.
If necessary, copy and paste these images from the resource files folder Exercises to the folder ricardo. -
Make the following changes. Use an internal style sheet for your styles.
-
 Page:
Page:
Title tag = Ricardo's Page by Your Name
(using your own name, of course)Background Color - Custom color (red =255 green=200 blue=145)
Text color = Green
- Text styles:
Heading 1 = green, font-family = Trebuchet MS, Tahoma, sans-serifHeading 2 = green, font-family = Trebuchet MS, Tahoma, sans-serif
regular paragraphs = green, font-family = Comic Sans MS, Arial, sans-serif
- Text:
Make the first line of text Heading 1 and the second line Heading 2.Add paragraphs at the bottom:
Los Lobos - my team
Back to Hector's page
-
- Images:
(Use File Explorer to find out the dimensions of the two images.)
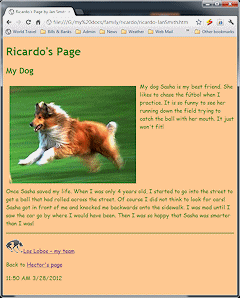
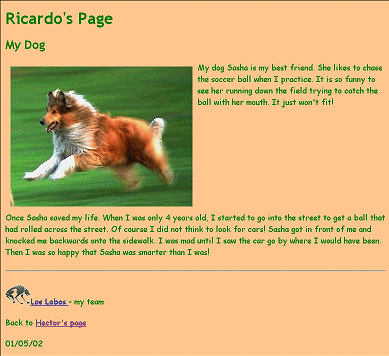
Place sasha.jpg at the beginning of the first regular paragraph. Use an inline style to make it float at the left with 10px margin all around.
ALT text = "Sasha"Place icon-lobos.gif at the left of the line "Los Lobos - my team".
ALT text = "Los Lobos"
- Wrapping:
First paragraph wraps around on the right beside Sasha's photo.Make the second paragraph start below the image.
- Links:
Use relative links to make icon-lobos.gif and the text "Los Lobos" links to the page loslobos-Lastname-Firstname.htm, which will be in this same folder.
(You will create this page in Exercise Web 2-2.)Use a relative link to make "Hector's page" a link back to your last version of Hector's page, hector25-Lastname-Firstname.htm which is NOT in the same folder as Ricardo's page. It's two levels up:
<a href="../../hector27-Lastname-Firstname.htm">Hector's page</a> - Horizontal rule:
Insert a horizontal line between the second regular paragraph and the Los Lobos link.
Add a style to the internal style sheet that makes the horizontal rule green. You will need to set several properties.
-
Timestamp:
At the bottom of the page before the BODY tag, add a new paragraph and insert from Notepad's Edit menu the time and date.
(Don't forget to update this before printing.) 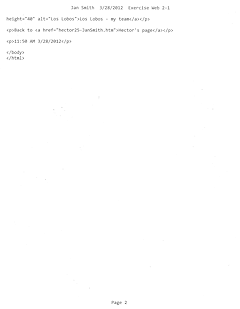
 Page Setup for text editor:
Header > include your own name and today's date and the text "Exercise Web 2-1".Footer > Page &p
-
 Save.
Save.
[ricardo.htm].
-
 Print from Notepad.
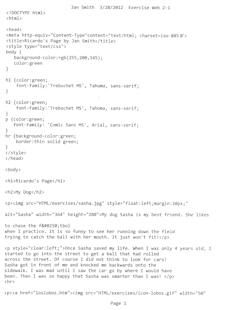
(Your code may look different from the illustration, depending on exactly how you wrote the styles and other content, especially blank lines, spaces, and indentions.)
-
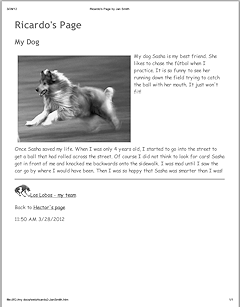
 Open the page in your browser.
 -
Test the link to Hector's page by clicking on it. Return to Ricardo's page with the Back button.
If the link does not work, edit it.
(There is no page yet for Los Lobos so you cannot test that link.)
- Print from the browser.
You can print in color if you wish (and you have a color printer!) but don't print the background.

You need some resource files to create the web pages in the exercises. If you have not already installed these on your Class disk, do so now.
Individual files can be downloaded as you need them from http://www.jegsworks.com/Lessons/resources/web resources/HTML/Exercises/ They should be saved to your Class disk in the folder
<drive for Class disk>:\class\web project2\Exercises