
Jan's Working with the Web
Formatting: Edit Image Background
The background of an image is sometimes a problem when it clashes with the background of the page. A transparent background is often best. That requires a GIF or PNG image format. Paint saves in those formats but unfortunately it won't save an image with a transparent color. What's a web author to do?
-
Convert: Use a graphics program or graphics converter that will save with a transparent color.
- Convert Online: Use a free online service that will convert your image to one with a transparent color.
- Change image background: Use a graphics program to edit the background color to match the page background.
It is clearly easier to use a program you already have... if you have one! The steps below will take you through the process to make the background of the image match the background of the page, using only Paint. It's awkward but it works. And you already have that program on your computer!
| |
Step-by-Step: Edit Image Background |
|
| What you will learn: | Paint: to
pick existing color from a picture Paint: to create a custom color Paint: to change color in picture Paint: to save image in different formats and test in browser |
Start with: ![]() , hector17-Lastname-Firstname.htm, resource files
, hector17-Lastname-Firstname.htm, resource files
Pick an Existing Color from a Picture
It is fairly common to want to match a color on another page or in a picture. You can use Paint's Color Picker tool to find out exactly what that color was! Then you can use Paint and a steady hand to replace a color with the new color.
In this section you will get Paint to find and remember the background color from a screen shot of Hector's page as a custom color. Then you will be able to use it in another image, IF you don't close Paint in between.
Of course we already know the RGB numbers for the color so we could create a custom color with those. But the following technique will work when you are trying to match a color for which you do NOT know the numbers.
- If necessary, open hector17-Lastname-Firstname.htm in your editor.
-
 Save As hector18-Lastname-Firstname.htm.
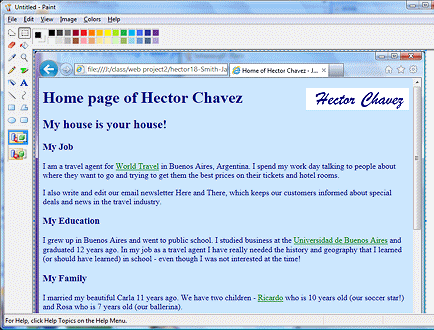
 - Switch to your browser and view this page.
 Use the key
combo ALT + Print Screen to capture a picture of the browser window.
Use the key
combo ALT + Print Screen to capture a picture of the browser window. -
Open Paint, if necessary.
-
In the Paint window, use the key combo CTRL + V to paste the screen capture into Paint
Windows XP or Vista
Windows XP has the color palette at the bottom.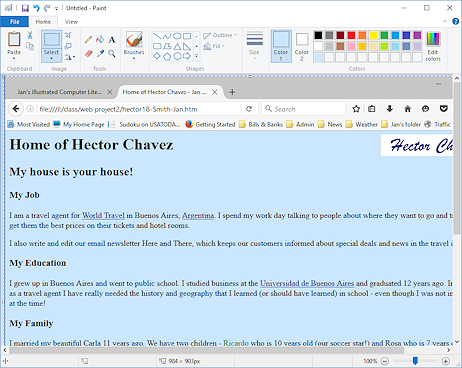
Paint in WinXP or Vista; Paint in Windows 7, 8, or 10
-
Click on the black Foreground color/ Color 1 square to select it.

 WinXP,Vista:


 Win7, Win8, Win8.1, Win10:

-
Click on the Color Picker tool
 .
.
The mouse pointer changes to the eye dropper shape. WinXP, Vista:
 Win7, Win8, Win8.1, Win10:
-
Move the mouse pointer
over the light blue background
in the image of Hector's page and click.
The square for Foreground/Color 1 changes to match the background color and the pointer changes shape: WinXP, Vista:

 Win7, Win8, Win8.1, Win10:

Not that you are going to need to draw anything this time!Paint now knows the background color from Hector's page. But, if you load a different picture, the Foreground/Color 1 will change back to black! You have another step to do.
Create a Custom Color
You can create one or more custom colors that Paint will remember but only for the current session. Once you close Paint, those custom colors vanish.
- Open the Edit Colors dialog:
WinXP, Vista:
Menu - >
 Win7, Win8, Win8.1, Win10:
Click the ribbon button Edit Colors
 .
.The Edit Colors dialog opens.
-
 If necessary, click the button Define Custom Colors>> to
expand the dialog to the right.
If necessary, click the button Define Custom Colors>> to
expand the dialog to the right.
The light blue color is already showing in the Color|Solid area because it was the selected color. Custom
Color: You could enter color numbers directly here if you know
what you need or
drag the crosshairs to pick out a color.
Custom
Color: You could enter color numbers directly here if you know
what you need or
drag the crosshairs to pick out a color. - Click the button Add to Custom Colors.
The first square for custom colors is now colored to match your custom color.Multiple
Custom Colors: If you want to save several custom colors,
you will have to pick a white square in the Custom colors rows first, and then pick your color on the right. When
you click the Add to Custom Colors button, the selected square gets
the new color. Otherwise, the dialog will always put the new color
in the first square.
- Click on OK to close the
dialog.
WinXP, Vista:
The foreground color is now the custom color instead of black. The palette square for black is now light blue, too.
 Win7, Win8, Win8.1, Win10:
The custom color now shows in the palette of colors in the row for custom colors.
Change Color in Image
Paint does not have a way to automatically replace all pixels of one color with another color. You will use the Fill tool to change the colors.
-
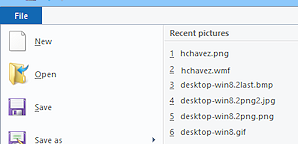
Open the list of recent files:
WinXP, Vista:
Menu - > Recent files at the bottom of the menu
 Win7, Win8, Win8.1, Win10:
Open the and look at the list.
-
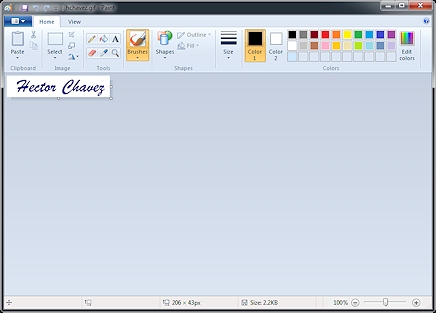
Click on hchavez.png.
This is Hector's signature with a white background, which is currently showing on Hector's web page.
In a previous lesson you also saved a WMF image as a GIF, so both names are probably in the list of recent files. Pick the correct version!
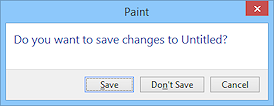 A dialog opens, asking if you want to save changes to your pasted image,
Untitled.
A dialog opens, asking if you want to save changes to your pasted image,
Untitled. Problem: File is not in
the list
Problem: File is not in
the list
Either this is not the computer on which you edited this file earlier or enough pictures have been edited since then to move it off the list.
Solution: Open the Paint menu and select . Navigate to your Class disk where you stored the file and select it there and click on the Open button. -
Click on the button No or Don't Save.
The signature PNG opens but Foreground/Color 1 is back to black. That's why we had to save the color as a custom color.
-
If necessary, click on the Foreground/Color 1 box to select it.
- Use a custom color for the Foreground/Color 1.
WinXP, Vista:
-
Open the Edit colors dialog again.
Menu: >
- Click the custom
color and then click on OK to close the dialog.

Win7, Win8, Win8.1, Win10:
Click on the custom color in the bottom row on the ribbon palette.
Foreground/Color 1 changes to the custom light blue again. What a lot of work!
-
-
Click on the Fill button.

-
 Move the pointer over the
white area of the picture.
Move the pointer over the
white area of the picture.
The pointer changes to a paint bucket pouring.
-
Click.
The white area around the signature changes to the color of Foreground/Color 1.
Some white pixels remain inside some of the letters. - Zoom in to 400% to enlarge
the image for editing by:
WinXP,Vista:
> > > Win7, Win8, Win8.1, Win10:
Drag the Zoom slide at the bottom right of the window to the right to 400%.
-
 Move the Fill pointer so that the tip of the pouring paint is over the white area inside the letter o.
 -
Click.
The white turns light blue. -
Repeat for each remaining area of white.
You do not have to change every single white or near white pixel. Remember that this is an enlarged view.Problem: Changed the wrong pixels
Getting the pointer in just the right spot is hard for the narrow areas, inside an e or z. Undo is your friend!
Solution: Undo and try again. -
Zoom to 100% and inspect.
Fix any glaring white spots by zooming again and filling the white spots. A few light spots at the edges will be OK.
Save in Different Formats and Test in Browser
-
Save As as PNG file by:
WinXP, Vista: Menu: > .
 Win7, Win8, Win8.1, Win10:
Open the File/ Paint menu and select >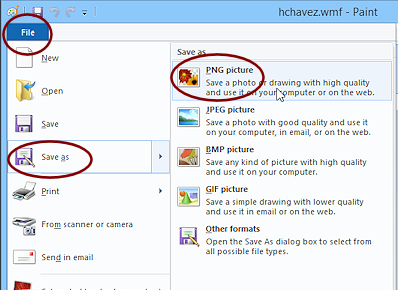
A Save As dialog opens.
-
Select, if necessary, PNG type.
-
Use the name hchavez-lightblue.png to save the changed file to the HTML
folder on your Class disk.
- Repeat the save but choose the JPEG file type.
-
Repeat the save but choose the GIF file type.
You now have several versions of the same image including hchavez.gif with a white background and hchavez-lightblue in three different formats with a light blue background. The resource files that you copied to this folder also had some other formats, which Paint cannot use.
-
Switch to your editor and edit the SRC for the signature image to the new GIF version, hchavez-lightblue.gif.
-
Save.
[hector18-Lastname-Firstname.htm]
-
Switch back to your browser and Refresh.
Whoops. The image's background is wrong. GIF format can only show 256 colors. Our custom color was not one of the colors! The exact color varies with the version of Windows. Who knew? WinXP shows a lighter blue background color for the
image than the page.
WinXP shows a lighter blue background color for the
image than the page. Vista shows a darker blue background for the
image than the page.
Vista shows a darker blue background for the
image than the page.
 Win7, Win8, Win8.1, and Win10 show a dithered background for the image in GIF format.
 Paint did not do a good job with this file format and this color. GIF images can only have 256 colors. Apparently the one we need is not in the colors that were saved.
A good graphics program will let you change the number of colors for the image and save again. The colors actually in the image are saved! Unfortunately Paint does not have that feature.
Let's try again with a different file formats.
-
Switch to your text editor.
-
Change the SRC to hchavez-lightblue.jpg (notice the different file extension!)
and Save.
[hector18-Lastname-Firstname.htm] -
 Switch back to your browser and Refresh.
Better!
-
Use the browser's Zoom to enlarge the page to 500%.
-
Inspect the signature.
The illustration shows an enlarged view at 500%.Background-color: This time the colors match in the outer areas of the signature image.
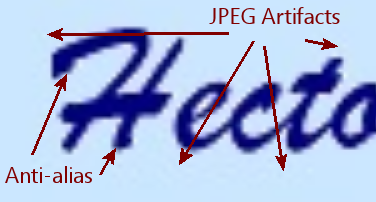 Anti-alias: The letters have a bit of fuzziness around them that is normal anti-aliasing to create a smooth curve out of square pixels.
 JPEG Artifacts: There are also ripples of fuzzy color surrounding the signature. These are a result of the way the image is compressed and sharpened in the JPEG format.
- Switch back to the editor.
 Change the SRC to hchavez-lightblue.png (notice the different file extension!)
and Save.
Change the SRC to hchavez-lightblue.png (notice the different file extension!)
and Save.
[hector18-Lastname-Firstname.htm]-
Switch back to the browser and Refresh.
The background color matches the page background. The fuzziness from anti-aliasing remains but the JPEG artifacts are gone.PNG format turned out better! Of course the difference at 100% zoom is hard to see in this example.
|
|
| © 1997-2017 Jan Smith All Rights Reserved |
Site Map What's New |
Privacy Policy Terms of Service Copyright Acknowledgements |
~~ 1 Cor. 10:31 ...whatever you do, do it all for the glory of God. ~~
Last updated: March 22, 2017