
Jan's Working with the Web
Style Sheets
There are three ways to apply styling with CSS (Cascading Style Sheets).
-
Inline style - in a tag
-
Internal style sheet - in the HEAD section of a web page
-
External style sheet - CSS file linked to the web page in the HEAD section
You worked with inline styles when you added a STYLE attribute to the IMG tag and adding the CLEAR:BOTH property in previous lessons. You can add a STYLE attribute to any HTML element. Different elements have different properties, of course.
Instead of writing the same STYLE attributes over and over on a page or throughout a web site, we can avoid a lot of typingand the opportunity for errors by using internal and external style sheets. We all want to save as much work as possible!
Example: External, Internal, Inline Style Sheets
Source code in editor:
External style sheet in editor:
CSS Syntax: Internal or External Style Sheet
Syntax: selector {declaration; declaration;}
A selector is the thing being formatted. It can
be an element, like H1 or P or SPAN. Or, it can be a class name like .comment or an ID like #footer. An ID is a unique name for a specific element on the page, like
<div id="footer">.
Each declaration is a property:value combination. A selector can have as many declarations as you want. Each one ends with a semicolon. The whole set of declarations for a single selector must be surrounded by curly braces { }.
Internal Style Sheet
It gets annoying to apply the same styling to many places on the same page. Instead, you can define the styling in an internal style sheet in one place - in the HEAD section of the page. You can add indentions and line breaks to the code to make it easy to read when you have several definitions or several properties in a definition.
Internal Style Sheet: Standard Tag
Syntax: tagname {property:value; property:value;}
By defining a style for a standard tag like IMG, H1, or P, you force the browser to use your style every place on the web page that the tag appears. This is great for keeping the look consistent!
Each new tag starts on a new line in the STYLE section.
Example: To style all of the images on a page to float at the left with 10 pixels of white space at the left and right, you could put the following code in the HEAD section of the page, with indentions and line breaks to make it easy to read:
<style type="text/css">
img {
float:left;
margin-right:10px;
margin-left:10px;
}
</style>
</head>
Internal Style Sheet: Class
Syntax: .classname {property:value; property:value;}
When you want to apply special styling only to certain objects, you can create a class in the internal style sheet and then apply the class in the tag for each object. The example below defines 4 classes.
<head>
<style type="text/css">
.imgright{
float:right;
margin-right:15px;
}
.comment {background-color:wheat;
font-size:small;
}
.width200 {width:200px;background-color: #B3FBDE}
.half {width:50%; text-align:center; background-color:#EED9FF}
</style>
</head>
In a browser these look like:

This is a paragraph with the class comment.
This is a paragraph with the class width200.
This is a paragraph with the class half.
![]() Tips
for picking a class name:
Tips
for picking a class name:
- Pick a name that tells what the class is for rather
than what it looks like.
Example: Use the class name .term instead of .purplebold to format the special terms on your page.
Advantage: If you change your mind about the look, just change the definition of the class .term and the page updates to use the new definition. The name .purplebold is not helpful if you decide to make the text green and italic instead of purple and bold! Think ahead!!
Exception: It can be helpful to have a set of class for widths and alignments ready to apply.
-
Be sure to put a dot in front of the name for a class in the definition!
- Do not start a class name with a number. Most browsers will not use it!
- Do not use special characters like %. Browsers may get confused. Predicting the results is difficult.
- Do not duplicate an element name like .table or .h3, even if these are not styled with your style sheet. You can add characters to elements to make the name different, like .table2.
How to Apply a Class
To apply the class named IMGRIGHT, you add the CLASS attribute to the tag, like:
You can apply two or more classes at once. Be sure they do not conflict! They must be in the same CLASS statement, separated by a space, like:
Example: Multiple Styles in Internal Style Sheet
The following code shows some of the parts you might need for the HEAD section of an HTML page, including a STYLE section with styling for two elements and several classes.
<meta http-equiv="Content-Type" content="text/html;charset=UTF-8">
<title>My Favorites</title>
<style type="text/css">
h1 {
text-align:center;
}
p {
margin-left:5px;
margin-right:10px;
}
.photogallery {
vertical-align: top;
}
.menu{
margin-left: 40px;
}
.portrait {
vertical-align: top;
margin-top: 6px;
margin-bottom: 6px;
}
/*A #ID formats an element with this ID. Can have only one element with this ID on the page, like id="logo" */
#logo {text-align:right;
border: narrow solid #000000;
}
p.comment {
padding: 6px;
border: thin solid #FF9900;/* medium orange*/
background-color: #FFFBE1;/* pale beige*/
}
</style>
</head>
Comments Inside the Code
You can add comments about your styles by typing your comment text between /* and */.
Use a comment to explain what the style is for or to remind yourself what it looks like.
Find the comments in the styles above.
Be sure to close your comment! The browser will ignore the code until it finds the final */.
Element.Class
Sometimes you want a class that only applies to a particular kind of HTML element. In the styles above, the last one, p.comment, is a class (.comment) which can only affect P tags. If you accidentally used COMMENT as a class on another kind of element, the browser would ignore it. You could define other classes like h1.comment or div.comment which apply only to those tags. This can be a handy way to make it clear to yourself which styles should hang out together. But you can very easily make things far too complicated!
By #ID
Sometimes there is one tag on the page that needs special formatting from the other tags of that type on the page. You can create a class that can be applied only to a tag with a particular ID. That name must be unique on the page.
<img id="logo" src="mail.gif" width="50" height="50">
Then in the style sheet you would define a class with the properties you want, like:
margin:10 5 10 5;
border:0;vertical-align:text-top;
}
External Style Sheet
To use the same styles on many different pages, you can gather your tag and class definitions onto an external style sheet and link it to those pages. The style sheet document is just a list of styles for standard tags and/or classes. No other tags are needed on the page, unlike a normal web page.
For example, you could put all of the styles from the examples above onto a plain text document named mystyles.css and then link the CSS document to the web page:
float:left;
margin-right:10px;
margin-left:10px;
}
.imgright{
float:right;
margin-right:15px;
}
h1 {
text-align:center;
}
p {
margin-left:5px;
margin-right:10px;
}
.photogallery {
vertical-align: top;
}
.menu{
margin-left: 40px;
}
.portrait {
vertical-align: top;
margin-top: 6px;
margin-bottom: 6px;
}
/*This is a comment. Use one to explain what the style is for*/
p.comment {
padding: 6px;
border: thin solid #FF9900;/* medium orange*/
background-color: #FFFBE1;/* pale beige*/
}
#logo {margin:10px 5px 10px 5px;
border:0;
vertical-align:text-top;
}
![]() Use
only plain text editor for CSS: Word processing programs like Word
add a lot of hidden data to the document which the browser won't understand.
Your style sheet will be ignored if you create it in such a program. You can safely use HTML editing software, like Dreamweaver.
Use
only plain text editor for CSS: Word processing programs like Word
add a lot of hidden data to the document which the browser won't understand.
Your style sheet will be ignored if you create it in such a program. You can safely use HTML editing software, like Dreamweaver.
How to Link an External Style Sheet
For the browser to find the styles in an external style sheet, you must link the external style sheet to the web page. You need a LINK tag in the HEAD section, before the STYLE section, if there is one, like:
<head>
<meta http-equiv="Content-Type" content="text/html;
charset=windows-1252">
<title>My Favorites</title>
<link rel="stylesheet" href="mystyles.css" type="text/css">
<style type="text/css">
h3 {color:#1d75c3;}
</style>
</head>
Once linked, any definitions for standard tags will be used automatically on that page. Any classes can be applied as you wish.
Compact declaration:
Some related declarations can be written in a short form, called a compact declaration. Border, font, background, padding, margin, and list-style can be written as compact declarations. The examples below show the same results with compact or normal declarations. Be careful with the pucntuation! The parts in the compact declaration are separated by spaces.
| Code | Results |
|---|---|
Border: p.ex1 {border:thin solid black;} OR p.ex3 {border-width:thin; |
with ex1: This text has a thin, black border around a P tag.
with ex3: This text has a thin, black border around a P tag. |
Font: p.ex2 {font:italic bold 12px/30px Georgia,serif;} OR p.ex4 {font-style:italic; |
With ex2: This text is italic, bold, 12px font size, 30 px line height and font is Georgia. The line-height is the space between lines in the same paragraph.
with ex4: This text is italic, bold, 12px font size, 30 px line height and font is Georgia. The line-height is the space between lines in the same paragraph. |
These compact declarations must be in this specific order. For border it is width type color. For font it is font-style font-variant font-size/line-height font-family. One or more parts may be omitted.
Combinator Selector:
You can create a style for several selectors at once if they have the same property values. Saves typing! The selectors must be separated by commas like:
h1, h2, h3 {font-family:Georgia, 'Times New Roman', serif;}
In addition, in the same style sheet or in one further down the cascade of style sheets, you can also write additional styles for the selectors, which are NOT the same for each one.
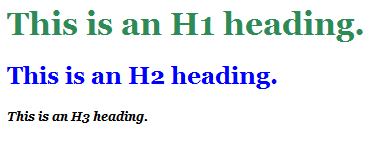
For example, the following uses the same font for H1, H2, and H3 but uses different other styles for each one:
| Code | Results |
|---|---|
h1, h2, h3 {font-family:Georgia, 'Times New
Roman', serif;}
|
|
This is part of the 'cascading' aspect of CSS, Cascading Style Sheets.
Parent-Child Selectors:
You can create styles that apply only to selectors (the child) that are contained in another selector (the parent). In the internal or external style, write the parent element, a space, and then the chld element
Examples:
| Code | Results |
|---|---|
Style: HTML: |
Company Statistics 2014Applies green color to text and a green border around the text only in a SPAN that is contained in an H3 tag |
Style: HTML: |
Applies only to a P tag that is contained in a DIV with id="footer". |
There are a number of other combinator selectors defined in different versions of CSS. Many of those added in CSS3 are not well supported yet by browsers. See w3school.com for a chart of selectors![]() .
.
Conflicts Between Styles: The Cascade
What happens if you have an external style sheet AND an internal style sheet AND an inline style. What's a browser to do?
That is where the 'cascading' part of Cascading Style Sheets comes in.
Example:
Below are the various styles, listed in the order that the browser will apply them. New choices overwrite the earlier ones.
- Browser defaults H1 heading = aligned on the left, bold, black text, no background color.
- External style sheet: h1 {text-align:right;color:red;background-color:fuchsia;}
- Internal style sheet: h1 {text-align:left;color:blue;background-color:yellow;}
- Inline style: <h1 style="color:green;text-align:center;}">This is my heading</h1>
Predict:
-
What color will the text in the H1 heading be?
-
What color will the background of the heading be?
-
How will it be aligned?
-
Will the heading be bold, or not?
![]() Show result- Normal order in HEAD
Show result- Normal order in HEAD
(Page opens in a new window/tab.)
![]() Order
is important: If you put the LINK to the external style sheet after the STYLE section in the HEAD instead of before it, then the
external style sheet will win out over the internal style sheet. What would
that do to the example above?
Order
is important: If you put the LINK to the external style sheet after the STYLE section in the HEAD instead of before it, then the
external style sheet will win out over the internal style sheet. What would
that do to the example above?
![]() Show result- Wrong order in HEAD
Show result- Wrong order in HEAD
(Page opens in a new window/tab.)
 Finding
Source of Errors in CSS:
Finding
Source of Errors in CSS:
When your styles are not applied as you expect or parts of the page vanish, start looking for errors in the source code.
Common Errors:
-
Spelling: Critical everywhere! The browser will NOT guess what you meant.
-
Tag names (H! is not H1.)
-
Property names (textalign is not text-align)
-
Values available (text-align cannot have value 'top'. But vertical-align can.)
-
Class name or ID when applied must match what was used in the style sheet
(mayclass is not myclass).
-
- Punctuation: There must be a colon : between the property and its
value and a semicolon ; at the end after the value, like:
float:left; margin-right:5px; - Spaces: No space between the
number and the unit of measure.
Write 10px and not 10 px.
Some browsers will just ignore the style if there is a space in between the number and the unit. -
Close all of the parts: quotes " around values, the final brackets like > or } for tags and styles, final tags like </h1> or </style>
-
Duplicate selectors: If you style the same property for an element or class twice, the browser will have to decide what to do. Making browsers think is risky! The results may be very different from browser to browser and not at all what you meant. The order within the style sheet becomes important again.
-
LINK an external style sheet to the web page or you will not be able to use its styles on that page.
- URL in the LINK for an external style sheet must be correct!
A longer set of tips is in the Appendix, Trouble-Shooting Page Display![]()
|
|
| © 1997-2017 Jan Smith All Rights Reserved |
Site Map What's New |
Privacy Policy Terms of Service Copyright Acknowledgements |
~~ 1 Cor. 10:31 ...whatever you do, do it all for the glory of God. ~~
Last updated: March 22, 2017