
Jan's Working with Words
AutoTools: Make Changes: Modify Text
Sometimes you need to modify what you have written. You might want to replace a word or phrase or to correct the spacing between sentences. For just a place or two you could just select and retype. If you need to replace the same word or phrase in many places, the Find and Replace Dialog is a real time-saver.
| |
Step-by-Step: Modify Text |
|
| What you will learn: | to replace selection by typing to find and replace text |
Start with: ![]() , trip_planner-Lastname-Firstname.docx
, trip_planner-Lastname-Firstname.docx
Type to Replace
- In line 20, select the words help us finish
planning for by dragging across them.
(This can be hard!)
-
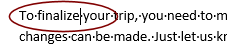 While the text is selected, type the word finalize as a
replacement for what you have selected.
While the text is selected, type the word finalize as a
replacement for what you have selected.
 Problem:
Typing did not replace the selection.
Problem:
Typing did not replace the selection.
You must make a change in Word Options.
Solution: Open the Word Options dialog. (Office button/File tab > Word Options/Options)
Then click Advanced in the Navigation pane, and in the Editing Options, check the box for Typing Replaces Selection.  Save.
Save.
Find and Replace
 Use the key combo CTRL + HOME to move the cursor to the very top left
of the document.
Use the key combo CTRL + HOME to move the cursor to the very top left
of the document.
 Pressing the HOME key by itself moves the cursor to the beginning of the
line.
Pressing the HOME key by itself moves the cursor to the beginning of the
line.
-
 On
the Home tab in the Editing group, select Replace.
On
the Home tab in the Editing group, select Replace.
The Find and Replace dialog opens to the Replace tab. The cursor is in the Find What: text box. You can search your document for particular words, special characters, and even spaces.
-
 Experiment: Find and Replace
- Click on the More >> button to see some options for your search.
- Click on the Format button to see what you can look for besides actual words! To search for something like "all words in italics," just leave the text box blank and click on the Format button and then choose > . You don't need to choose a Format this time.
- Click on Special to see a list of special
characters and features that you can search for. This is a fast way to
find all of the fields in your document if a field does not show a gray
background until you hover over it.
- Click on the << Less button
since you won't need these options at this time.
You can replace what you "find". This is very helpful when you have to change a term or phrase throughout a document. It also can be used to help find those nasty double spaces that you didn't mean to type and are so hard to see!
When you are ready to continue...
- Type two spaces in the Find What: box. (That's right.
Press the spacebar twice.)
There is no way to show a symbol for those spaces but the cursor did scoot over.
-
 Click on the Find Next button.
Look at your document for the highlighted spot. (You may have to drag the Find dialog out of the way to see). Two spaces between the words to and be are highlighted.By default, Spell Check
considers a double-space between words to be an error, which explains the wavy line in the document. Cute trick!

 Word 2007, 2010: green wavy line for grammar error

 Word 2013, 2016: blue wavy line for formatting error.
- Click in the Replace with: text box.
- Press the spacebar once and then click the Replace button.
Tada! Two spaces have become one and the highlight moves to the next place that has two spaces.The two spaces that follow Package 1 are highlighted. You want to keep those spaces for now so don't get carried away with your replacing. Sometimes you don't want ALL double-spaces replaced.
- Click the Find Next button, but don't replace any double spaces until you find the final pair of spaces in the last line,
between in and one .
- Replace them
with a single space.
-
Click on Find Next again.
 A message box informs you that the search is finished. Word 2013 and 2016 automatically cycle through the whole document.
 Earlier versions of Word work down through the
document from the location of the cursor when you opened Find and Replace. You can change to search up in the options that the More >> button
shows. When you reach the end of the document, Word will
kindly ask if you want to search from the beginning.
Earlier versions of Word work down through the
document from the location of the cursor when you opened Find and Replace. You can change to search up in the options that the More >> button
shows. When you reach the end of the document, Word will
kindly ask if you want to search from the beginning.
- Close the Find and Replace dialog.
- Save.
[trip_planner-Lastname-Firstname.docx]
|
|
| © 1997-2017 Jan Smith All Rights Reserved |
Site Map What's New |
Privacy Policy Terms of Service Copyright Acknowledgements |
~~ 1 Cor. 10:31 ...whatever you do, do it all for the glory of God. ~~
Last updated: March 22, 2017