
Jan's Working with Words
Printing: Print Preview
In the Print Preview, you can see what your pages will look like when printed. Well, that's the theory, anyway. Sometimes there are still unhappy surprises.
In particular, if part of your document is in the area in which the printer cannot actually print, the Print Layout view may show your text anyway, but Print Preview probably will not.
In the olden days before Word 6, there was no preview at all. You had to guess about the formatting, what fonts to use, where to place images. Wait! You could not print images on a dot-matrix printer anyway! You had to know what fonts were installed on the printer. Screen fonts and printer fonts were not exactly the same, even if they had the same name. You never really knew if you had guessed right until the document was printed! Some days it took bags of patience and a lot of wasted trees to get a good looking print-out at last.
![]() Look
before you print!
Look
before you print!
If you always look at the Print Preview before
you actually print, you can reduce the time and ink it takes to get a good
print-out.
What is the No-Print Area?
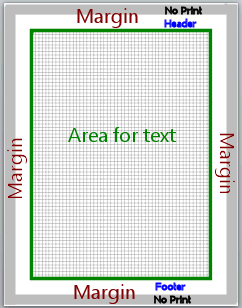 The no-print area is
the part of the page where a particular printer cannot print. The margin includes both the no-print area and any
extra white space up to where you can type
on the page. The header and footer text fit in that white space.
The no-print area is
the part of the page where a particular printer cannot print. The margin includes both the no-print area and any
extra white space up to where you can type
on the page. The header and footer text fit in that white space.
Most printers can print as close as 0.5 inch from the top and bottom edges of the page and up to 0.25 inch from the left and right edges of the paper. Many can get even closer to the edges. Few printers allow printing all the way to the edge of the paper.
Some printers have larger no-print areas. For
example, the old HP500C printer needed minimum margins (to cover the no-print
area) for the
top of 0.2 inch (Great!), left and right of 0.25 inch (Acceptable!) but for the bottom
a whopping 0.716 inch
(Terrible!).
I got a very unhappy surprise when I first printed with that printer!
 You
will need to set the top/bottom margin large enough to include the
text of the header/footer plus the no print area.
The larger the font, the bigger the margin must be for text to fit in a header or
footer. Word attempts to print the whole header/footer
anyway. If you are not careful, your header or footer can wind up overlapping the document's text!
You
will need to set the top/bottom margin large enough to include the
text of the header/footer plus the no print area.
The larger the font, the bigger the margin must be for text to fit in a header or
footer. Word attempts to print the whole header/footer
anyway. If you are not careful, your header or footer can wind up overlapping the document's text!
You might get a warning if you try to print a document that has something hanging over into the no-print area. But you might not. To add to the confusion, the warning can appear when you cannot see anything wrong because it's the white space that is the problem!
How white space can cause a no-print warning but you can't see the problem:
- Header/footer height: The space needed for your particular font does not fit, but the actual letters in your text do fit.
- Header/footer height: Blank lines or Space After or Space Before will be cut off but your actual text shows OK.
- Document body width: A table does not fit in the width, but the text in the table does fit. When the table has invisible borders, you cannot see that part of the table was cut off.
- Document section width: A document section or the header or footer has its width set to wider than the printable area, but the actual text fits inside the printable area.
| |
Step-by-Step: Print Preview |
|
| What you will learn: |
to find the no-print area for your printer to use Print Preview to resize the header/footer height to use Shrink One Page button |
Start with:![]() , flyer-World Travel Inc-Lastname-Firstname.docx as finished in the Spell Check lesson.
, flyer-World Travel Inc-Lastname-Firstname.docx as finished in the Spell Check lesson.
Find the no-print area for your printer
To figure out where your printer can and cannot print, you could create a test document with a lot of text and a header and a footer and experiment until you figure out the correct margins. There is a faster way and you won't have to print anything at all!
-
Click the Page Layout ribbon tab.
-
In the Page Setup tab group, click the dialog launcher button


 to open the Page Setup dialog.
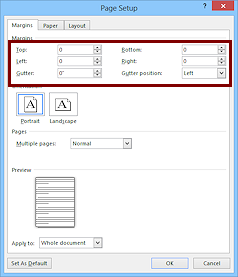
On the Margins tab, change all four margins to 0 and then click the OK button.
Surprise! A message box appears, warning you that one or more of your margins are outside the printable area.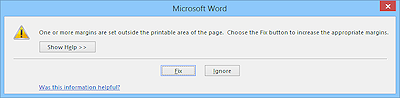
In case you wondered, Yes, you need to check all four margins. They may not all be the same.
Click the Fix button.
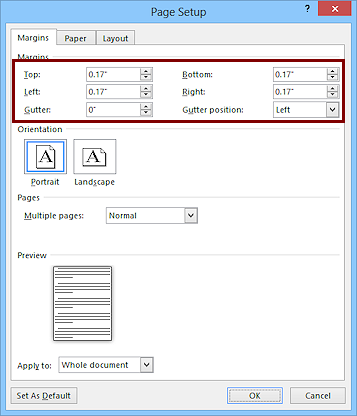
Word changes your margins without closing the dialog.These minimum margins are for the printer currently assigned to this document (usually the default printer) and may be quite different for a different printer!
Remember: The minimum margin may not give you enough room for a header or a footer at the font size that you want.
-
Click on Cancel.
You won't want such a small margin very often!
Preview: Inspect and Correct
![]() Color
documents may not print in color! Print Preview will show in
color even if the selected printer cannot print color or if its properties are set to print in gray scale. Word does not
have a way to show you what the document will look like in gray scale.
Color
documents may not print in color! Print Preview will show in
color even if the selected printer cannot print color or if its properties are set to print in gray scale. Word does not
have a way to show you what the document will look like in gray scale.
- Can you printer actually print in color?
- Did you set the printer's properties to print in gray scale? This choice is remembered! (more on the printer properties in the next lesson)
- If necessary, open the current version
of your World Travel flyer in Word again.
[flyer-World Travel Inc-Lastname-Firstname.docx]
-
Click in the Quick Access Toolbar on the Print Preview button


 .
.
You put that button on the bar in an earlier lesson.[If the button is not there, use the Office Button > Print > Print Preview or File tab > Print.]
Does your document look the way you wanted? You will not see the marks for paragraphs and spaces etc., or the wavy underlines for errors in the preview.
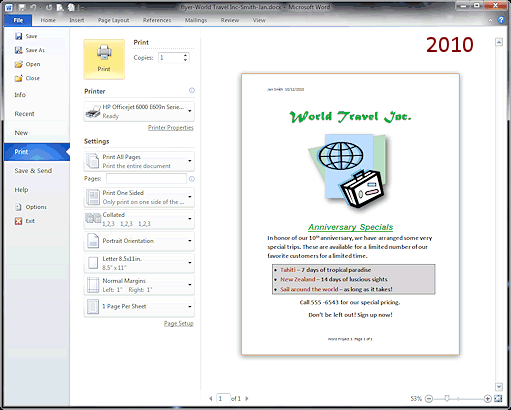
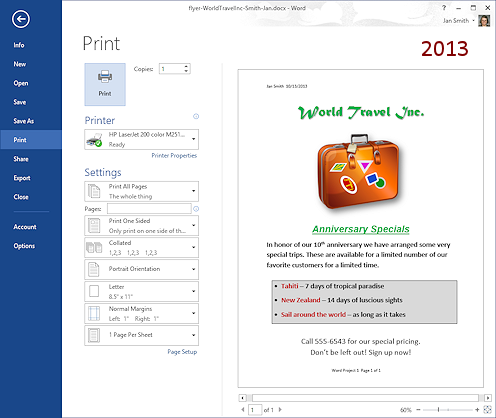
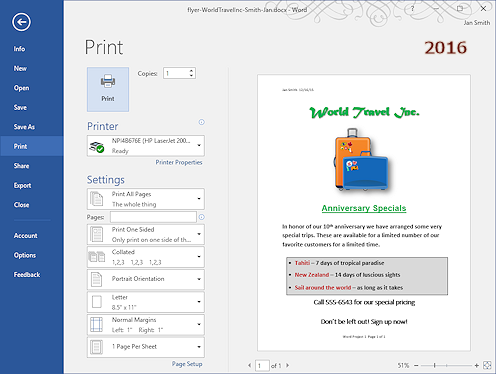
-
Compare your flyer to the picture of the finished version below.
Some images below have alternate images.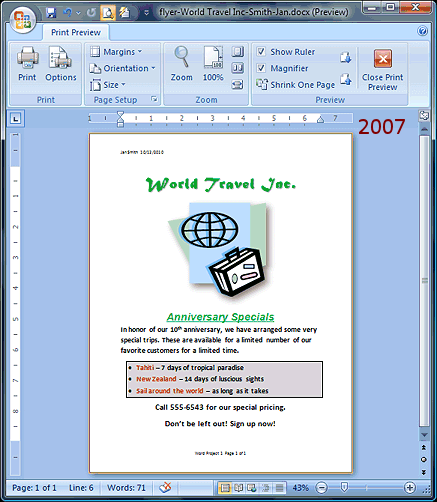
 Problem:
You find
errors while looking at the preview.
Problem:
You find
errors while looking at the preview.
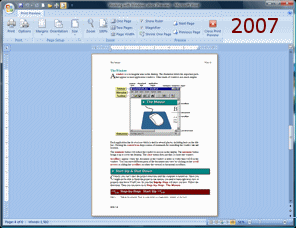
 Word 2007: You can edit without leaving Print Preview
in Word 2007.
Word 2007: You can edit without leaving Print Preview
in Word 2007.Solution for Word 2007: Click on the check box for Magnifier in the Print Preview toolbar to uncheck it. This will toggle the pointer from
 Zoom to its regular
I-beam shape
Zoom to its regular
I-beam shape  for editing.
Now you can edit without leaving the preview window. This is handy for
fixing a spelling error or adding or deleting a word or two. If there is
much to change, it's easier
to just go back to the regular Print Layout view where you can use the ribbon
buttons.
for editing.
Now you can edit without leaving the preview window. This is handy for
fixing a spelling error or adding or deleting a word or two. If there is
much to change, it's easier
to just go back to the regular Print Layout view where you can use the ribbon
buttons.

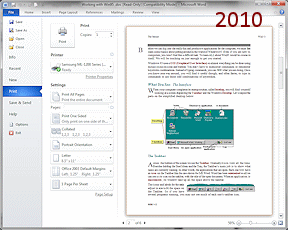
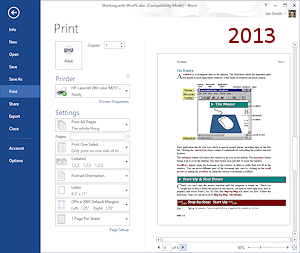
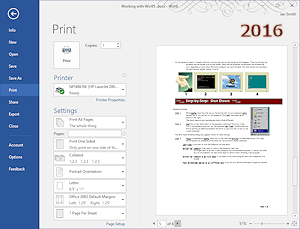
 Word 2010, 2013, 2016: You cannot edit while in the Preview and
Print pane.
Word 2010, 2013, 2016: You cannot edit while in the Preview and
Print pane. Solution: Return to the normal document view to make the corrections.
- If necessary, while still in Print Preview, use the
Zoom slider at the bottom right of the preview and the scrollbars to
enlarge the preview so you can actually read the small text in the header and footer.
- Inspect both the header and the footer.
Are they showing completely in the Print Preview? Be sure you can actually read the text. If part is cut off, you will find out how to fix it shortly.
-
Leave the preview and go back to the Print Layout view:
Word 2007: Click the red Close Print Preview button. Word 2010: Click the File tab. Word 2013, 2016: Click the Back button  at the top left of the navigation pane.
-
 If
you had to make corrections, save.
If
you had to make corrections, save.
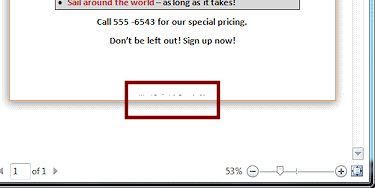
Problem: Vanishing Header/Footer
We usually expect a header/footer to be a single line of fairly plain text. But it doesn't have to be! Word treats the header and footer of a document like they were separate documents. In fact, a header or footer can be quite tall with many lines of text and even images. You can set a lot of features differently for the header and footer than for the rest of the document. It can get rather confusing.
Footers seem to be more likely to fail to print correctly than headers. Maybe we are not as careful to check the bottom of the page!
The same methods work to fix both. Let's create a footer problem to fix!
Show Vertical Ruler:
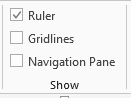
If the rulers are not showing, click the Views tab and, in the Show tab group, check the box Ruler.
 Problem:
Vertical Ruler does not show after checking the Ruler box.
Problem:
Vertical Ruler does not show after checking the Ruler box.
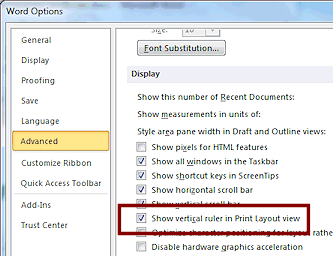
Solution: Open the Word Options dialog > Advanced page > Display section > Put a check mark beside "Show vertical ruler in Print Layout view". Click on OK to close. The vertical ruler should now be showing at the left of your document.
Edit Footer:
-
 Double-click in the footer area to open it for
editing.
Double-click in the footer area to open it for
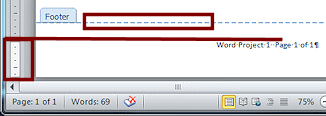
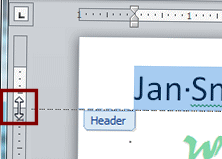
editing.Word treats at this footer area as its own little document. There is a top 'margin' between the first line that you can type on and the dashed line, which is the shows where the footer starts on the page.
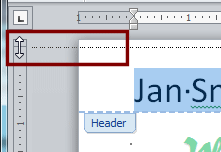
In the vertical ruler at the left, the white area on the ruler measures the height of the 'document area', that is, where you can type in the footer. However, the ruler does NOT show where the no-print area is at the bottom of the margin.
-
 At the bottom of the vertical ruler, hover over the line where the
white and gray areas meet.
At the bottom of the vertical ruler, hover over the line where the
white and gray areas meet.
The pointer changes to a double-headed arrow and a ScreenTip appears.
If you drag up or down, you resize the white area on the ruler. This changes the area where you can type in the footer. Point of Confusion: The ScreenTip here says 'Top Margin'.
Did you expect that? Why isn't it 'Bottom Margin', since the footer is
inside the bottom margin of the page? There are multiple margins
here! The edge that you hovered over is the bottom edge of the top margin of the footer
itself. Remember that Word is treating the footer like it is
a separate document, so it has its own margins on all sides. Those can
be different from the margins for the page as a whole. Like I said, it's confusing!
Point of Confusion: The ScreenTip here says 'Top Margin'.
Did you expect that? Why isn't it 'Bottom Margin', since the footer is
inside the bottom margin of the page? There are multiple margins
here! The edge that you hovered over is the bottom edge of the top margin of the footer
itself. Remember that Word is treating the footer like it is
a separate document, so it has its own margins on all sides. Those can
be different from the margins for the page as a whole. Like I said, it's confusing!
-
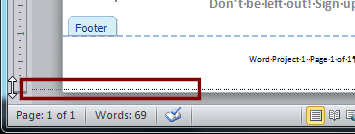 Drag down to the bottom of the ruler but do not release
the mouse button yet.
Drag down to the bottom of the ruler but do not release
the mouse button yet.
A dotted line across the page shows where the new "top" margin for the footer will be.
-
 Release the mouse button.
The footer text moves to the bottom edge of the page.
The vertical ruler shows a very small white area that is just tall enough for your footer text. Word 2013, 2016: Word switches back to the main text area. Double-click in the footer again to see the footer's ruler. -
 Switch to Print Preview.
Does the footer show? Not for my printer! Just the very top edge of the letters showed. The rest is in the no-print area for this printer.For another printer I tried the footer was completely gone. No hint that there was supposed to be something there!
-
 Experiment: Minimum space in footer to print
footer text?
Experiment: Minimum space in footer to print
footer text?
Switch back to Print Layout view and open the footer again for editing.
Drag the margin on the vertical ruler to a different height to change the top margin for your footer. Then check Print Preview to see if the footer is showing now.How large can the top margin in the footer be and still see the footer text in Print Preview? You answer will depend on which printer the document is set to use and the current font size for the text.
-
Fix the problem of the vanishing footer: While editing the footer, drag the top edge of the white area in the ruler to a spot that lets the footer show in Print Preview.
Problem: Header/Footer on Top of Document Text
Changing the margin of your document may not change what you see in the header or footer. Word tries to help you out by displaying the header and footer even when the document's margin is actually too small. You can wind up with header or footer text on top of document text! Let's make that happen.
-
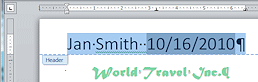 Edit the header to increase the font size to 48 pt.
(The color of the title and the rest of the color is faded since you are editing the header.)
-
While still in the header, drag the bottom margin of the header on the vertical ruler up to the top of the ruler. A dotted line shows where the new bottom margin will be.
-
Release the mouse button.
The document body moves up and overlaps the header! That might shock you right out of your chair!
The margins for the header were not changed just because you changed the margin for the document.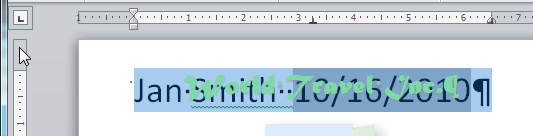
- Undo each of your changes, using the Undo button or
the key combo
 CTRL + Z
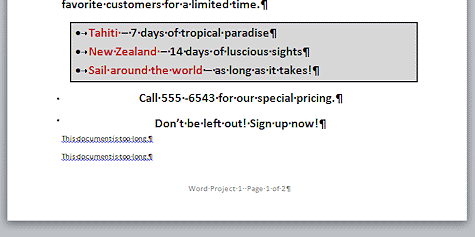
Problem: One Too Many Pages
It is fairly common for a document to run over onto an extra page by just a couple of lines, or even for the last page to be blank except for the header/footer. There are several things you might do to reduce your document by one page.
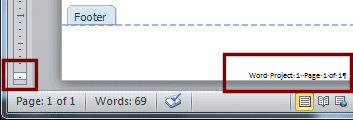
- Check the number of pages in the document by looking at the numbers on the Status bar.
You should have 1 page in this document.
-
 To
create a problem for you to
To
create a problem for you to
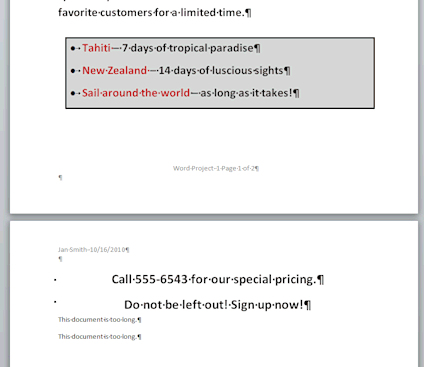
fix, click to the right of "Sign up now!" to put the cursor at the end of the body text.
- Press the ENTER key and type This document is too long.
-
Press ENTER to start a new line and type the same thing again.
The last two original lines and the two new ones are over onto a new page. Just the kind of problem we need to look at!
Of the suggestions above, reducing font size might work (or revising the text!). Let's see what that Shrink One Page button can do.
-
Shrink to fit one page:
Word 2007:
- Switch to Print Preview.
- Click on
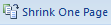 the Shrink One Page button.
Word 2010, 2013, 2016: The Backstage Print view does not have
a Shrink One Page button. This feature is not on the ribbon
anywhere but it is available in the list of commands that you can
add.
- At the right end of the Quick Access Toolbar, click on the More button and select More commands...
- Change the Choose commands from: box to show All commands.
- Scroll the list and click on Shrink One Page to select it.
- Click the Add>> button to move the command over to the Quick Access Toolbar list.
- Click on OK.
- Back in Page Layout view, on the Quick Access Toolbar, click on the
new button,


 Shrink One Page.
 The
document is back to one page. (You may not see the blue wavy
underlines that are in the illustration.) If you closed the
document after you finished the Spell Check lesson, you will see green squiggles
again for
any grammar errors that you ignored.
The
document is back to one page. (You may not see the blue wavy
underlines that are in the illustration.) If you closed the
document after you finished the Spell Check lesson, you will see green squiggles
again for
any grammar errors that you ignored.
- Click in the Title, World Travel Inc.
What font size shows on the Home tab?
- Repeat for each paragraph on the page.
All of the font sizes are smaller.
- Close the document without saving
changes unless you have had to make other
corrections.
In that case, use Undo to remove the formatting changes from Shrink One Page, then delete the two extra lines that you typed. Your document should then be back in good shape. Save your corrected document.
When there are not too many extra lines or when the problem is width rather than length, the Shrink One Page method can work well. The size of all the text on the pages will be reduced, but not the header and footer text, which are treated as separate documents. Text can get too small to read in some cases, so you need to review the whole document carefully.
|
|
| © 1997-2017 Jan Smith All Rights Reserved |
Site Map What's New |
Privacy Policy Terms of Service Copyright Acknowledgements |
~~ 1 Cor. 10:31 ...whatever you do, do it all for the glory of God. ~~
Last updated: March 27, 2017
Ways to fix a final page that is blank or has very little text: