
Jan's Working with Words
Brochure: Inside
You are now ready to work on page 2 of your brochure, the part that will be inside the folded document. You will create several more styles. Practice makes perfect!
|
|
Step-by-Step: Brochure Inside |
|
| What you will learn: | to replace temporary text with text from another document to update styles for headings to match selection to create a Body Text style from formatted selection to apply a custom style to format bullet list to add images to linked text boxes |
Start with: ![]()
![]() ,
brochure-tahiti5-Lastname-Firstname.docx from the
previous lesson, tahiti.doc
from the resources files
,
brochure-tahiti5-Lastname-Firstname.docx from the
previous lesson, tahiti.doc
from the resources files
You will copy more of tahiti.doc and paste it into the linked text boxes that make up the inside of the brochure. Then the formatting fun begins!
Copy and Paste Text
- If necessary, open tahiti.doc from your resource files
 and brochure-tahiti5-Lastname-Firstname.doc from your
Class disk. (It should be in your Recent list for Word.)
and brochure-tahiti5-Lastname-Firstname.doc from your
Class disk. (It should be in your Recent list for Word.)  Save as brochure-tahiti6-Lastname-Firstname.docx to the word project3 folder of
your Class disk.
Save as brochure-tahiti6-Lastname-Firstname.docx to the word project3 folder of
your Class disk.
-
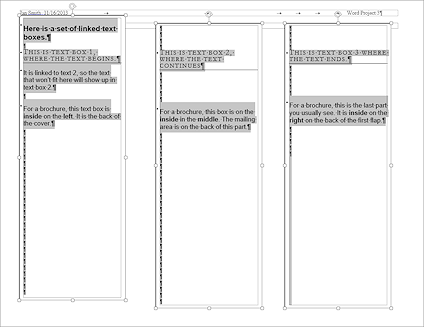
On page 2 of brochure-tahiti5-Lastname-Firstname.docx, start from Text Box 4 on the left and drag to select the text in the 3 linked text boxes.
Whoops. All you can select is what is selected in Text Box 4 even though the text boxes are already linked. Of course you could drag, delete, drag again, delete again, and repeat until all of the text in the linked text boxes was gone. There are other ways to select it all at once.
-
 Click somewhere
in the text box to deselect the text.
Click somewhere
in the text box to deselect the text.
You will use a different method of selection.
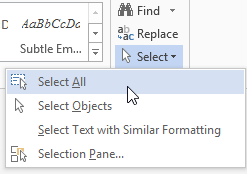
With the cursor in Text Box 4, on the Home tab in the Editing tab group, click on the button Select
 .
.
A short list appears.-
 Click on Select All.
Alternate Method:
 Key combo: CTRL + A selects all text and objects in the current container.
-
Press the DELETE key to remove all of this temporary text.
 If the cursor is in
the document body instead of the text box, you will select the whole
document and delete everything, including the first page! Possible glitch: My copy of Word 2013 becomes mostly unresponsive if I delete a selection from more than one text box at a time. I had to repeatedly select and delete to get rid of the temporary text. Anyone else have that problem or is it something with my particular system?
If the cursor is in
the document body instead of the text box, you will select the whole
document and delete everything, including the first page! Possible glitch: My copy of Word 2013 becomes mostly unresponsive if I delete a selection from more than one text box at a time. I had to repeatedly select and delete to get rid of the temporary text. Anyone else have that problem or is it something with my particular system?
- Switch to tahiti.doc and select lines
4 through 31, from What to see and do in Tahiti through
Call 54 (1) 821-6543 .
- Copy these lines.
-
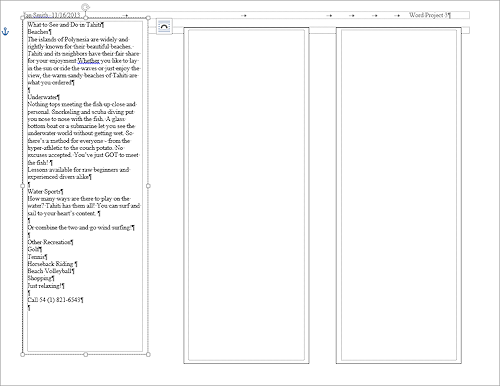 Switch back to brochure-tahiti5.doc and paste in Text Box 4.
The text fits entirely in this text box... for now.
- Save.
[brochure-tahiti6-Lastname-Firstname.docx]
Headings
-
Place the cursor in line 1 What to See and Do in
Tahiti and apply Heading 1.
-
Select this heading text and format with the Font dialog as:
Garamond
Regular (not bold or italic)
size 28
Small caps
Condensed by 1.25 pt
Kerning at 14 pt. and above.
- Format the Paragraph with:
Space before=0
Space after = 24 pts.
Line spacing = exactly at 24 pts..
- Update the style to match your changes.
- Select the word Tahiti in the heading and make it Bold.
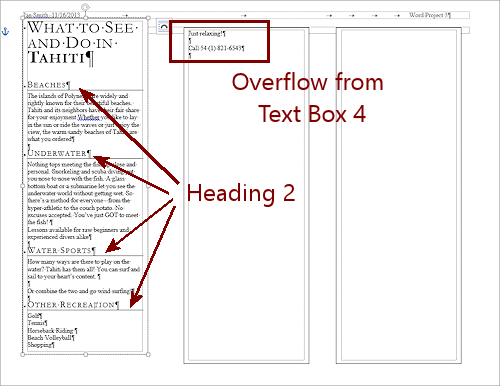 Apply Heading 2 (which you modified earlier in Format Flap) to the lines Beaches , Underwater , Water Sports , and Other Recreation .
Some of the lines flowed into the next text box.
- Save.
[brochure-tahiti6-Lastname-Firstname.docx]
Body Text
The default paragraph style for Word documents is Normal. If you want to format your ordinary paragraphs differently, you will want to create a Body Text style.
-
Select the paragraph that starts
The
islands of Polynesia... .
- Format it as
Font:
Garamond
Regular
size 12
Condensed by .25 pt.
Paragraph:
Alignment = Justify
Line spacing after = 12 pt.
-
Create a new style named Body Text from this paragraph.
Whoops. You see a warning that this name is already in use!
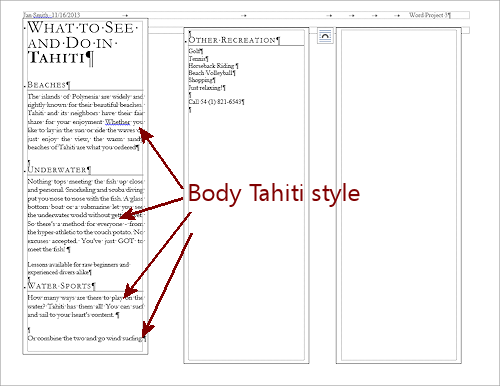 Name the new style Body Tahiti
instead.
Name the new style Body Tahiti
instead.
-
Apply the Body Tahiti style to the paragraphs which begin with Nothing tops... , How many ways... , and Or combine...
 Tip: Select a whole paragraph by triple clicking it.
- Save.
[brochure-tahiti6-Lastname-Firstname.docx]
The differences may be subtle. The more text there is, the more difference these changes make.
Block Quote
-
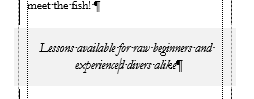 Click in the paragraph Lessons
available...
Click in the paragraph Lessons
available...
- Apply the style Block quote to it.
You created this style in the previous lesson. - Save.
[brochure-tahiti6-Lastname-Firstname.docx]
Bulleted List
-
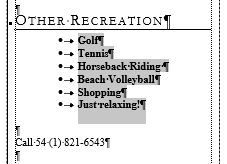
Select the lines from Golf through
Just relaxing .
-
Click on the Bullets button.
Did you get the default bullet that uses a solid black circle for the symbol?
 Problem:
Wrong bullet scheme applied.
Problem:
Wrong bullet scheme applied.
Word remembers and applies the bullets you used last.
You used a sun symbol on page 1 of the brochure. But you don't want to use that scheme here. Sometimes is is worth clicking the Bullets button anyway to see if the right scheme is ready.
Solution: Click on the arrow beside the Bullets button and select the solid disc symbol as the bullet.Problem:
List Paragraph style does not use the small solid black circle.
Solution: Select the items in the list and click the Bullets button's arrow to open its menu. Click on the small black solid circle in the Bullet Library section.
 Format with Paragraph:
Spacing before = 0
Spacing after = 12 pt
Line Spacing = Single
- Indent
once with the Indent button
- Make Bold.
- If necessary, on the ruler change the tab stop or move the indention so the space after the
bullet looks like the illustration (with the bullet underneath the R in OTHER and the G in Golf under the gap between R and e in Recreation.
- Save.
[brochure-tahiti6-Lastname-Firstname.docx]
Phone Number
You will create a block quote type format for the phone number.
-
Select the last line - Call
...
- Apply Heading 3.
-
Format the Font as:
Arial Black
Bold
size = 14
Condensed .5 pt
Position lowered 4 pt
- Format the Paragraph as:
Centered
Spacing before = 3pt.
Spacing after = 3 pt..
Line Spacing = Single
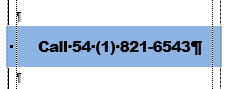 Add Shading with color Dark Blue, text 2, Lighter 60%
to the whole paragraph.
Add Shading with color Dark Blue, text 2, Lighter 60%
to the whole paragraph.
- Add Border as Box white ¾ pt applied to paragraph. Options - all four distances = 9 pts
- Update Heading 3 to match the selection.
- Save.
[brochure-tahiti6-Lastname-Firstname.docx]
Add Images
In your local copy of the resource files ![]() in the tahiti subfolder, you will find photos to add to the brochure.
in the tahiti subfolder, you will find photos to add to the brochure.
Online copies:
Online folder for images ![]()
You may use the link above to see a list of the files in the tahiti folder online.
Method for
copying into document from the list:
Click on an image file
and it will show the image in your browser window. Right click on the image
in the browser and
choose Copy. Go to the location in your document and Paste. Return to
the browser and use the Back button to return to the list to make
another selection.
If you print your brochure with only black ink, you will be disappointed with the way it looks compared to what you see on the screen. Color makes a tremendous difference. Photos often look a lot different in black and white because all colors of the same darkness will show up as the same shade of gray. In fact some photos are completely worthless when changed to shades of gray.
-
Insert images from the resource files as listed below. These images have already been sized with a graphics program to save space and downloading time. Word will automatically down-size large images to fit in the text box.
There should be a blank line that is styled with Body Tahiti at the spot where you insert each image. Check for the style before inserting. Create such a line if it doesn't exist yet. The wrong paragraph style, like Heading 2, can crop your image! Try it!
 after Beaches paragraph palm.gif
 after Underwater paragraph scuba.gif
after the block quote snorkel.gif
after Water Sports paragraph windsurf.gif
after 'Just relaxing' list item hut.gif
-
Center
each image by selecting it and clicking the Center button.
- Select the scuba picture and resize it by dragging a bottom corner to keep the Water Sports paragraph entirely in the same
text box.
- Save.
[brochure-tahiti6-Lastname-Firstname.docx]
Final Changes
Text Box 4 is positioned higher on the page than the other two text boxes. (Yes, that error was in the template!)
-
Select Text Box 4 and move it down until the Header with
it lines up with the other two text boxes on the page.
- Select Text Boxes 4, 5, and 6 and change the Shape Outline to no outline.
- Turn off showing text boundaries in the Options > Advanced dialog.
- Spell Check.
Make any spelling or grammar changes needed.
There is at least one missing punctuation mark.
-
Inspect the brochure's two pages in Print Preview. Make corrections, if necessary.
- Save.
[brochure-tahiti6-Lastname-Firstname.docx]
 Print only page 2.
Manual Duplex Printing: If you want to print this page on the back of page 1, you must put page 1 back in the printer's stack of paper. Test first to be sure you know how a page should be oriented in the paper stack for your page to print on the correct side and right side up. This can be a big problem if you are using a shared printer. A different print job can wind up on the back of your paper!
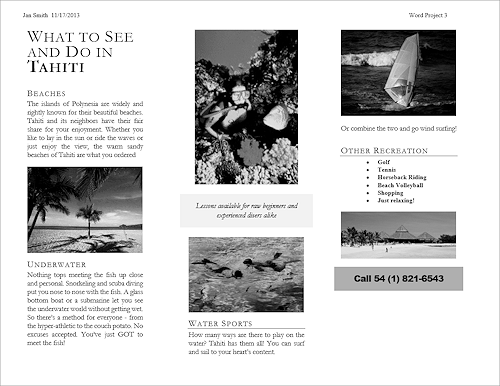
Gray Scale: The brochure looks a lot different when printed in gray scale instead of in color!
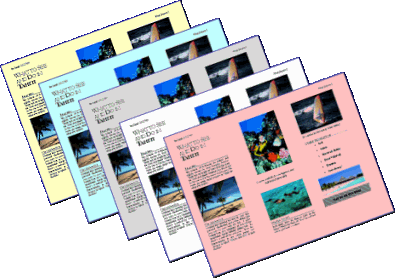
![]() What Paper to Use:
What Paper to Use:
The look of your brochure is also
affected by the paper you print it on. Commercial brochures often use
slick, shiny paper. Photos look their best on this kind of expensive
paper.
The color and texture of the paper make a difference, also.
If you have some colored paper, card stock, or photo paper, try printing the brochure to see how different it looks with different materials.
The
white parts of photos will be the color of the paper! You cannot print white! Look at the
beach and the surf in the pictures. The pink paper shows the effect the
most of the examples in the illustration.
|
|
| © 1997-2017 Jan Smith All Rights Reserved |
Site Map What's New |
Privacy Policy Terms of Service Copyright Acknowledgements |
~~ 1 Cor. 10:31 ...whatever you do, do it all for the glory of God. ~~
Last updated: March 22, 2017