
Jan's Working with Words
Report: Finish: Add Table
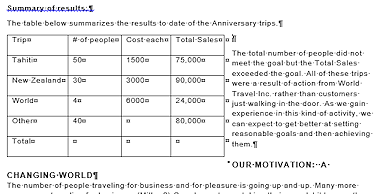
 You can now add to the report a table
about the sales of the Special Anniversary trips. This kind of information is much
easier to understand in a table. All the numbers just blur together when you read them in a paragraph.
You can now add to the report a table
about the sales of the Special Anniversary trips. This kind of information is much
easier to understand in a table. All the numbers just blur together when you read them in a paragraph.
You will use a simple formula in your table. When your calculations get much beyond simple addition, you should consider including a spreadsheet in your report, possibly on a separate page, instead. Spreadsheets programs, after all, are written to make complicated calculations easy.
| |
Step-by-Step: Add Table |
|
| What you will learn: | to draw a table in an existing
document to apply Table style to center table and wrap text to use AutoSum and view formula to right align numbers |
Start with: ![]()
![]() , report-WorldTravelInc4-Lastname-Firstname.docx
, report-WorldTravelInc4-Lastname-Firstname.docx
Draw Table
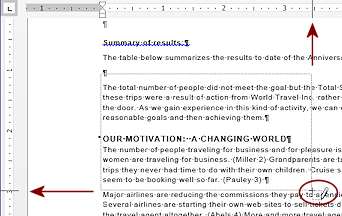
The current document has a sentence that refers to "The table below..." but there is no table there yet. With the current template and editing that you have done, there is not room on the page for a table. That's an easy fix!
 Save as report-WorldTravelInc5-Lastname-Firstname.docx on your Class disk
in the word project4 folder.
Save as report-WorldTravelInc5-Lastname-Firstname.docx on your Class disk
in the word project4 folder.- If necessary, open your last version of the report, report-WordTravelInc4-Firswtname-Lastname.docx
- Place the cursor at the left end of the line: Summary of results and insert a Page Break.
 Place cursor on blank line
after the sentence The table below summarizes...
Place cursor on blank line
after the sentence The table below summarizes...
The original template had a table in this spot that we deleted.
Draw a table here that is about 3.5" wide and 2" high.
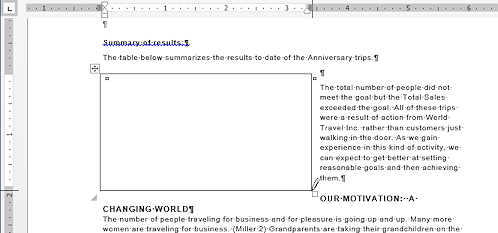 The existing text
will wrap around the new table.
The existing text
will wrap around the new table.
 Problem: Table includes text from next paragraph.
You dragged from a spot a bit too low.
Solution: Delete the table containing text and try again. This time drag from a bit above the paragraph mark.-
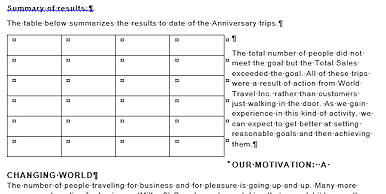 Draw lines to create 6 rows and 4 columns.
The rows cannot be shorter than the default row height but some may be taller. The exact widths and heights are not important for now.If your table was too short, it will enlarge automatically as you add rows.
- Press the ESC key to stop drawing.
-
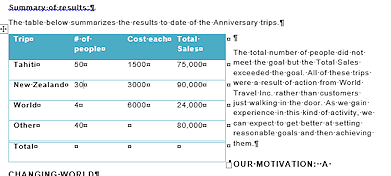
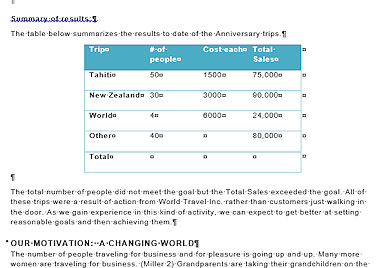
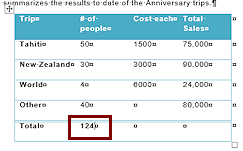
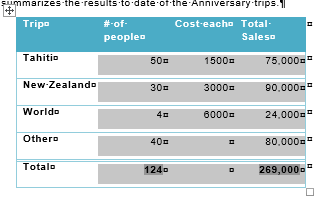
 Enter text as shown in the illustration at right.
You must type in the commas yourself.In Excel you can apply a number style to text to automatically handle commas, but not in Word.
-
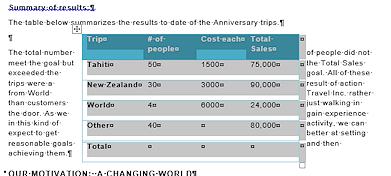
 Resize the table by dragging the borders, if necessary, to make the column
headings fit on one line and also "New Zealand" should fit onto one line.
Resize the table by dragging the borders, if necessary, to make the column
headings fit on one line and also "New Zealand" should fit onto one line.
Table width should be about 3.5" and the total table height should be about 2".Look at your rulers but don't worry if the sizes are not exact or if the texts wraps differently alongside the table.
- Save.
[report-WorldTravelInc5-Lastname-Firstname.docx]
Apply Table Style
A table style has many advantages over manually formatting a table. It will automatically reapply when you rearrange, add, or delete rows or columns. You can apply a table style early but manual formatting needs to wait until after you are SURE that the table structure is finished.
-
 Experiment: Table Styles
- On the Table Tools: Design tab, hover over one of the styles in the gallery of Table Styles. Live Preview shows what the table would look like.
- What changes did the style make? Look for changes in borders and fonts and shadings.
- Hover over several different styles from different rows in the gallery.
- Change the choices in the Table Style Options tab group and hover over your choices again.
-
What difference do you see?
(Scroll the rows in the gallery on the ribbon instead of using the More button. The expanded gallery is so large that it will hide your table.)When you are ready to continue...
-
 With
the cursor in the table anywhere, on
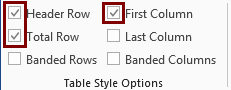
the tab Table Tools: Design in the Table Styles Options tab group, check only the boxes listed below and leave the others unchecked:
With
the cursor in the table anywhere, on
the tab Table Tools: Design in the Table Styles Options tab group, check only the boxes listed below and leave the others unchecked:
- Header row
- First column
- Total row
- Click on
the More button to expand the gallery of Table Styles or scroll the rows in
the ribbon gallery. Do you see different styles? You should if you had to check or uncheck option boxes.
-
Select a style
 :
:
This style uses Aqua-Accent 5 for shading the first row. It has aqua colored horizontal borders for the rows and a double line border above the Total row. The text in the first column and the first row will be bold, but you cannot see that in the thumbnail.

 Word 2007, 2010:
Medium Shading 1-Accent 5.
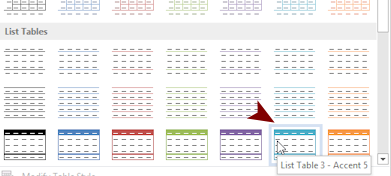

 Word 2013, 2016:
List Table 4 - Accent 5
-
 Save.
Save.
[report-WorldTravelInc5-Lastname-Firstname.docx]
Format Table
Next you will center the table on the page and keep the text from wrapping around it.
-
 Select the whole table.
- On the Home tab or Mini-Toolbar, click the Center button.
The whole table is centered on the page in the middle of the text. Not quite what we want!
-
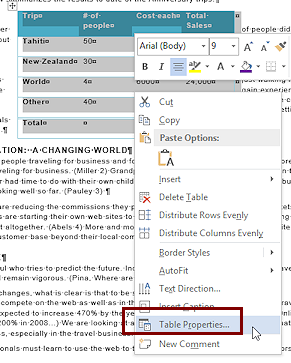 Right click on the table and click on the
command Table Properties.
Right click on the table and click on the
command Table Properties.
The Table Properties dialog opens.
-
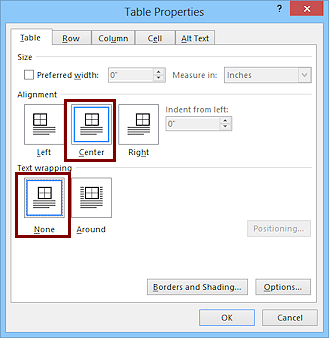 If
necessary, click on the tab Table.
If
necessary, click on the tab Table.
The Alignment is already set to Center because of your previous action. You could have waited and selected Center for the table here instead of using the Center button.
- In the Text wrapping section, click on None and then on OK.
- If necessary, adjust column widths so that New Zealand is on one line in its cell and # of people and Total Sales are on two lines in their cells.
-
 Save.
Save.
[report-WorldTravelInc5-Lastname-Firstname.docx]
![]() If you apply formatting manually and
then apply an Table Style, you may replace some or all of your manual formatting
with that of the style. It depends on what features the style includes. The order you do things can make a big difference!
If you apply formatting manually and
then apply an Table Style, you may replace some or all of your manual formatting
with that of the style. It depends on what features the style includes. The order you do things can make a big difference!
AutoSum and View Formula
You could have typed in totals in the bottom row when you entered the text. But then, if you had to change a number, the total would NOT automatically update to use the new number. Using a formula to calculate the total can prevent this embarrassing error.
- Place the cursor in the second cell of the bottom row, which is in the column '# of people'.
- On
the tab Table Tools: Layout in the Data tab group, click the button Formula

 .
.
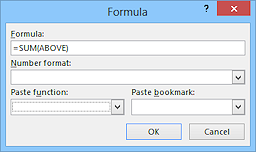
The Formula dialog opens already filled in with the formula to add up the cells above the current cell, =SUM(ABOVE) since that is the formula used the most.
-
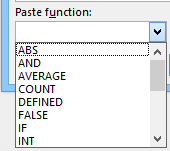 Click the arrow for the Paste function text box and inspect the list of functions.
We will not be exploring other functions for Word tables in these lessons. We could have used the function =PRODUCT(B2,C2) to calculate the Total Sales column for row 2. A spreadsheet program handles calculations better than Word does.
-
 Click on OK.
Word adds up the cells above the current cell and shows the total in the cell, not the formula.
- Repeat for the last cell on the last row.
-
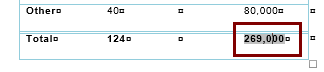 Click in the new total.
The background turns gray, which shows that this value is a field.The Word Options dialog controls whether or not a field shows a highlight.
Options > Advanced > Show document content > Field
Choices are Never, Always, and When selected. 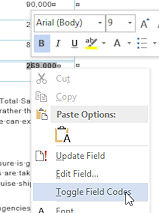 Right click on each field and choose to
show the formula being used.
Right click on each field and choose to
show the formula being used.
 Notice that the row height increases to show the formula.
- Right
click again on each field and choose to make
both fields show the sum again instead of the formula.
The row returns to the previous height.
- Save.
[report-WorldTravelInc5-Lastname-Firstname.docx]
Alignments
Numbers usually look better and are easier to read when either aligned to the right or justified on a decimal tab.
 Drag from the second cell in the second row,
which has the number 50 in it, down to the bottom right cell.
This selects all the cells with numbers.
Drag from the second cell in the second row,
which has the number 50 in it, down to the bottom right cell.
This selects all the cells with numbers.
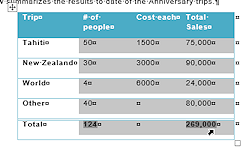
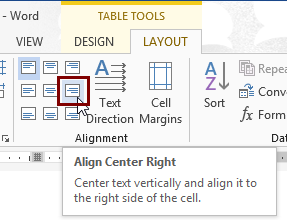 On
the tab Table Tools: Layout in the Alignment tab group, click on the button Align Center Right.
On
the tab Table Tools: Layout in the Alignment tab group, click on the button Align Center Right.
The numbers move to the right. The vertical alignment in the cells does not change. There is not any extra height to rearrange in.
-
Save.
[report-WorldTravelInc5-Lastname-Firstname.docx]
Your table is now complete!
|
|
| © 1997-2017 Jan Smith All Rights Reserved |
Site Map What's New |
Privacy Policy Terms of Service Copyright Acknowledgements |
~~ 1 Cor. 10:31 ...whatever you do, do it all for the glory of God. ~~
Last updated: March 22, 2017