 |
 |
Step-by-Step: Format Lines |
 |
|
What you will learn: |
to enter text
to select a whole line or
multiple lines
to use default paragraph styles
to change font, font styles, font size, alignment
|
Start with:

Enter Text and Save
- If necessary, open a new blank document by clicking on
 the New document button. the New document button.
- Type in
your blank document the text shown in the illustration above. Be sure to
include all the blank lines, too.
To help you type in the text, here is a copy of the
text you are to type,
which will open in a new window. Print this from your browser by selecting from the menu |
and then OK. Close the window and return to this window.
Check the image above to be sure you get the blank lines and spaces right.
Remember that to get a new line you press the ENTER key. A
 paragraph mark will appear at the end of the paragraph. paragraph mark will appear at the end of the paragraph.
Notice how long lines are wrapped to fit inside the page. This word wrap feature means that you don't have to press ENTER every time the text reaches the edge of the page. This is quite a change for folks who are used to typing on a typewriter! Your paragraphs will continue to wrap as you make changes to your text or change the page margins or do anything that would change the fit of the text to the page. So remember - don't press ENTER until you need a new paragraph!
 Click the Save button to save your document. Be sure your Class disk is in the drive. Click the Save button to save your document. Be sure your Class disk is in the drive.
 How to handle a full disk
The Save As dialog will appear. Isn't it handy how the Save As dialog box uses the first part of the text as a suggested name?
- Press
the HOME key to move the cursor to the front of the File name text box.
- Type flyer in front of World Travel Inc.doc so that the name of the document is flyer-World Travel Inc.doc . Save the document in the word project1 folder on your Class disk.
You may have to change folders and drives. Use the Look in: drop list or the
 Up-One-Level button. Up-One-Level button.
Select a Line
- Move your pointer to the margin area beside the first line until it changes from
 the I beam shape to the selection shape the I beam shape to the selection shape
 . This unmarked area just to the left of the text area is called the selection area. The only way you know you are
there is that the pointer shape changes from the I beam shape to the
arrow. Move too far to the left and you are out of the selection area.
The pointer remains an arrow though. It's a bit confusing until you get
used to it. . This unmarked area just to the left of the text area is called the selection area. The only way you know you are
there is that the pointer shape changes from the I beam shape to the
arrow. Move too far to the left and you are out of the selection area.
The pointer remains an arrow though. It's a bit confusing until you get
used to it.
- Select the first line by clicking in the selection area beside the line. This will highlight the entire line!
Another method is to drag from one end to the other of the text you want to select.
Reminder: As you work with the text, you may find some lines no longer show on the screen. Use the scrollbars to move the document inside its window.
Format Lines: Styles
-
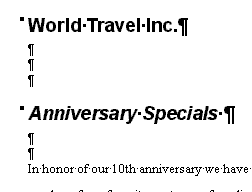 With line 1 still selected, from the Formatting bar, select
the style Heading 1. The formatting changes using the default
formatting for Heading 1. With line 1 still selected, from the Formatting bar, select
the style Heading 1. The formatting changes using the default
formatting for Heading 1.
- Select line 5, containing the words "Anniversary
Specials", by clicking in the margin beside it.
- Use the Style box to apply Heading 2 to this line. The formatting of
this line is now different, but not the same as Heading 1.
Format Lines: Font Dialog
- Select line 1 again.
- From the menu, choose | . The Font dialog box will
appear. When you want to make several changes, this dialog is more
efficient than using the toolbar.
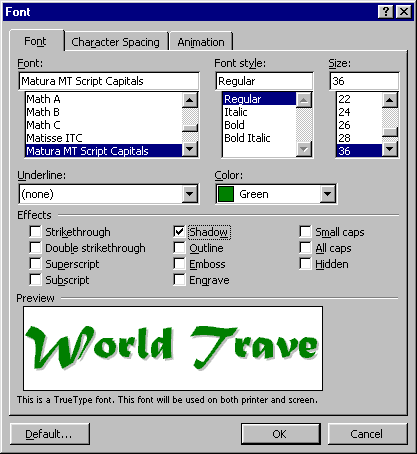
Your computer may have different fonts to choose from than the illustration shows. Some basic fonts come with Windows. Many programs add their own fonts, especially word processors and graphics programs.
- Click on Matura MT Script Capitals in the Font list
to change the font for the selected text.
This font comes with MS Office. If you don't have this font, choose one that is similar.
- Change the Size to 36 by scrolling in the Size
control until you can click on the "36".
- Change the Color to Green by clicking the down
arrow to open the list and scrolling until you can click on "Green". [In
Word 95 this color is called "Dark Green".]
- Click in the box beside Shadow in the list of
Effects.
- Click on OK to apply your changes.
 In
some versions of Word a wavy green underline appears underneath the title. This
means that Word thinks there may be a grammar error. In
some versions of Word a wavy green underline appears underneath the title. This
means that Word thinks there may be a grammar error.
-
 If
you have the wavy green underline, right click on the title. The menu shows that
Word thinks this is a sentence fragment. If you click on Ignore Sentence. Word will forget about, but
only for this editing session. You don't need to bother this time. If
you have the wavy green underline, right click on the title. The menu shows that
Word thinks this is a sentence fragment. If you click on Ignore Sentence. Word will forget about, but
only for this editing session. You don't need to bother this time.
- Center your text by clicking on
 the Center
button on the toolbar. the Center
button on the toolbar.
- Select line 5, containing the words "Anniversary
Specials", by clicking in the margin beside it.
- Right click on the highlighted text and choose from the
popup menu.
- In the Font dialog box change: Font = Arial, Style = Bold Italic, Size = 24, Underline = Single, Color = Green.
- Center the line using the Center button.
Select Multiple Lines
- Move the pointer to the left margin beside line 8,
which starts the paragraph "In honor of...".
 To see which line your cursor is
in, look at the Status bar. To see which line your cursor is
in, look at the Status bar.
- Click to
select the line, but don't release the mouse button yet.
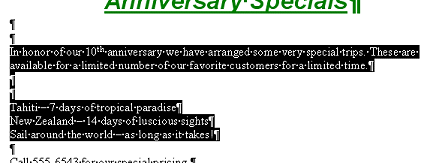
- Drag
down the left margin to the end of the list of trips and release the
mouse button. You will highlight all the lines you dragged across.
Format Lines: Toolbar
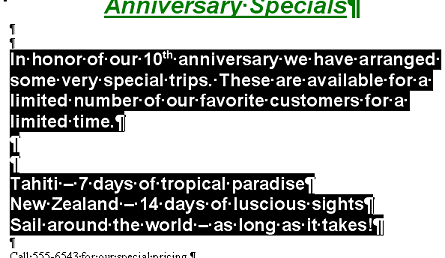
- While the highlighting remains, from the toolbar, choose Font = Arial, Size = 18, and click
 the Bold button. the Bold button.
Format Lines: Paragraph Styles
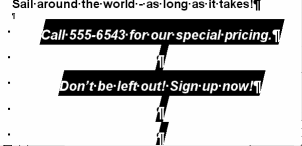
- Select
the last two lines of text and the two paragraph marks below them.
-
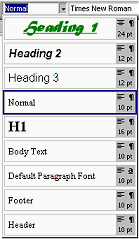
While the lines are selected, click on the arrow beside the Styles drop list
of on the Formatting toolbar.
 Styles change automatically:
Word may be set to automatically update styles to match the formatting you
apply yourself. This automation can be helpful, but is certainly
frustrating if you don't know why your styles are changing! This choice
is in the Style dialog in Word 97/2000. Styles change automatically:
Word may be set to automatically update styles to match the formatting you
apply yourself. This automation can be helpful, but is certainly
frustrating if you don't know why your styles are changing! This choice
is in the Style dialog in Word 97/2000.

 In Word
2002/2003, the choice is in the Modify Style dialog, which you open by right-clicking a style in the Styles and
Formatting task pane. In Word
2002/2003, the choice is in the Modify Style dialog, which you open by right-clicking a style in the Styles and
Formatting task pane.

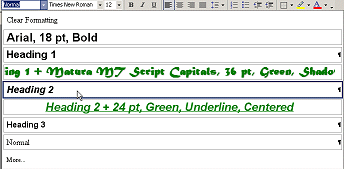
 In Word 2002/2003,
you will see in the Styles list the formatting you have applied yourself as well
as the named styles. Handy! In Word 2002/2003,
you will see in the Styles list the formatting you have applied yourself as well
as the named styles. Handy!
|
Word 97/2000 |
Word 2002/2003 |
- Apply Heading 2 to your selected lines.
- Center the lines using the
Center button.
- Change the font size to 20 using the Size drop
list.
 Save the document
with the same name. [flyer-World Travel Inc.doc ] Save the document
with the same name. [flyer-World Travel Inc.doc ]
 How to handle a full disk

|

