
Jan's Working with Databases
Basics: Exercise Access 2-2
You need to use what you just learned, and maybe learn a little more. Complete all parts of the following exercises. Don't forget to backup your Class disk when you have completed the exercises or whenever you stop for the day and saved a document along the way.
Exercise Access 2-2: City Theater Productions
| What you will do: | Create a new blank desktop database Create tables manually Enter data Use the Lookup wizard (2007) Print Relationships Report Use AutoForm Modify form in Design View Create a query that sorts Use Report Wizard Modify report in Design View Print all pages of report |
Start with: Access open
The City Theater needs a database to keep track of their productions over the years.
Tables
 Create a new blank file and save it as ex2-2-citytheaterproductions-Lastname-Firstname.accdb on your
Class disk in the folder databases project2, which holds the files for this project. Use your own first and last names, of course.
Create a new blank file and save it as ex2-2-citytheaterproductions-Lastname-Firstname.accdb on your
Class disk in the folder databases project2, which holds the files for this project. Use your own first and last names, of course.
- Create and save the following tables in Table Design View and
enter the data displayed in Datasheet View.
Hint: If you create a blank table in Datasheet view, changing the column names before entering records makes the ID numbers start with ID=2 instead of 1!Table name = Production Types
Fields:- ProductionTypeID - AutoNumber data type; primary key
- ProductionType - Text or Short Text data type
ProductionTypeID ProductionType 1 play 2 musical 3 concert 4 reading 5 dance 6 pageant 7 other Table name = Seasons
Fields:- SeasonID - AutoNumber data type; primary key
- Season - Text or Short Text data type
SeasonID Season 1 Winter 2 Spring 3 Summer 4 Fall 5 Christmas Table name: Venues
Fields:- VenueID - AutoNumber data type; primary key
- Venue - Text or Short Text data type
- External - Yes/No data type
A check mark in a Yes/No field means Yes, or True. You can click the box or TAB into that field and press the space bar to check the box.
VenueID Venue External 1 Main Theater No 2 Little Theater No 3 School Yes 4 City Park Yes 5 Palace Theater Yes 6 Amphitheater Yes 7 Fair grounds Yes 8 Other Yes Table Name = Productions
Fields:- ProductionID - AutoNumber data type; primary key
- ProductionName - Text/Short Text data type
- Director/Conductor - Text/Short Text data type
- ProductionTypeID - Lookup field using the Production Types table. Sort Ascending on ProductionType field.
- Author - Text/Short Text
- SeasonID - Lookup using Seasons table. Sort on SeasonsID since the seasons of the year are not in alphabetical order.)
- YearPerformed - Number data type with Integer field size
You cannot use the word Year as the field name. That is a reserved word, meaning it has special use in Access. - VenueID - Lookup using Venues table. Do not include the field External in the Lookup list. Sort on Venue field.
- Notes - Memo or Long Text type
For fields that have a Lookup list, be sure to select from the list when entering records.
ProductionID ProductionName Director/Conductor ProductionType Author SeasonID Year VenueID Notes 1 My Fair Lady Peter Fellows musical Alan Jay Lerner Winter 2005 Main Theater
2 Romeo & Juliet Jared Mason play William Shakespeare Spring 2004 Little Theater
3 West Side Story Peter Fellows musical Leonard Bernstein, Stephen Sondheim Winter 2004 Main Theater
4 Cats Peter Fellows musical TS Eliot, Andrew Lloyd Webber Christmas 2004 Main Theater
- In Design view, add a Description to the fields that use Lookup lists that tells which table is being used.
 Save the table.
Relationships
-
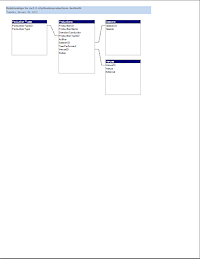 View the Relationships.
 - Adjust the size and locations of the tables in the Relationships window so that all fields are visible.
 Create and print the Relationships Report.
Yours may be arranged differently from the illustration.
Form
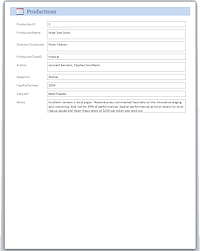
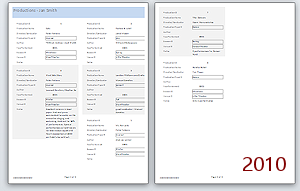
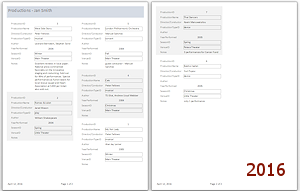
- AutoForm: Use AutoForm to create a form based on the Productions table. Adjust the controls as needed to make the form easier to use. Make sure that the values show completely for all records. Your form may be different from other students' and from the illustration below.
- Save the form as Productions Form.
- Use the form to enter the records below.
| ProductionID | ProductionName | Director/Conductor | ProductionType | Author | SeasonID | Year | VenueID | Notes |
|---|---|---|---|---|---|---|---|---|
| 5 | London Philharmonic Orchestra | Manuel Sanchez | concert | |
Fall | 2004 | Main Theater | guest conductor - Manuel Sanchez |
| 6 | Balshoi Ballet | Yuri Popov | dance | |
Christmas | 2005 | Little Theater | only 1 performance |
| 7 | Thai Dancers | Kaem Manuwaluilou | dance | |
Spring | 2005 | Palace Theater | 3 performances for Cancer Fund |
-
Add to record #3, West Side Story, the following text in the Notes field:
Excellent reviews in local paper. National press commented favorably on the innovative staging and costuming. Sold out for 99% of performances. Special performances as fund-raisers for local rescue squad and Heart Association at $200 per ticket also sold out.
Do not resize the Notes field this time even though the whole note does not show.
- Check Print Preview.
If necessary, make changes in Design View so that a form fits in the width of the paper. -
 Print the form for record #3 only.
You cannot print selected records from Print Preview!
Filter Method: Filter to show only the record you want and then view in Print Preview as usual.
Alternate method: Select the record by clicking its record selector bar at the left in the form. Then open the Print dialog (NOT from Print Preview). Click on the radio button in the Print dialog for Selected Record(s).
Query
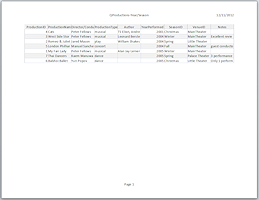 Query: Create a query that sorts the records in the
Productions table on the year and then the season.
Query: Create a query that sorts the records in the
Productions table on the year and then the season.
(HINT: Drag the field YearPerformed to the left of the field SeasonID in the query's grid and sort those two fields Ascending.)
- Save the query as QProductions-Year/Season-Lastname-Firstname, using your own first and last names.
- Print the datasheet for the query in Landscape orientation with the columns resized so that the table fits on just one page. The Notes text will be cut off.
Report
- Report Wizard: Use the Report Wizard to create a columnar report based on
the query you just created.
In the wizard you do not need to sort since the query already sorts the records.
 Access 2007: Choose the 'Access 2007' AutoFormat style.
 - Make adjustments as needed to make the data display properly in the report. Resize controls where needed. Rearrange controls if you wish. Set the Can Grow and Can Shrink properties to Yes if necessary.
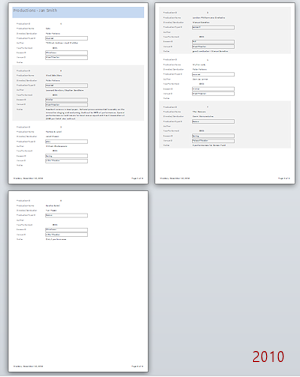
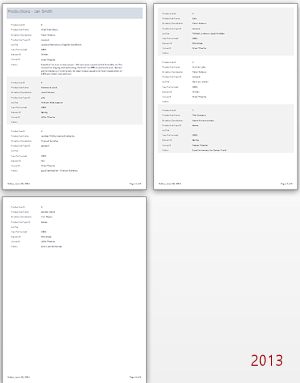
- Save the report as Productions - Lastname, Firstname, using your own first and last names.
-
Print all of the report's pages.
(You may have a different number of pages, if you rearranged the fields.)
The Report Wizard produces somewhat different layout and formatting in different versions of Access. The illustrations show reports with all fields aligned to the left. The version from Access 2013 also has all borders set to Transparent in the Property Sheet.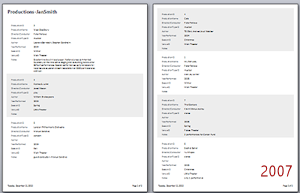
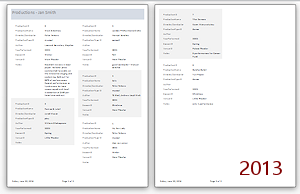
Print Preview of report
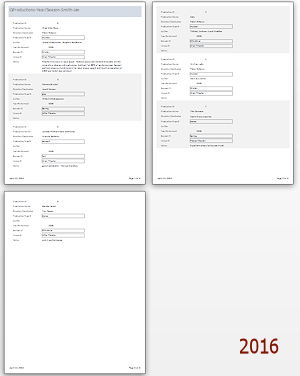
 Change the report to use 2 columns.
In Design View, move and/or reduce the width of the controls on the report and change the report's width to fit in 4 inches. In the Page Setup dialog, on the Columns tab, use 2 columns and check the box for Same as Detail. On the Print Options tab, leave the margins as 0.25". Choose Column Layout = Down, then Across. Change the Title to Productions Report - Firstname Lastname and rearrange as needed to fit within the width needed for two columns. View the Print Preview again.- Save as Productions Report-2 columns - Lastname, Firstname.
-
Print the report's 2 pages.

Print Preview of report in two columns
|
|
| © 1997-2017 Jan Smith All Rights Reserved |
Site Map What's New |
Privacy Policy Terms of Service Copyright Acknowledgements |
~~ 1 Cor. 10:31 ...whatever you do, do it all for the glory of God. ~~
Last updated: March 23, 2017