
Jan's Working with Databases
Basics: Access Objects: Edit AutoForm
Making changes to an autoform is trickier than you might think from looking at its simple layout. All of the controls are positioned in a table. Change the size of one and the whole column must change to match!
Views
There are three views for a form. You edit the records in Form View. You edit the form itself in Layout View or Design View.
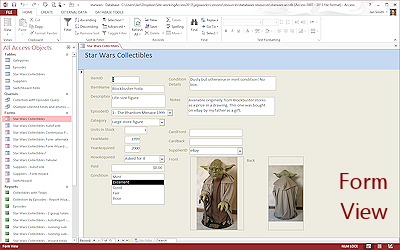
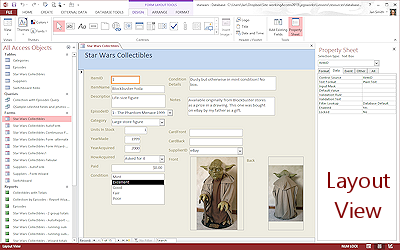
Layout View looks a lot like Form View, but you cannot change the data in the fields while in Layout View. Confusing, if you don't realize which view you are in!
Layout View is best for adjusting the size and position of controls because you can see the record data in the controls.
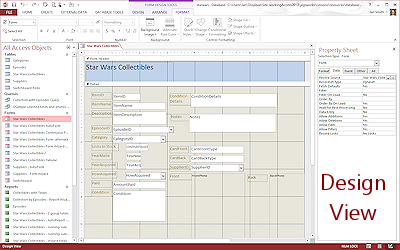
Form Design View is where you will make most changes. You can adjust any property of the form or of a control on the form from this view.
| |
Step-by-Step: Edit an AutoForm |
|
| What you will learn: | to work with Stacked Layout to remove Stacked Layout to resize and move a control in Design View to save an object in the database with a new name to apply a new theme |
Start with: ![]() ,
,![]() , mytrips-Lastname-Firstname.accdb from previous lesson
, mytrips-Lastname-Firstname.accdb from previous lesson
Form Design View: Working in Stacked Layout
Your autoform has the controls and their labels neatly lined up in a single column using the Stacked Layout. If the underlying table had had more fields, you might have wound up with 2 or even 3 columns. This auto-layout changes the way things work in the Design and Layout views. It is very confusing if you don't know how the layout works!
Let's see what happens when you resize a control in a Stacked Layout.
 If necessary, open the form Trips AutoForm.
-
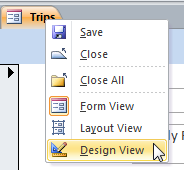 Right click on the form's title tab and select the
Design View.
Right click on the form's title tab and select the
Design View.
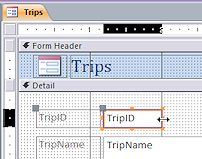
The Form Design View opens.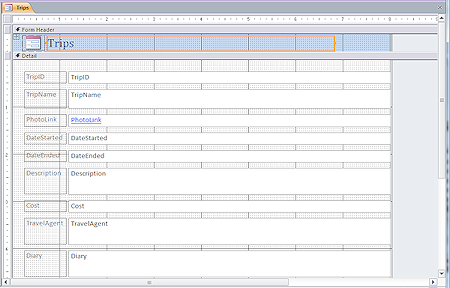
The controls are white on a dotted background in the illustration. The data in your records shows in these when in Form View. In this form all of the controls are text boxes but there are several other types of controls that we will look at later.
Each control has a label to its left, which is the default for any control. The label text is the name of the field by default, but you can edit it. Some field names are not user-friendly!
The Form Design View does not show any actual data. But it is obvious that the TripID control, for example, is far wider than any ID number will need. How wide should it be? Are you a good guesser? You will have to guess about the new widths that you want in Design View!
-
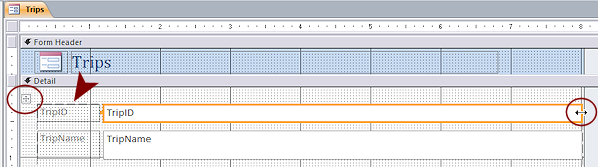
Click on the control for TripID.
What changes?
-
Border: The selected control gets an orange border and resizing handles appear in middle of the left and right sides.
-
Select Table button
 : Appears at the top left of the table of controls and labels. Clicking this button will select everything inside the table.
 - Dashed outline:
 Access 2007:
A outline of small dashes surrounds the label that matches the selected control.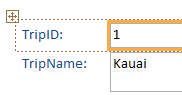


 Access 2010, 2013, 2016:
An outline of large dashes surrounds the whole table created by the Stacked Layout.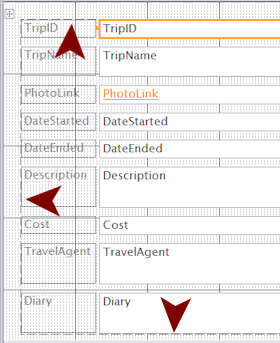
-
What you did not get:
-
Move handle (gray) - on the text box or on its label.
-
Resize handles (orange) in corners and the middle of top and bottom sides of the text box.
Why? The Form button applied the Stacked Layout which locks the controls into rows and columns.
-
-
- Move the mouse pointer over the right end of the text box until the pointer shape changes to the Resize Horizontal shape,
 .
.
-
 Drag to the left.
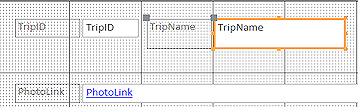
An outline of the text box shifts as you drag to show you where it will be if you let go of the mouse to drop the box. -
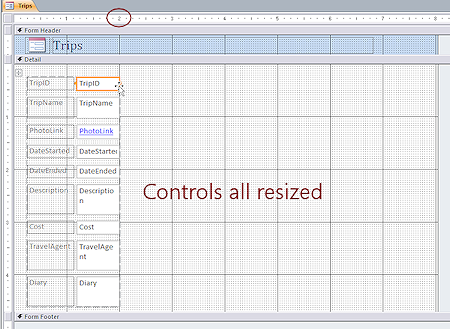
When the right edge is lined up with the 2" mark on the ruler, release the mouse button.
All the other text boxes move too!
It's that Stacked Layout at work. All of the text boxes are in a 'table'. Do you see the dashed line around the labels and controls?
When you resize item in a column, you resize all of the controls in that column.
This is not a good size for most of the controls.
- Undo with the key combo CTRL + Z.
The layout returns to the original.
Form Design View: Remove Stacked Layout
You can get that TripID text box to a more reasonable size. You just have to make the Stacking Layout let go. You will change the size and position for a couple of controls for practice. Fancier work will wait until a later lesson.
-
On the ribbon, click on the tab Form Design Tools: Arrange.
-
Hover over each button to see a screen tip about it.
This tab is not the same in Access 2007 as it is in the other versions. Access 2007: The Arrange ribbon tab has several features controlling the layout.

Access 2010, 2013, 2016: The Arrange ribbon tab has a lot of commands that only make sense for layout tables, like the various Insert buttons, Merge, Move Up. These commands all work with the Stacked and Tabular Layouts and will be grayed out if the focus is not on something that is in one of these auto-layouts.

- Unavailable buttons are a clue:
Access 2010, 2013, 2016: Click in the blank area to the right of the controls.
Most of the buttons in the ribbon go gray. The focus is no longer in the layout table.

- Click on the TripID control to select it.
Access 2010, 2013, 2016: The ribbon shows those 'table' related buttons are now available. 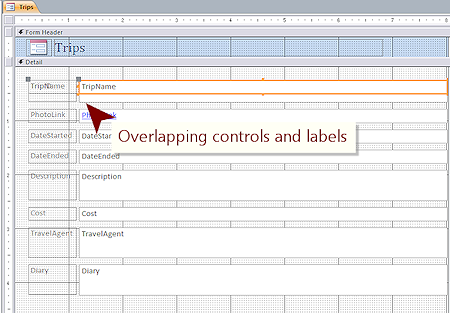 On the Arrange tab, click the button Remove Layout
  .
.
(This button does not show if you are in Layout view.)Can you see the changes?
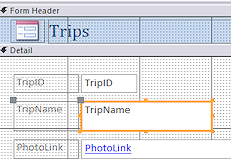
The selected control TripID and its label now have all of the handles: the gray move handles and the orange resize handles on the corners and in the middle of each side. This is the normal state for a selected control
But it looks like TripName may be the selected control now. Not really. TripID is underneath it. The Stacked Layout was removed from only TripID, not the other controls. The rules for that layout moved the remaining table to the top row on the page. Yikes. That's no help at all.
You need to get the layout removed from all of the controls.
-
Undo.
-
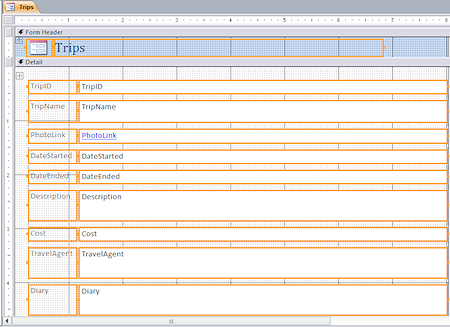 With one of the controls selected, click the Select Table button at the top left.
 All of the controls show the orange border for a selected object.
-
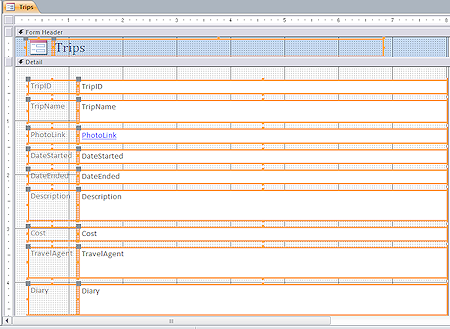 Remove Layout.
 All of the controls now show all of the handles for a normal selected object: gray Move handle at top left of control and orange Resize handles on the corners and in the middle of each side.
-
 Save the form.
[Trips AutoForm]
Form Design View: Resize and Move Controls
Now you can resize and rearrange the controls on the form.
TAB Order: Using TAB to move from control to control is a useful way to navigate a form. But moving controls on the form can make the TAB order no longer match the order of the controls on the form. Confusing! Adjusting the TAB order will be discussed in a later lesson.
- Click on a blank area to deselect the controls.
- Click on the TripID control to select it.
-
 Resize the text box:
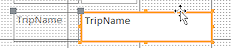
Move the mouse pointer over the handle in the middle of the right side of the TripID text box until the pointer changes to
the Resize Horizontal shape. Be careful. The edge of the form is nearby. If the shape changes to the Resize Column shape,
 , you will be resizing the form width instead of the text box.
- Drag to the left until the right edge of the text box is at the 2" mark on the
ruler.
- Release the mouse button.
The text box resizes. TaDa!
 Similarly, resize the TripName control so that its right edge is at the 3" mark.
- Move control and its label:
 Move the mouse pointer to the orange border, but not over a handle.
The pointer shape changes to the Move shape .
. -
 Drag to the right and up.
An outline shows where the control will be when you drop.The dots and grid lines help you see if things are lining up the way you want.
-
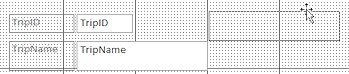
 When the control seems level with the TripID control, drop.
The label came along for the ride even though the outline did not show it.
Did you leave enough space for the control's label? If not, Undo and try again or use the Problem solution below. Problem: TripID and TripName are not lined up
It can be difficult to drag and drop in exactly the right spot.
Solution: While the control is selected, press the arrow key to move the control in that direction on the screen.
-
Save the form.
[Trips AutoForm] -
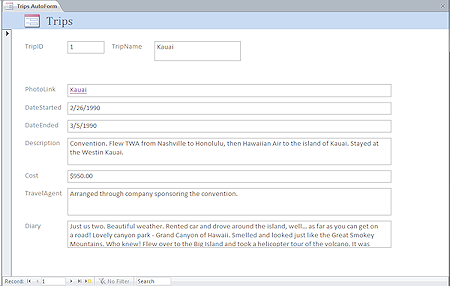
 Return to Form View and look at each record.
Do the new sizes for TripID and TripName work for all records?
Do you think the sizes are good for the future?
-
 Experiment: Move and Resize
Return to Design View and experiment with moving and
resizing the controls.
Can you come up with a better arrangement of the fields? Selecting multiple controls: Drag the mouse from outside a control across any part of several controls that you want to select. All will be selected, along with their matching labels.
 Save Object As: (Do not use the Save button!)
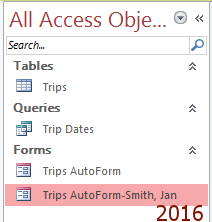
Save the changed form with a new name, Trips AutoForm - Lastname, Firstname, using your own first and last name, of course. Access 2007:  Office button > Save As > Save Object As Access 2010, 2013, 2016: File tab > Save Object As
The Navigation Pane now has one table, one query, and two forms.
Form Layout View: Apply AutoFormat or Theme
Access 2007 uses the term AutoFormat for the command that applies the Office 2007 themes. Access 2010, 2013, and 2016 just use the term Theme, like the other Office programs. Access 2010, 2013, and 2016 have an AutoFormat command, but it is not on any of the standard ribbon tabs. Either way, you can change the look of the whole form or report at once IF you have not applied non-theme formatting manually. That makes it easy to use the same theme on all of the documents for a particular business or project. The themes are different in each version of Access. A theme sets background, font, font size, and font color.
An AutoFormat or Theme can be applied from Design View or Layout View.
![]()
![]()
![]() Access 2010, 2013, 2016:
Access 2010, 2013, 2016:
-
 No Undo for Theme: The Undo list does not track applying a theme to a form or report. You will have to remember which one you started with! It also affects the automatic colors in datasheets for alternate rows, but does not override colors you picked manually.
 - Theme applies to ALL forms and reports in the database.
![]() Which theme is the current one? In the Theme gallery, at the top is a thumbnail for the themes used in the database. AutoFormat is not as kind! I have not found a way to reveal the name of the current AutoFormat.
Which theme is the current one? In the Theme gallery, at the top is a thumbnail for the themes used in the database. AutoFormat is not as kind! I have not found a way to reveal the name of the current AutoFormat.
 Change to the Layout View of your new form, Trips AutoForm - Lastname, Firstname.
Since the Layout View includes actual data, you will be able to see clearly whether your controls are the right size for each theme or autoformat that you try.-
Open the gallery of themes:
Access 2007:
On the Form Layout Tools: Arrange tab, click on the AutoFormat button .
.A gallery of themes from Office opens.
Access 2010, 2013, 2016:
On the Form Layout Tools: Design tab, click the Themes button .
.A gallery of themes from Office opens.
-
Try out each theme:
Access 2007:
Select each one in turn.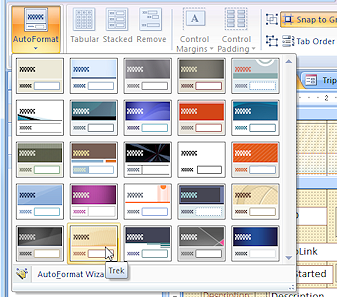
Access 2010, 2013, 2016:
Hover over each one in turn. Live Preview will show the changes. The themes are different in each version.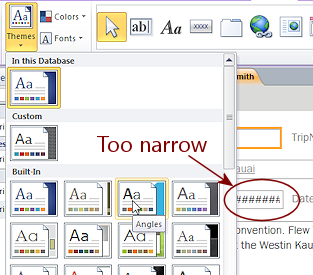
The background color of the Form Header and the fonts used throughout will change with each theme. Some themes use a much larger font size than others. The data may not fit in your controls at a larger font size. You have to decide if you like the theme well enough to change the control size.
- Pick one of the themes by clicking it in the gallery.
- If necessary, adjust the sizes of the controls so that all data shows neatly.
- Save your form again.
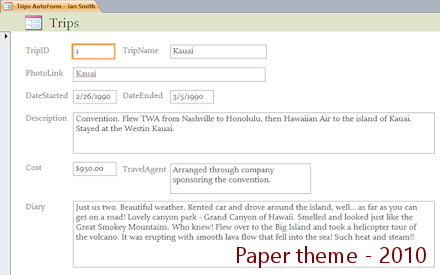
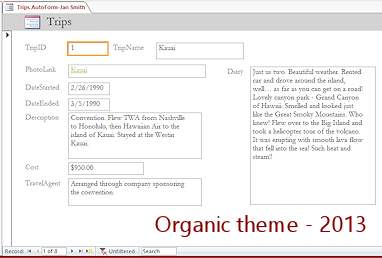
[Trips AutoForm -Lastname, Firstname]Examples of custom forms: Different arrangements of controls and different themes
- Open the original autoform, Trips AutoForm, in Form View.
Access 2007: The original autoform is unchanged. Access 2010, 2013, 2016: The theme you just picked is applied to ALL forms and reports. Whoops. That is not what we wanted! -
Access 2010, 2013, 2016: Change the theme back to the theme named Office, at the top left corner of the Built-In or Office themes.
The fonts and colors go back to where you started but the layout of controls does not change. - Close all open objects.
|
|
| © 1997-2017 Jan Smith All Rights Reserved |
Site Map What's New |
Privacy Policy Terms of Service Copyright Acknowledgements |
~~ 1 Cor. 10:31 ...whatever you do, do it all for the glory of God. ~~
Last updated: March 22, 2017