
Jan's Working with Databases
Basics: Access Objects: Report Image
A database report does not have to be fancied up with pictures to work well. But it doesn't hurt either!
There are two kinds of images that you might see in a report:
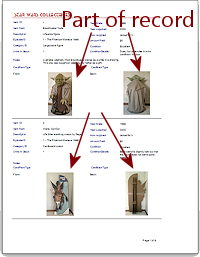
- Part of a record, like an employee photo or a product photo.
The image can be in an OLE Object field or (better) an Attachment field. - Not part of a record, like the company or school logo or just something for decoration.
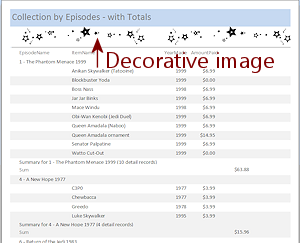
A report can have a decorative image in the report header or footer or the page header or footer. You can even add one to the Detail area, where the record controls are, but the same image will appear beside every record.
Clip Art
Unlike other Office programs, Access does not include a way to easily insert clip art.  There is an Insert Image button on the Report Tools: Design tab but it only lets you browse your computer for images to use. So you need to save an image first before you can use it in Access.
Alternate method: Use a different Office program to get the image you want. Then copy it, switch to Access, and and paste the image to the report's Design view.
In the Step-by-Step section below you will add a decorative image to your report. Later in the lessons you will work with records that have images as part of the record.
| |
Step-by-Step: Report Image |
|
| What you will learn: |
to insert an image
to edit image with Property Sheet |
Start with: ![]() ,
,![]() , mytrips-Lastname-Firstname.accdb from previous lesson
, mytrips-Lastname-Firstname.accdb from previous lesson
Report Design View: Insert an Image
Alternate method: If you do not have access to the Internet, use the Insert Image button on the Report Design Tools: Design ribbon tab, and navigate to a picture of your choice or to
travel-map.png ![]() in the databases resources files for these lessons.
in the databases resources files for these lessons.
- Open Word, Excel, or PowerPoint to a new blank document.
- Switch to the Insert ribbon tab.

 Click the Clip Art or Online Pictures button .
The Clip Art pane or the Insert Online Picture dialog opens.- In the search text box, type luggage and press ENTER.
The results show thumbnails of images with keywords that match. - Select an image that you think will look good on the trips report and insert it into the blank document.
- While the image is still selected, copy it with the key combo CTRL + C.
 Switch to the Access window and open the Trips Report Wizard report in Design view.
- Click in a blank area of the Detail section to deselect any controls and to select the Detail section.
-
 Paste with the key combo CTRL + V.
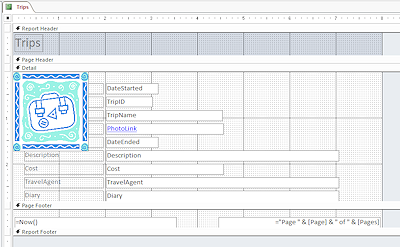
The image appears at the top left of the section. It is at its full size and lies on top of the existing controls.Your image may be different from the illustration. The images available from Microsoft change over time.
- Drag the image to the upper right of the Detail section.
-
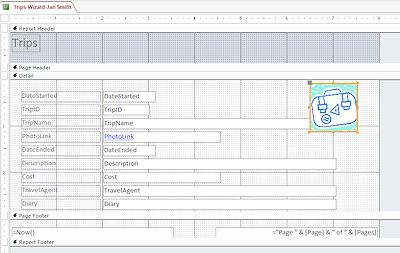 Drag the bottom left corner handle of the image up and right to resize the image to about 1" square.
Look at the rulers at the top and right of the Design view window.
(Exact size is not important right now.)The image is cropped instead of getting smaller. Did you expect that?
Report Design View: Edit Image with Property Sheet
Many tasks are as easy to do in the Property Sheet as with ribbon commands or by dragging. Some tasks must be done with the Property Sheet. Always check the box at the top of the Property Sheet before making changes to properties. Do you have the correct control or section selected?
While the image is still selected (shows an orange border), inspect the top of the Property Sheet.
It should show the selection type is 'image' and the
drop list should show 'OLEUnbound' plus a number.-
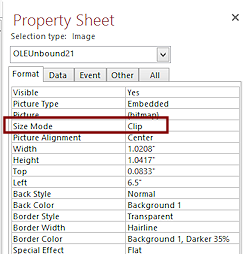
Select the property Size Mode in the Property Sheet.
An arrow appears at the right of the property value.The default value for inserted images is Clip. There are three choices in the drop list for the property:
- Clip = Image is cropped to fit in the control. The part of the image that will show depends on the next property, Picture Alignment. The default value is Center.
- Stretch = Image stretches to completely fill the control. This may distort the image if the proportions of the control are different from those of the image.
- Zoom = Image shows at the largest size that will fit in the control while keeping its original proportions.
To have the image resize when you resize the control, the Size Mode must be Zoom.
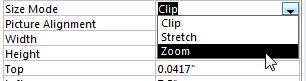 Click the arrow for the Size Mode property.
The drop list of choices appears- Click on Zoom.
The image resizes to fit inside the control.
If the control is not proportioned like the image, there will be extra blank space. -
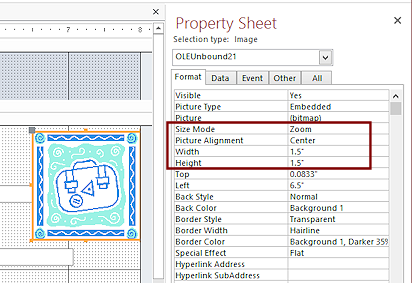 Change the Width and Height properties to 1.5".
The image enlarges.
With the Size Mode set to Zoom, there will be extra space unless the image you choose was square like the one in the illustration. Problem: Page width expanded
The page automatically enlarged to hold the image at its new width and height.
Solution: Drag the image to the left of the 8" line on the ruler. Drag the edge of the page to the left to 8" or less.
- Click in a blank part of the report design area to deselect the image control.
-
 Click on

 the Save button in the Quick Access Toolbar.
Your changes to the report are saved.
[Trips Report Wizard] -
 Switch to Print Preview.
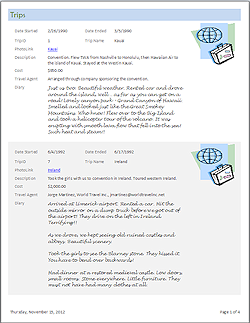
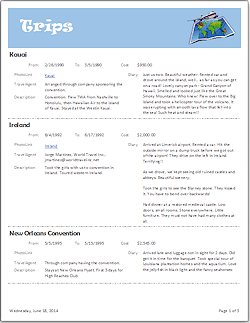
You should have 4 pages. Each record shows the image that you put in the Detail section.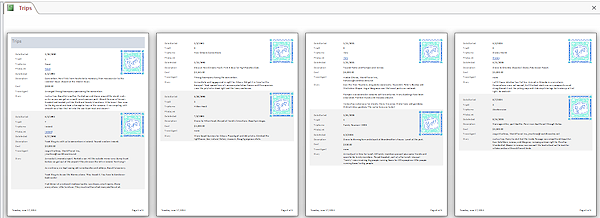
- Evaluate: Is the image with each record helpful, attractive, or a waste of space?
The image does make it easy to see where a record starts, how many records are on a page, and such - even more than the alternating background colors. You could remove the alternating background color and use an image or a dividing line to separate records instead.
Your Turn
 Experiment: Design View
- Try to improve the
layout of the report.
- Resize the controls.
- Move them to different locations.
- Use the Property Sheet or the Report Design Tools to change fonts, colors, font size, background color.
- Change and/or resize the image.
- Try to improve the
layout of the report.
-
When you have finished your improvements, use the Save As command to save your report with the name Trips Report Wizard -Lastname, Firstname, only use your own first and last names.
 Access 2007: Office button > Save As

 Access 2010, 2013, 2016: File tab > Save As
Examples: Changing fonts, font size, position and size of controls, image, alternate background color for Detail section, add a dividing line between records
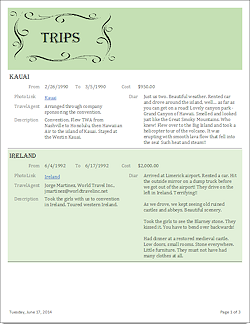
Results can be very different!
|
|
| © 1997-2017 Jan Smith All Rights Reserved |
Site Map What's New |
Privacy Policy Terms of Service Copyright Acknowledgements |
~~ 1 Cor. 10:31 ...whatever you do, do it all for the glory of God. ~~
Last updated: March 22, 2017