
Working with Numbers
Intro: Select & Navigate: Row/Column
Suppose you want to rearrange the order of columns or you want to apply formatting to a whole row. You need to select whole rows or whole columns but no one wants to scroll to the far edges of a sheet to do this kind of selecting. (Remember the 1,048,576 rows in 16,384 columns!)
So, what's the easy way? Use the column and row headers to do your selecting!
| |
Step-by-Step: Select Rows/Columns |
|
| What you will learn: | to select a row or column to select adjacent rows or columns - drag or with keys to select non-adjacent rows or columns |
Start with: ![]() budget-2010-Lastname-Firstname.xlsx from previous lesson
budget-2010-Lastname-Firstname.xlsx from previous lesson
You will not be saving any changes in this lesson but your instructor may want you to capture some screen shots to prove you did the lesson. Ask.
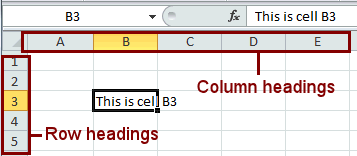
Select Column/Row
-
 Hover over the heading for Column C.
The pointer changes to
 the select column shape when it is over the column heading.
 - Click.
The whole column is selected.
While the mouse button is down, the Name Box shows 1C, which means that 1 column is selected. Once you release the mouse button, the Name Box shows C1, the first cell in the selection.
- Click on other columns to confirm that the Name Box shows 1C while the mouse is still down to select the column. This is certainly could be confusing!
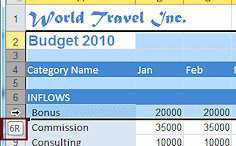
- Hover over the heading for Row 4.
The pointer changes to the select row shape when it is over the row heading.
- Click.
The whole row is selected.
While the mouse button is down, the Name Box shows 1R, which means that 1 row is selected. Once you release the mouse button, the Name Box shows A4. - Click on other rows to see that the Name Box shows 1R for them, also, as long as the mouse button is down.
Select Multiple Adjacent Columns/Rows: Drag
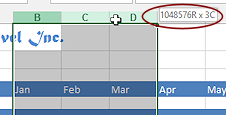
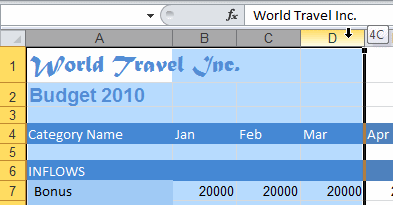
 Drag across the headings for Columns B, C, and D.
Columns B, C, and D are selected.
While you are dragging, a screen tip tells how many columns you have selected.

 Excel 2007, 2010:

 Excel 2013, 2016:
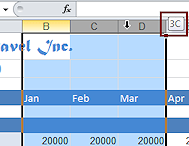
After you release the mouse button, the Name Box shows only the upper left cell selected.
-
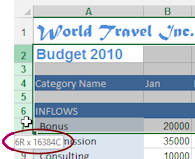
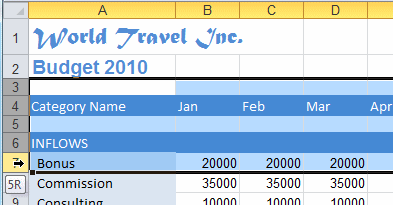
 Drag across the headings for Row 2 through Row 7.
Rows 2, 3, 4, 5, 6, and 7 are selected. While you are dragging, a screen tip shows how many rows are selected.
Excel 2007, 2010: 
Excel 2013, 2016:

After you release the mouse button, the Name Box shows only the cell reference for the upper left cell selected.
Select Multiple Adjacent Columns/Rows: SHIFT Key
-
 Select Column A by clicking its heading.
- Hold down the SHIFT key and select Column D. Release the mouse button.
Columns A, B, C, and D are selected.
- Select Row 3.
-
 Hold down the SHIFT key and select Row 7. Release the mouse button.
Rows 3, 4, 5, 6, and 7 are selected.
Select Multiple Non-Adjacent Columns/Rows: CTRL Key
When you need to select rows and columns that are not next to each other, the CTRL key is your friend.
-
 Select Column B.
- Hold down the CTRL key and select Columns D and F.
- While still holding down the CTRL key, select Rows 1, 3, 5 and 7.
All selected columns and rows are still selected. (Look at the colored headings)
Of course this works for just columns or just rows, too!
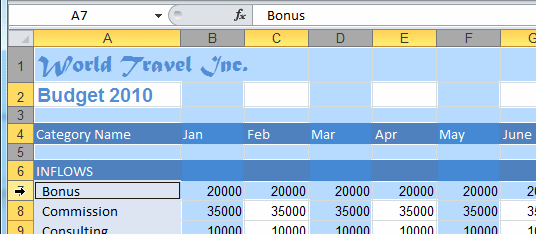
- Return selection to cell A1.
|
|
| © 1997-2017 Jan Smith All Rights Reserved |
Site Map What's New |
Privacy Policy Terms of Service Copyright Acknowledgements |
~~ 1 Cor. 10:31 ...whatever you do, do it all for the glory of God. ~~
Last updated: March 27, 2017