
Jan's Working with the Web
Saving: Save a Page
To save a complete web page yourself, with all its graphics and other needed files, can be tricky. You need three things to see the page the same way it appears from the Internet:
- The source code for the page itself.
- All of the graphics and any other files needed to run the page.
- The correct folder structure to put the related files in.
Some web pages are different each time you visit. Stock market charts, weather maps, and news reports are examples of such pages. Other pages are interactive, containing a form, game, or activity that is controlled by a program on the server instead of by the source code for the page. You may be able to save the page as it looks at the time, but the saved page won't change or react any more.
Source Code:
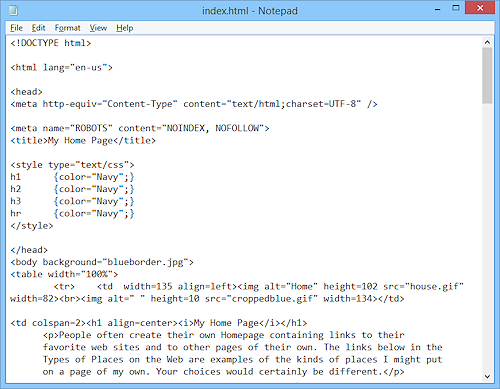
Example: Source Code
The source code is a plain text file that contains the text on the page and the addresses of the images and other files that the page uses. Various HTML tags tell the browser which parts are headings, paragraphs, tables, etc.
Graphics:
Every picture on the page
is a separate graphic, even things like arrows ![]()
![]() , bullets
, bullets ![]()
![]() , icons
, icons ![]()
![]() and text with fancy
fonts and effects, like
and text with fancy
fonts and effects, like![]()
![]() .
.
Depending on your browser version,
you may have to save each graphic
separately!
Paths to Graphics and Files:
The source code contains URLs for graphics like ../images/mydivider.gif, attached files like style sheets and scripts, and linked pages like ../basics/index.html . If you don't put these style sheets and scripts in the same relative location, the browser won't be able to find them. This can get tricky!
You can try saving all the files and graphics to a single folder and see if the page displays correctly.
If it does not, you have two choices. You can read the paths from the source code and create folders to match or you can change the paths in the source code. You'll want to use the method that is the least amount of work for you.
![]() Broken links: On a page you save yourself, links
to other pages may not
work, depending on how the links were coded. If the link has the full
URL, like http://www.jegsworks.com/index.html, it will still
work if you are connected to the Internet. If the link is a relative link
like "basics/index.html", it won't work from your hard drive unless you saved that page, too, and put it
in the right folder.
Broken links: On a page you save yourself, links
to other pages may not
work, depending on how the links were coded. If the link has the full
URL, like http://www.jegsworks.com/index.html, it will still
work if you are connected to the Internet. If the link is a relative link
like "basics/index.html", it won't work from your hard drive unless you saved that page, too, and put it
in the right folder.
Framed pages: An earlier version![]() of these lessons included
discussion of framed pages. I have dropped this material because few sites
use frames anymore. They were deprecated (declared obsolete and
dropped) in HTML5 when that standard was finalized in 2014.
of these lessons included
discussion of framed pages. I have dropped this material because few sites
use frames anymore. They were deprecated (declared obsolete and
dropped) in HTML5 when that standard was finalized in 2014.
File Types
You have several choices in the Save as type box.
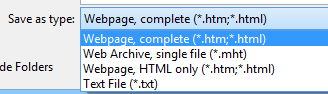


 Web Page, complete: Saves the source code as an
HTML file and puts all the graphics, sounds, style sheets, etc.
in a separate folder, named the same as the web page. All the paths are changed to
match. Cool!
Web Page, complete: Saves the source code as an
HTML file and puts all the graphics, sounds, style sheets, etc.
in a separate folder, named the same as the web page. All the paths are changed to
match. Cool!
- Web Page, HTML only saves
only the source code.
- Text saves only the
text on the page, and not any of the images or formatting. The file extension is txt.
- Web Archive saves a snapshot of the page in a single file instead of all the little files
separately. The file has the extension mht and uses the
icon
 . A good method for single pages! Having a single
file makes it easy to move or copy to a another disk.
. A good method for single pages! Having a single
file makes it easy to move or copy to a another disk.
| |
Step-by-Step: Save Web Page |
|
|
What you will learn: |
to save a page as Web Page, complete |
Save Web Page, Complete
Start with: ![]()
![]()
![]()
- If necessary, open My Home Page in your browser and attach your removable Class disk.
 On your Class disk create a new folder named web project1 in the folder where you are saving your class documents.
- Open the Save As dialog with the key combo CTRL + S , or...
IE:  > File > Save As... Chrome: Right click on the page (not on an image) and select Save As...
OR, > Save page as... Firefox: Right
click on the page (not on an image) and select Save Page As... OR,
> Save page as... Firefox: Right
click on the page (not on an image) and select Save Page As... OR,
 > Save Page
The Save As dialog opens. - In the Save As dialog, navigate to
the web project1 folder on your
Class disk.
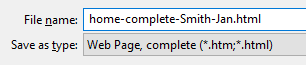 Save the page with the name home-complete-Lastname-Firstname.html and with the type Web Page,
complete . (Use your own first and last names, of course.)
Save the page with the name home-complete-Lastname-Firstname.html and with the type Web Page,
complete . (Use your own first and last names, of course.)
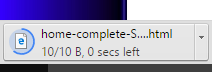
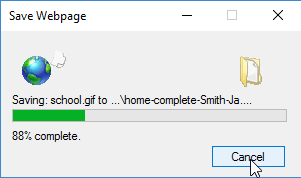 IE: You may have to work through one or more
confirmation dialogs, depending on your security settings. A dialog pops up with a progress bar and the name of the file currently being saved. But it may go by too fast to
read.
IE: You may have to work through one or more
confirmation dialogs, depending on your security settings. A dialog pops up with a progress bar and the name of the file currently being saved. But it may go by too fast to
read.
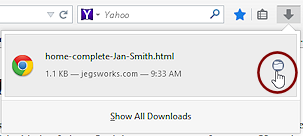
 Chrome: The Status bar shows the progress of the
download with a circle around the default program icon that gradually fills in. For this page, the circle may complete too fast to follow. The
Status bar button stays in view until you close the bar or
the browser. Do not close it yet.
Chrome: The Status bar shows the progress of the
download with a circle around the default program icon that gradually fills in. For this page, the circle may complete too fast to follow. The
Status bar button stays in view until you close the bar or
the browser. Do not close it yet.
The illustration shows the IE icon instead of the Chrome icon because that was the default program for .html files.
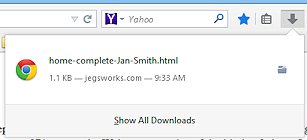 Firefox:
The download arrow at the top left enlarges and animates while the download is in progress. This page may download too fast for it to show. When the download completes, click the Download arrow to show recent
downloads. Do not close this window yet. (The illustration shows a Chrome icon for the page because Chrome was the default browser on the computer.)
Firefox:
The download arrow at the top left enlarges and animates while the download is in progress. This page may download too fast for it to show. When the download completes, click the Download arrow to show recent
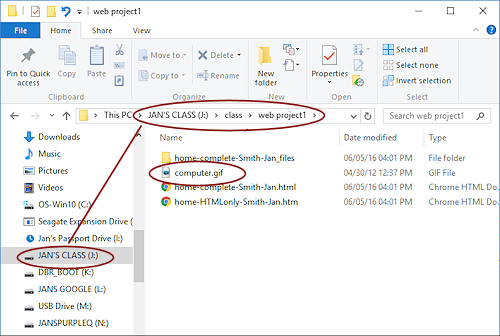
downloads. Do not close this window yet. (The illustration shows a Chrome icon for the page because Chrome was the default browser on the computer.)- Open a File Explorer window that shows the contents of
the web project1 folder:
IE: Open an Explorer window, navigate to your Class
disk and open the web project1 folder. You should see your new file there.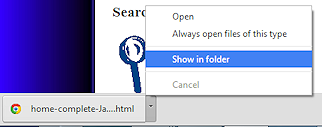 Chrome: Click the arrow at the right side of the
Status bar button for the download and select Show in folder.
Chrome: Click the arrow at the right side of the
Status bar button for the download and select Show in folder.
A File Explorer window opens and shows your new file.
 Firefox: In the Downloads list, click on the folder icon to the right of the file in the Downloads window.
A File Explorer window opens and shows your new file.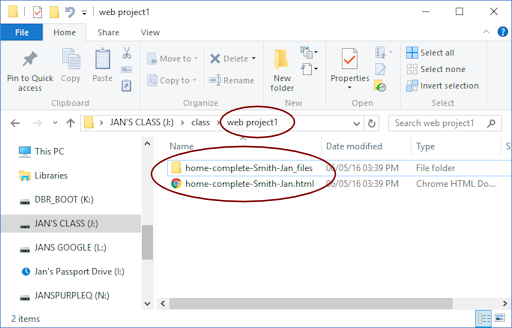
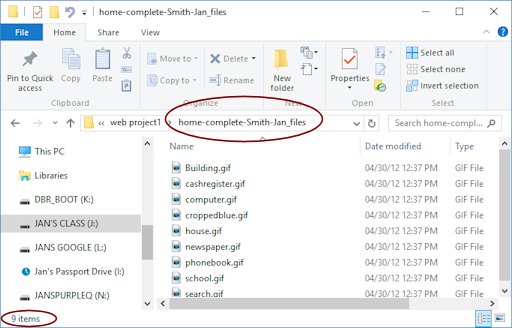
- Double click on the folder home-complete-Lastname-Firstname_files.
Explorer expands the folder to show the files it contains.
Wow. Did you expect so many? These are the images on the page.
- Use File Explorer's Back button to return to the view of the folder web project1.
-
Double click on the file home-complete-Lastname-Firstname.html
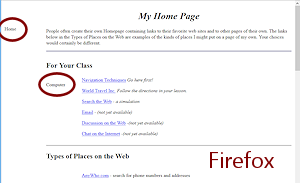
 The page My Home Page opens in
your default browser. It looks nearly the same as the original. Only the background image is missing. Any images that are added using CSS (Cascading Style Sheets) will not be saved.
The page My Home Page opens in
your default browser. It looks nearly the same as the original. Only the background image is missing. Any images that are added using CSS (Cascading Style Sheets) will not be saved.
- Check the Address Bar.
It should show the path to your Class disk's copy. IE:
 Chrome:
 Firefox:
The illustrations show a flash drive named drive J. Yours, of course, may use a different letter. Or you may be saving your files to a hard drive or network folder.
Note: Chrome automatically changes the space in web project1 to %20, which is the code for a space in a URL. That allows web servers that do not allow spaces in file names to find the file.
- Close the tab in your browser that shows the Class disk copy of My Home Page.
Save Web Page, HTML only
- With your browser showing the original page My Home Page, open the Save As dialog again.
If you have not done much since your finished the previous section, the dialog will still show the web project1 folder on your Class disk, but it does not matter this time.
- File
name: Type the path in the File name text box yourself this time,
e:\class\web project1\home-HTMLonly-Lastname-Firstname.htm
Of course 'e' should be the letter of your Class disk and you would use your own actual name for the Firstname and Lastname parts.
- File
type: Select for Save as type: Web page, HTML only
(*.htm, *html)
This saves only the HTML code and no other files.
Click on the Save button.
- In the Address bar of the browser, type the
path
e:\class\web project1\home-HTMLonly-Lastname-Firstname.htm
where e is the drive letter for your Class disk and using your own name.
-
Press ENTER.
Hmm. There are some parts missing here! The images aren't here. That's what happens when you save only the HTML. Each browser shows the missing image locations in a different way.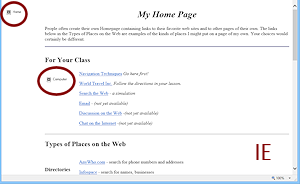 IE: Shows a small icon and the ALT text, if there is room in the space that the image should take up.
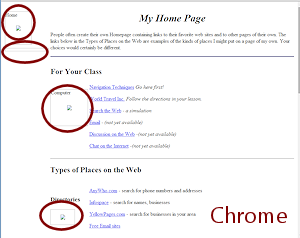 Chrome: Shows a broken image icon and the ALT text inside a rectangle that is the size of the image.
 Firefox: Shows the ALT text where the image should be, but does not show an icon or an outline.
-
Click the Back button to return to the original My Home Page.
Using a Transparent Image
Below the outline for the house image in the 'HTML only' copy of My Home Page, Chrome shows a narrow rectangle for another missing image. No image showed here on the original page. What is it??
This mysterious image is a transparent image used to manage the spacing on the page. The whole page is one giant table. The transparent image keeps the table column on the left wide enough so that all the text in the column on the right is off of the blue border. The image is invisible itself. The rectangle is showing here because the image is missing.
This technique is a sneaky way around the tendency for HTML tables to collapse to the smallest size possible.
IE: Save as Web Archive, single file (MHT format)
IE offers an additional file format, Web Archive, single file. Instead of putting the images into a separate folder, IE can put the images AND the HTML source code into a single file. This makes it very easy to move the page to a different drive.
-
In Internet Explorer, return to the original My Home Page, which has all of the images and background.
- Open the Save As dialog again. (File > Save As...
)
- Save My Home Page again to the web project1 folder, using the name home-singlefile-Lastname-Firstname.mht and the type Web Archive, single file (*.mht) .
-
 Switch back to the File Explorer window and show the web project1 folder
again.
Switch back to the File Explorer window and show the web project1 folder
again.
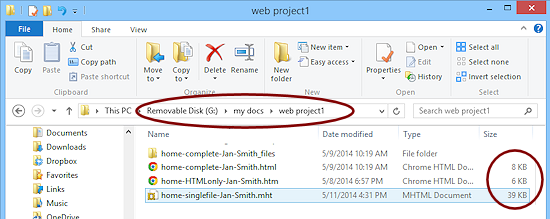
The file home-singlefile-Lastname-Firstname.mht is much larger than home-complete-yourname.htm and home-HTMLonly-yourname.htm. It contains all the images also instead of saving them separately. Of course the 'complete' version has files in a separate folder, too. The MHT version is still bigger than the 'complete' version plus its folder. Bigger, but much easier to move to a new location.
Save an Image
Sometimes you don't need the whole page, just an image on the page.
-
 Right click on the image of the computer on the page My Home Page.
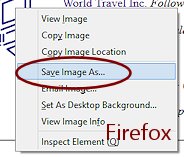
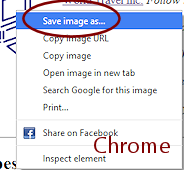
 Choose Save picture as... or Save image as...
The Save dialog appears.
-
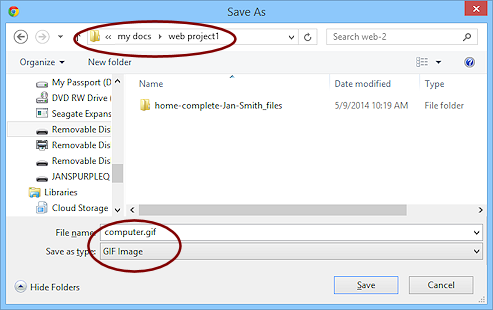 Save to the web project1 folder
with the name and file type that the dialog suggests, computer.gif.
Save to the web project1 folder
with the name and file type that the dialog suggests, computer.gif.
 Open a File Explorer window to the web project1 folder on your Class disk.
The image file joins the copies of the whole page that you made earlier.
(If you are using IE, you have an additional item.)
Save the Background Image
A web page can have an image in the background, underneath the text and other images. This might be a solid block of color or a single large image or a small image that is tiled across the page over and over. The page My Home Page has a background formed from a long, narrow image that is blue on the left end and white to the right. A cropped version shows below. The original is 2000 pixels wide so that it won't repeat horizontally inside the window.
![]()
In previous browser versions, you could right click on an area with no text or other images and the context menu had a choice to save the background image. Chrome does not do this. Microsoft Edge does not either. IE shows the commands but they are unavailable (IE11 on Win8. and Win10). Firefox lets you View Background Image which shows the image in a browser window by itself. You can save from there.
I have not found an explanation for IE's unavailable commands.
|
|
| © 1997-2017 Jan Smith All Rights Reserved |
Site Map What's New |
Privacy Policy Terms of Service Copyright Acknowledgements |
~~ 1 Cor. 10:31 ...whatever you do, do it all for the glory of God. ~~
Last updated: March 22, 2017
Most drives show up in File Explorer only when a device is attached, but some show up in the list even when nothing is attached.
I have had computers with a media card reader. The USB ports that are part of the reader show all the time in File Explorer. But card slots for different kinds of removable media only show in File Explorer when a card is inserted. I don't know why there is a difference. It is confusing!