
Jan's Working with the Web
HTML Code: Page
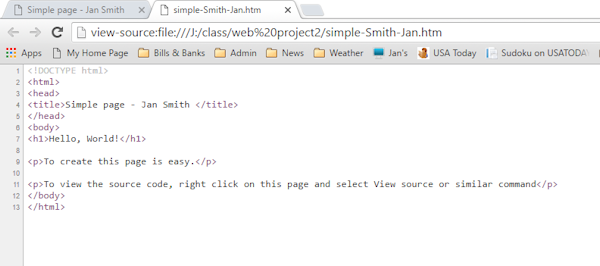
You have now inspected the actual source code for a web page and you have seen how some basic tags work. It is time to try writing your own source code.
You need to use a basic text editor. The directions for this lesson will assume you are using Notepad.
It is important to be able to edit the raw code, even if you usually use a high-end WYSIWYG editor. Sometimes the automation built into these high-end editors is not quite as smart as you wish it was! You will find that you do have to do some things yourself. So it makes sense to get comfortable with working directly with the HTML code.
| |
Step-by-Step: Create a Page |
|
| What you will learn: | to create a simple HTML document to view HTML document in a browser to print from the browser to view source code from the browser to open source code in Notepad to edit the source code to inspect source code of live web page |
Start with: ![]()
![]()
Create a Simple HTML Document
Before you type in the text of the page, you need to create the basic parts of an HTML document. Then you can start entering your headings and paragraphs.
- Open Notepad.
Start > Programs > Accessories > Notepad
(Win8, 8.1) Start screen > type Notepad > click on Notepad
(Win10) Search box on Taskbar > type Notepad > click on Notepad in the results
You might want to put a shortcut to Notepad on your Desktop or pin it to the Task Bar (Win7, 8, 8.1, 10).
- Type the lines below onto the blank page in Notepad (but
replace your name with your own name).
Check your typing carefully! These parts create a blank page that will follow the DOCTYPE rules for HTML 5.
(You can also copy and paste! but put your own name in the TITLE tag.)
<!DOCTYPE html>
<html>
<head>
<title>Simple page - your name</title>
</head>
<body>
</body>
</html>
 Don't forget these basic page parts. Type these required tags
(both opening and closing tags) when you first start your document so you won't forget them. It is especially easy to forget
the closing tags.DOCTYPE:
This tag tells the browser to use the HTML5 rules to interpret your code. There are many other doctype
declarations out there for older standards. If you need to use an older
doctype, be very careful with the spelling and punctuation! Otherwise,
older browsers may get really confused and not use the standard you
expected. TITLE tag: The text in the
Don't forget these basic page parts. Type these required tags
(both opening and closing tags) when you first start your document so you won't forget them. It is especially easy to forget
the closing tags.DOCTYPE:
This tag tells the browser to use the HTML5 rules to interpret your code. There are many other doctype
declarations out there for older standards. If you need to use an older
doctype, be very careful with the spelling and punctuation! Otherwise,
older browsers may get really confused and not use the standard you
expected. TITLE tag: The text in the <title>tag is shown in the browser's title bar or page tab and not on the web page itself. It will also be used as the name for the shortcut to the page in Favorites/Bookmarks if you bookmark the page.Use a TITLE that makes it clear what the page is about. Avoid titles like "Welcome to my Home page" and "Home page" which do not give any information at all.
A search engine's list of results uses your title. The title strongly affects how your page is ranked by some search engines. Make sure the title describes the page accurately.
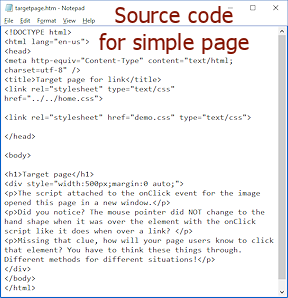
- Type in between the
<body>and</body>tags the following lines to create a heading and 3 paragraphs:
<h1>Hello, World!</h1>
<p>To create this page is easy. </p>
<p>To view the source code, right click on this page and select View source or similar command.</p>
(Your text may wrap differently depending on the size of the window and whether Text Wrap is turned on or off.)
 Closing P tag: The
 <p>tag does not actually require a closing</p>tag under HTML standards. But it is a good idea to include the closing tag. Without the closing tag, in complex pages you sometimes get unexpected formatting of later text.  Insert your Class disk, if necessary.
- From the menu select > and type in the path
g:\class\web project2\simple-Lastname-Firstname.htm
where you should replace 'g' with the letter for your own drive. Replace Firstname and Lastname with your own name, of course.
Or, you can navigate in the Save As dialog to the correct folder.The folders in the path should already exist if you have done the previous lessons. If they do not, you will need to create them.
File
Extension: An HTML document must use
an extension that browsers recognize. The most common extensions are .htm and .html. Pages that are generated by the server may
have a different extension.
- Close Notepad.
View HTML Document in Browser
To see what you have created, you must view the document in a browser.
- Open your browser.
- Type in the address bar the path to the file you just saved:
g:\class\web project2\simple-Lastname-Firstname.htm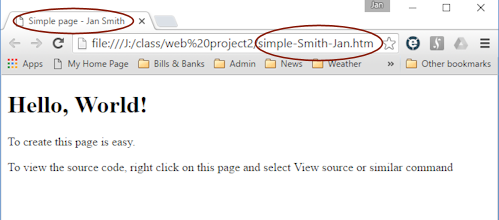 The
page displays using the default fonts for your browser.
The
page displays using the default fonts for your browser. Notice the title on the tab and the file name in the Address bar.
Print from Browser
You learned to print from your browser in Browser Basics: Printing.
 Open Print Preview.
 IE: Right
click > Print Preview
IE: Right
click > Print Preview Chrome: Right click > Print...
 Firefox:
  > Print..Always
preview before printing: It may take
a lot more sheets of paper than you think. Parts may not fit on the
page.
> Print..Always
preview before printing: It may take
a lot more sheets of paper than you think. Parts may not fit on the
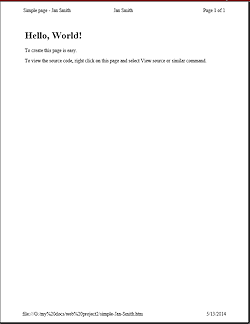
page.The illustration shows the print preview from IE. The header and footer are arranged differently in Chrome and Firefox. Your browser should still have the settings you made in Browser Basics: Printing. Chrome does not yet [June, 2016] allow changes to what prints in the header and footer.
Be sure your own name is in the Title instead of the words "your name". The TITLE text will print in the page header, by default.
- If necessary, open the Page Setup dialog where you can fix the margins and what is in the header and footer. Save your changes.
-
 Print.
The preview closes and you are back in the browser.
View Source Code from Browser
Some old browsers opened the source code in Notepad. Current browsers open the source code in a new browser window or in a pane. You cannot edit code when you view source code. The old way was better for a web page author!
- Right click on the page and select View source or View page source.
A new window opens and shows the code for the page. Each browser shows the code a bit differently. Chrome and Firefox use their own internal viewer. IE also has an internal viewer but may open the source code in Notepad or another editor.
 Problem: Some of the lines of text extend
out of view to the right in the window
Problem: Some of the lines of text extend
out of view to the right in the window
Solution: Resize the window or turn on text wrapping.How to turn on text wrapping:
IE: Click Word Wrap button  on the white toolbar Chrome: Word Wrap is on by default. Firefox: View > Wrap long linesPage
Source: You can always view the source code for any HTML page that you can view in your browser. This is a good way
to learn about writing HTML pages. When you see a page that does
something interesting, look at the source code to see how it was done.
on the white toolbar Chrome: Word Wrap is on by default. Firefox: View > Wrap long linesPage
Source: You can always view the source code for any HTML page that you can view in your browser. This is a good way
to learn about writing HTML pages. When you see a page that does
something interesting, look at the source code to see how it was done.Some actions, like scoring quizzes, may be handled by the server that hosts the page, using a server-side script. You will not be able to see how those actions are managed.
Pages that include advertising will also have seriously messy-looking source code.
A browser window that shows the source code will not let you edit, only copy and paste somewhere else. Not fun! You cannot save changes back to the web server unless you have the username and password.
- Close the source code window.
Open Source Code in Notepad
You will have to open your source code in a text editor to make changes.
- Open a File Explorer window to your Class disk.
-
Right click on simple-Lastname-Firstname.htm and from the context menu select
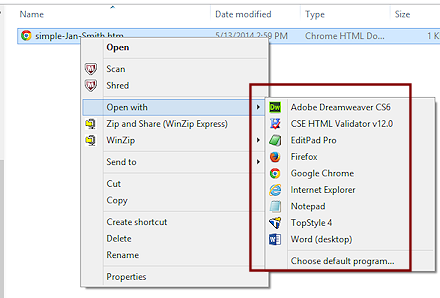 The menu expands to show programs installed on your computer that can open an HTML file.
The menu includes browsers, which will not let you edit the page!
You probably have different items on your list than what is in the illustration.
- Select .
Notepad shows your simple page again.
Edit Source Code
Now you get to practice editing the code.
- Delete the two paragraphs along with their paragraph
tags.
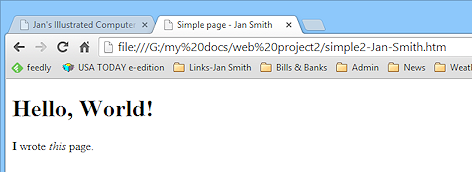
- Type
<p><b>I</b> wrote <i>this</i> page.</p>below the line<h1>Hello, World!</h1>.
- With the Class disk connected, select from the
menu >
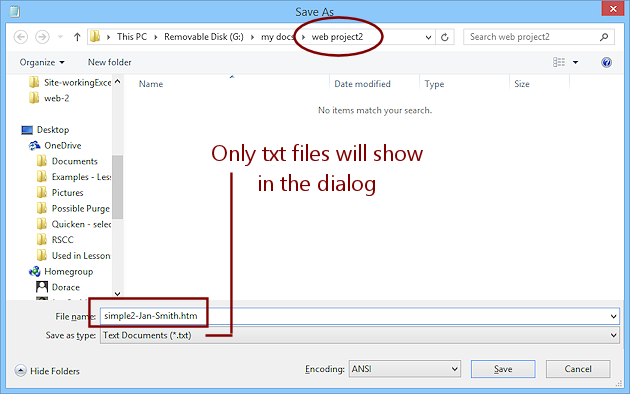
- In the dialog that appears, save your changed document in the web project2 folder as
simple2-Lastname-Firstname.htm .Location of saved file: Be careful to check where you
are saving your page. The last location you used will usually be remembered. Is that where you want this file to go?
- Close Notepad.
- Switch to your browser, which is still showing simple-Lastname-Firstname.htm.
- In the address bar, change the
name of the file to simple2-Lastname-Firstname.htm so that the
path reads something like g:\class\web project2\simple2-Lastname-Firstname.htm but with the path to your own flash drive or wherever you saved your
documents for this class.
-
 Press the ENTER key.
The browser loads your revised document in the original window.
- Print the new document from the browser.
Congratulate yourself! You have just written an HTML document.
 Experiment: Inspect Source of Live Web Page
The page that you just wrote is truly simple. What's out there on the Web is not usually that simple!
-
 In a different browser window, navigate to the
following page that looks simple:
In a different browser window, navigate to the
following page that looks simple:
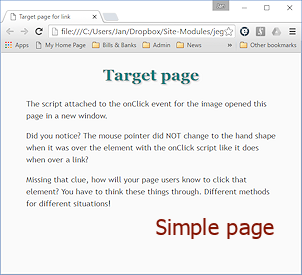
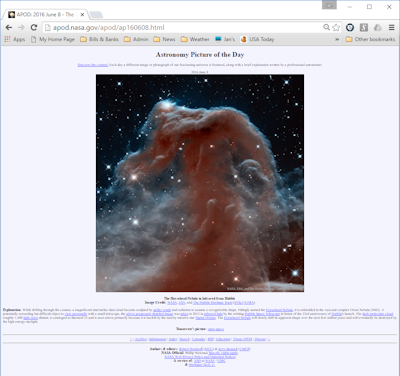
NASA's Astronomy Picture of the Day for January 20, 2012.- View its page source.
What is on this page changes every day. Most of the images are beautiful!
-
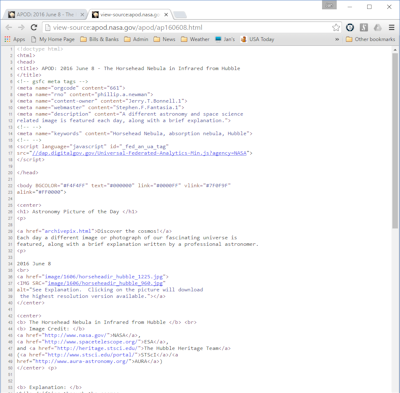 Does the source code look simple?
 - How many lines down do you have to go to get to the BODY tag?
- Does this source code feel 'simple' to you?
It's actually not bad at all as web pages go. It is easy to read because of the spacing included. It does not have any style sheets, tables, lists, linked files, or scripts. Very plain vanilla.
This page does contain a coding mistake or two. At least the folks in charge of the standards would say so! But it displays just fine.
- View its page source.
-
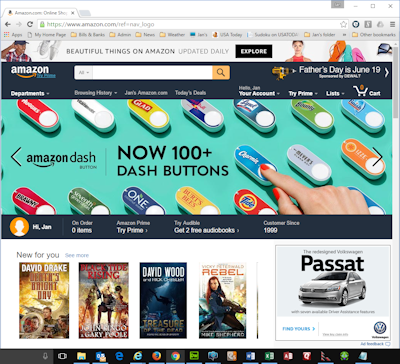 Navigate to a page that looks complex like a shopping site, a news page, or a social networking page and view its page source.
 The example here is from Amazon. The main image rotates through three different images. The black bar in the middle greets you by name if you have an Amazon account and reminds you of current orders. Is that good or creepy?
- Can you tell anything about at all about how the page is constructed?
- How many lines down do you
have to go to get to the BODY tag? In the example it was line 280.
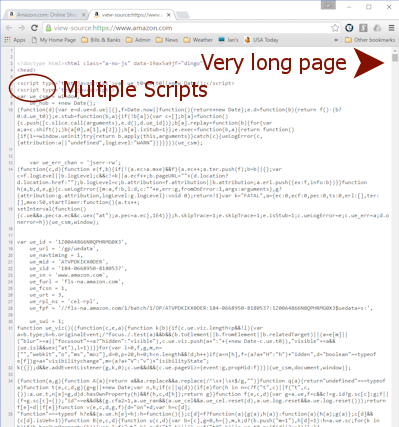 The last line is #6005. That's one long page of HTML code!
 - Once a page gets to
a certain level of complexity you really do need HTML editing
software. Happily, we won't get that complicated in this course!
Error: Order of Closing Tags
It is easy to get your closing tags out of order when tags are nested inside other tags. Let's go over this concept again...
Rule on Nesting: Nested tags must be closed in reverse order from how they were opened.
Example: To display the following sentence- This is hard!
Correct: <p>This is <b><i>hard!</i></b></p> Closed in opposite order as opened
Wrong: <p>This is <b><i>hard!</b></i></p> B
and I closed
in the same order as opened.
Wrong: <p>This is <b><i>hard!</p></i></b> P tag closed before the B and I elements closed.
Wrong: <p>This is <b><i>hard!</p></b></i> All closed out of order.
![]() Browsers
try to help: Your
browser will
try to figure out what you should have written, but some browsers (the old Netscape
in particular) may not be as forgiving. Even in helpful browsers bad nesting can sometimes make
parts of the document disappear!
Browsers
try to help: Your
browser will
try to figure out what you should have written, but some browsers (the old Netscape
in particular) may not be as forgiving. Even in helpful browsers bad nesting can sometimes make
parts of the document disappear!
|
|
| © 1997-2017 Jan Smith All Rights Reserved |
Site Map What's New |
Privacy Policy Terms of Service Copyright Acknowledgements |
~~ 1 Cor. 10:31 ...whatever you do, do it all for the glory of God. ~~
Last updated: March 22, 2017