
Jan's Working with the Web
Images: Insert
Inserting an image looks simple. There are some pitfalls, however, that can sabotage you.
Image Pitfalls
- Moving the web page: Breaks the link to the image. Move the image files also or else change the paths to where the images are.
This is different from word processing documents which include a copy of the image inside the document's file.
-
Changing the width and height of an image: Just changing the values for width and height in the IMG tag does not change the size of the image file itself. The whole file downloads, no matter how small it looks on the page.
-
Overwriting original image file: Some WYSIWYG editors will "help you out" when you resize an image with the mouse. When you save the page, the program resizes the image and overwrites the original image. The original image is gone forever. The resized image may not look as good as you expected! Do you have a copy somewhere else?
| |
Step-by-Step: Insert Image |
|
| What you will learn: | to copy image files to insert an image using a relative path to find out the dimensions of the image to resize an image with the IMG tag (not a good plan!) |
Start with: ![]() hector6-Lastname-Firstname.htm,
resource files
hector6-Lastname-Firstname.htm,
resource files
![]() Word
Wrap depends on window size: With
Word Wrap turned on, in Notepad or your text editor, your text will likely wrap differently from what is
shown in the illustrations. That's OK.
Word
Wrap depends on window size: With
Word Wrap turned on, in Notepad or your text editor, your text will likely wrap differently from what is
shown in the illustrations. That's OK.
Copy Image Files
You will add some images on Hector's page. You must know the path to the image files in order to use them on an HTML page.
To keep things simple, you will first copy a folder of images for these lessons into the web project2folder on your Class disk, where you are saving the different versions of the page.
![]() How to handle a full disk
How to handle a full disk
At some point you may need to remove some files from your Class disk to
make more room or else start using a new flash drive. If you want to start using a new
disk, copy hector7-Lastname-Firstname.htm to your new disk.
 With Notepad showing hector6-Lastname-Firstname.htm, from the menu select > .
- Save with the name hector7-Lastname-Firstname.htm in the web project2 folder on
your Class disk.
Now your changes will not overwrite the previous version and your images will use relative paths instead of full paths.  On your Class disk, create a new folder inside web project2, called HTML.
There are now two subfolders in web project2.
-
 Download the resource files
 for HTML Basics. Extract the
files to the new folder.
for HTML Basics. Extract the
files to the new folder. You may get one or more messages about copying a file without all of its properties. Let those images be copied anyway.
 Icon for HTML page: What icon shows by a web page in the list of files will depend on what your default browser is. The illustration shows Chrome was the default browser when the screen shot was taken.
Insert Image: Relative Path
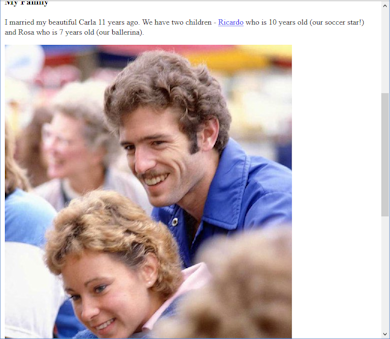
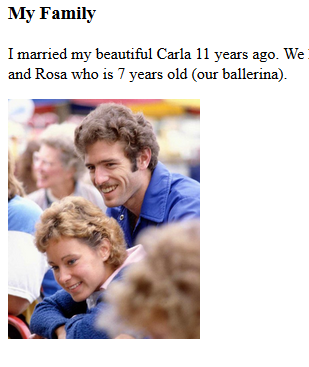
You will insert a photo of Hector and his wife Carla. (Technically, an image is 'linked' instead of 'inserted'.)
- Move your cursor to the right of the closing paragraph tag in the section My Family and press ENTER to create a new line.
 Type the tag exactly
as shown below (Yes, there is an error):
Type the tag exactly
as shown below (Yes, there is an error):
<img src="HTML/carl.jpg">
This image should be a photo of Hector and his wife Carla.
This tag uses a relative path to the file, which tells the browser how to get to the image file:
"Starting from the folder containing the current HTML document, go down to the folder HTML and then find the image carl.jpg in that folder."Forward Slash / or Back Slash \:
You should use a forward slash after the folder name, HTML/carl.jpg . All Internet addresses use a forward slash. Your browser may automatically change forward slashes to back slashes when the path is to your own computer or a removable drive. You should still use Internet style addresses in your web pages.-
Save.
[hector7-Lastname-Firstname.htm ]
 Switch to your browser and load the page hector7-Lastname-Firstname.htm
You can type in the full path to the page on your Class disk or edit the one that is there if hector6-Lastname-Firstname.htm is still showing.
Whoops. There is no image.
(Each browser shows this in a different way.)This means something about the path must be wrong. In this case, it is the filename that is not right.
-
 Switch back to Notepad.
 - Edit the path so that the filename is carla.jpg
Spelling is so important!
- Save.
[hector7-Lastname-Firstname.htm]
- Switch back to the browser.
- Refresh.
Much better! Cute couple. But the image is quite large.
(No, this is not a photo of anyone I know! It came from a clip art collection.)
Find and Use Image Dimensions
When the IMG tag does not include the width and height of the image, the browser does not know how much space to allow for the image. The browser lays out the text first, downloads the image file, and then rearranges the page to make room for the image. The page can jump a lot if there the image is large or there are several images. Very disconcerting! Plus, it slows down the display of the page if you make the browser do all this extra calculating!
File Explorer offers just the information you need about an image.
- Open File Explorer and navigate to your Class disk and the HTML files
you copied there.
- Find the file carla.jpg
- Find the dimensions of the image:
 WinXP: Hover over the thumbnail or the file name.
A screen tip shows the dimensions and file size. This lovely feature is missing in later versions.


 Vista, Win7, Win8, Win8.1, Win10: Click on the filename or thumbnail.
The Dimensions and the Size show in the Details pane. This is on the bottom of the window in Vista and Win7 and on the right side in Windows 8, 8.1, and 10.
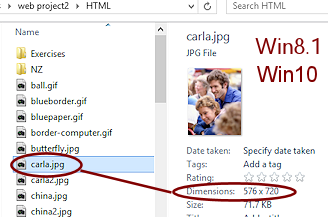
This image is 576 pixel wide and 720 pixels tall. The file size is 71.7 KB.
 Problem: Vista, Win7: Dimension or Size don't show in Details pane
Solution: Enlarge your window. More Details will show in the Details area across the bottom. Problem: Win8, Win8.1, Win10: Detail pane does not show
On the File Explorer ribbon in the View tab, click on the Details pane button. - Return to Notepad.
- Edit the IMG tag to include the width and height that you found:
<img src="HTML/carla.jpg" width="576" height="720">
- Save.
[hector7-Lastname-Firstname.htm]
- Switch back to the browser and Refresh by pressing the F5 key.
The page reloads. The image did not change if you entered the correct width and height. You probably cannot tell that the page loads faster and without jumping since its a small page so far. In a page with many images, the difference is very noticeable!
Resize with IMG Width and Height
Some people still put large images onto web pages and then revise the width and height to make the picture smaller. The large file still has to download! Not a good plan. Plus, changing the width and height can reduce the quality of the picture into the 'ugly' category.
-
 Switch back to Notepad.
 -
Edit the IMG tag, changing width and height to 1/3 of the original:
<img src="HTML/carla.jpg" width="192" height="240">
- Save.
[hector7-Lastname-Firstname.htm]
- Switch back to the browser and Refresh.
The image looks pretty good at this smaller size even though the browser is doing the work of resizing.
Some images do not downsize well at all. Only vector images enlarge well.
|
|
| © 1997-2017 Jan Smith All Rights Reserved |
Site Map What's New |
Privacy Policy Terms of Service Copyright Acknowledgements |
~~ 1 Cor. 10:31 ...whatever you do, do it all for the glory of God. ~~
Last updated: March 22, 2017