
Jan's Working with Windows:
Control Pointer
There are several things that you can adjust about the way your pointing device behaves. There are currently [Oct. 2015] two dialogs that you can use in Windows 10 -the new Modern/Metro style and Classic style.
Classic style dialogs are still widely used, even in Windows 10, especially for advanced settings. There are indications that future updates for Windows 10 will move these Control Panel items into Settings with the Modern style.
The new style for a dialog is especially helpful on a touchscreen.
You will experiment in the Step-by-Step below until you find settings that let you use the mouse or touchpad or touchscreen comfortably.
- Settings: Devices > Mouse
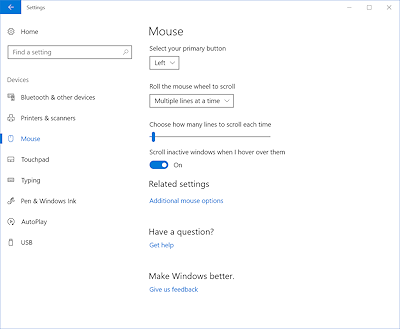
The Settings dialog and its children show the most common settings in this style. The Mouse Properties dialog opens when you click the link 'Additional mouse options'.
Touchpad:
A touchpad must be a 'precision touchpad' for the new gestures for Windows 10
 to work. It might not show up in the dialog at all.
 - Control Panel: Mouse Properties

Additional Mouse Options: Mouse Properties dialog
Your favorite pointing device may have more features than a standard mouse has. For example, you may be able to adjust the pressure sensitivity of a touchpad. Your device may have extra buttons that can be programmed. To manage these extra features, there is probably an extra dialog or an extra tab in the Mouse Properties dialog.
Example: Manufacturer's Settings dialog
Logitech, for example, has a dialog, SetPoint Settings, for managing extra features in a mouse, trackball, or touchpad. Below are illustrations for a wireless trackball and a wireless touchpad. Other manufacturers may have their own dialogs.
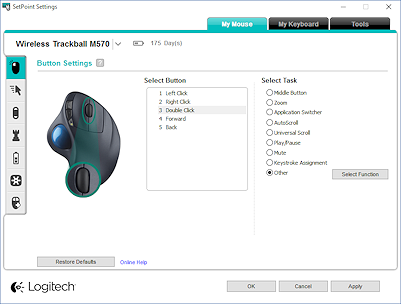
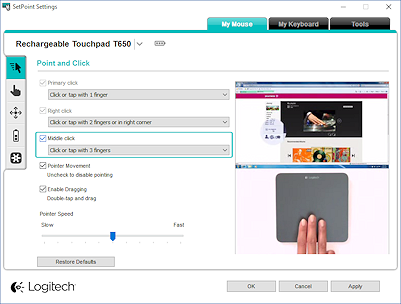
My own Logitech wireless trackball and wireless touchpad connect to the computer with the same Unifying Receiver. Windows does not see that there are two devices!
Classic mouse vs Optical mouse:
Older classic style mice that use a roller ball to sense the motion of the
mouse need to be placed on a mouse pad. Such a pad has the right amount of texture to let the roller ball roll
smoothly without sliding. The disadvantage to this old type of mouse is that is needs to be cleaned regular to keep the ball rolling smoothly.
An optical mouse uses a laser instead of a roller ball. It does not usually need to be on a mouse pad. But it does need a surface with a visual 'texture'.
Customizing and User Accounts:
Any customizing that you do to Windows settings applies only to the current user. So, if you have your own logon account, you can rearrange and customize all day and other users won't be affected at all!
| |
Step-by-Step: The Pointer |
|
| What you will learn: | to move the pointer on the screen with your pointing device to click, double-click, right click, and drag to use Classic and Modern styles for dialogs to Search for the Control Panel to adjust pointing device settings using: check box, slide control, command button |
Start with: ![]() Desktop and Taskbar showing
Desktop and Taskbar showing
Move the Pointer
The directions in this lesson assume that you are using a normal mouse to move the pointer ![]() on the screen. If you are using another type of pointing device (trackball, touchpad, or touchscreen), you will need to interpret the directions to make sense for your device. For example, 'tap' instead of 'click' for a touchpad or touchscreen. Or 'roll the ball' instead of 'move the mouse' for a trackball. The lesson Using the Mouse
on the screen. If you are using another type of pointing device (trackball, touchpad, or touchscreen), you will need to interpret the directions to make sense for your device. For example, 'tap' instead of 'click' for a touchpad or touchscreen. Or 'roll the ball' instead of 'move the mouse' for a trackball. The lesson Using the Mouse![]() has explanations and practice for these actions.
has explanations and practice for these actions.
- Turn on your computer if it is not
already on.
[Hmm. If you are reading this on the screen, I guess your computer is definitely on!]
- Experiment with moving the pointer around on the screen.
Get a feel how what you do with the pointing device itself affects the pointer motion on the screen. - Move the pointer slowly and then quickly.
With a quick motion, the pointer may accelerate faster than your hand or the mouse. This is helpful when moving all the way across the screen, especially large screens.
Click and Right Click
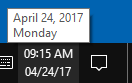 Move the pointer over the time, displayed at the far right of the Taskbar.
As you hover over the time, the day and date pop up.
-
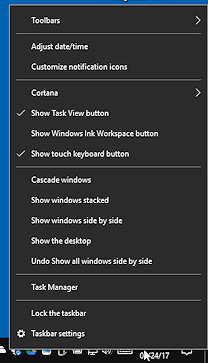
 Without shifting the pointer position, click the right mouse button.
 A context menu appears. It may may have different colors and even somewhat different entries, depending on the personalizations that have been applied and the exact version of Windows 10.
Read through the choices. Many of these change the look or behavior of your Desktop.
You can lock the Taskbar so that it cannot be moved around. This also keeps the Notification Area from being resized.
For the next section you need a movable Taskbar.
-
If there is a check mark beside the menu command Lock the Taskbar ,
 click on the command with the left mouse button, to unlock the Taskbar.
The menu will close immediately.
Click and Drag
Be sure that the Taskbar is not locked. (See step above)
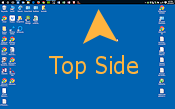
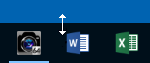 Slowly move the pointer to the top edge of the Taskbar.
It will change to the Vertical Resize shape . If you move too fast, you may
miss the change.
. If you move too fast, you may
miss the change.-
 While the pointer shows this shape, hold the left mouse button down and
  drag upwards.
The Taskbar expands upwards. - Now drag back down to the bottom of the screen and release the mouse button.
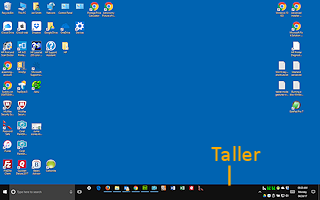
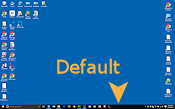
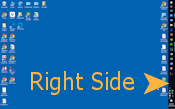
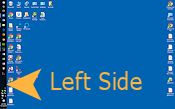
The Taskbar returns to the default height. - Point to the Taskbar in a blank area.
- While the pointer
 has its normal shape, drag the Taskbar again over to the right of the screen.
Wow! Suddenly the whole thing moves and the Desktop resizes! Keep dragging to the top and over to the left of the screen. There is a position to make everyone happy!
Bottom Right Top Left Now, you have seen the pointer change shape; you have clicked and dragged. What skills you have!
If you wish, you can lock the Taskbar back again now.
Device Settings
There are pointing device settings in the Settings dialog (new style) and also in the Mouse Properties dialog (classic style). The Mouse Properties may affect other pointing devices also. You have another opportunity to practice!
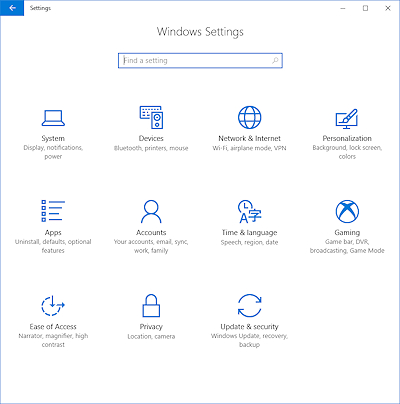 Open the Settings dialog with one of the methods below:
- Click on Start and then on Settings.
( Start >
  Settings )
 - In the Taskbar Search box, type settings and select Settings - Trusted Windows Store app.
- Click the Settings icon if it is pinned to the Taskbar or is on the Desktop.
The Settings window opens.
- Click on 'Devices' in the top row.
The window changes to show the Devices list on the right and a menu about devices on the left.
- Click on 'Mouse' in the Devices menu.
A few settings for the mouse appear on the right.The settings that are currently available here [April 2017] are limited. In the future the other mouse settings may be moved to this dialog from the Control Panel's Mouse Properties dialog.
New feature: 'Scroll inactive windows when I hover over them' is very useful when you often work with overlapping windows.
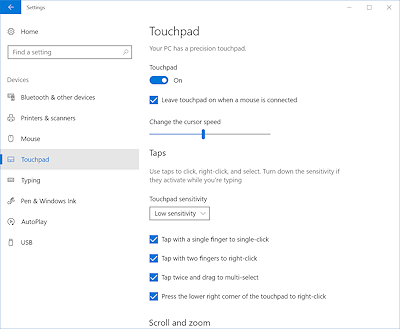
Touchpad: Shows in the Devices list only when the computer has a touchpad. My external Logitech touchpad has its settings in a separate SetPoint dialog.
-
Click on the link 'Additional mouse options'.
The classic style Mouse Properties dialog opens.The illustration includes a tab for SetPoint Settings, which is for Logitech pointing devices. You may not have that tab.
- Close the dialog by clicking its Close button on the Title bar.
We will practice another way to open this dialog before working with it.
Search for Control Panel
The Control Panel has shortcut icons for many features, but unlike some versions of Windows, Windows 10 does not come with a shortcut to the Control Panel on the Start menu. You will use Windows Search to open the Control Panel.
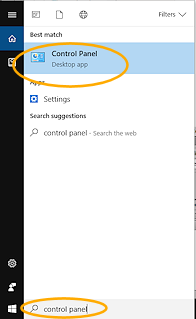 In the Search box on the Taskbar, type control panel.
Search results appear above the box.
Your results may not look quite like the illustration.- Click on Control Panel (Desktop app).
The Control Panel window will open. What you see depends partly on what hardware and software you have installed on the computer.
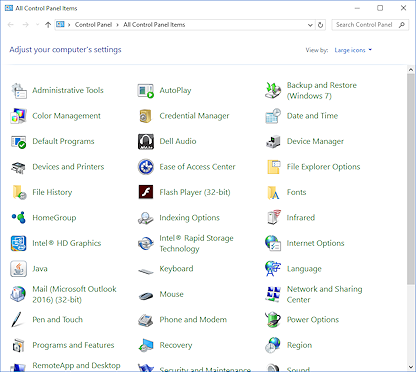
Control Panel with Large Icons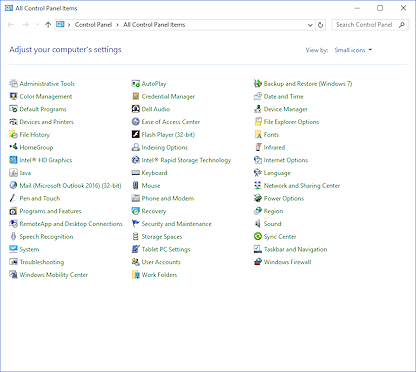
Control Panel with Small IconsThe View by drop list lets you change from large icons to small icons. The next time you open Control Panel, Windows will display the icons in the size used the last time.
The illustration has some icons for apps that did not come with Windows, so you may not see those:
- Hardware: Dell Audio, Intel HD Graphics, Intel Rapid Storage Technology,
- Software: Flash Player, Java, Mail (Microsoft Outlook 2016)(32-bit)
-
Inspect the icons in the Control Panel.
Be sure to scroll the window to see any icons that are out of sight at the bottom!
How are the items arranged? The default is alphabetically across and then drop down a row and go across again. Did you expect that?Is it obvious to you what each of these items would control? We will not work with all of these dialogs in these lessons.
Mouse Properties Dialog
Buttons Tab: Check Box, Double-Click, Slide Control
The Mouse Properties dialog lets you control several behaviors of your pointing device. Some settings will apply to any pointing device, not just a mouse. There are several different kinds of inputs to practice with. The mouse image may be different in your dialog, depending on your mouse you are using and the version of Windows 10.
-
Move your pointer to the Mouse icon
 in the Control Panel, until the pointer changes to the Hand shape
  .
.The icon image may be different if your mouse has its own software.
 Click.
A dialog opens that lets you change some of the behaviors of the mouse.
The illustration shows a dialog with a tab for SetPoint Settings. You will see this tab only if you have a Logitech pointing device and installed the SetPoint software.
Click on the Buttons tab, if it is not already selected.
The Mouse Properties dialog allows you to set several characteristics about your mouse's behavior.
- Check Box:
- Click in the check box to the left of 'Switch primary and secondary buttons'.
A check mark appears in the box, which turns on the feature. The picture of the mouse changes to put the blue highlight on the current primary button. This is very helpful to people who are left-handed. - Click in the box again to change the setting back to the default left button.
If you are left-handed, you may want to keep the switch!
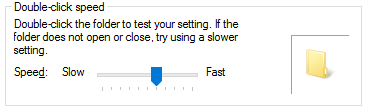 Test your ability to double-click in the folder icon in the test area in the
dialog.
Test your ability to double-click in the folder icon in the test area in the
dialog.
If you succeed in double-clicking on the folder, the image will change!Your pointing device may use its own dialog. You may have to look around to find the test area.
- Slide Control:
- Move the pointer over the blue marker on the slide.
- Drag to move the slider.
 Double-click in the test area
again.
Double-click in the test area
again.
Is this easier or harder?
Experiment to find a double-click speed that is comfortable for you.
[Note: if you are on a network or shared computer, you may not be able to keep your changes for your next session.]
Mouse Properties Dialog
Pointer Options Tab: Slide Control, Check Box, Command Button
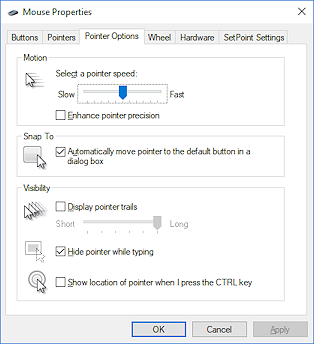 Click on the tab labeled Pointer Options.
Here is where you can change how the pointer moves across the screen.- Slide Control:
- Move the pointer over the blue marker on the slide in the Motion section at the top.
- Drag to move the slider.
The slider can stop only at a tick mark. Some sliders have more marks than others.
- Test your mouse's motion.
Try different speeds on the slide control until you find a speed that is comfortable. - Command Button: Click the Apply button.
The changes you have made so far are saved without closing the dialog - Check Box: Click on the check box labeled "Show pointer trails". Move your mouse around. Try different trail lengths by moving the slide
from "Short" to "Long".
Do you like pointer trails? - If you like pointer trails, click the Apply button.
If you don't, click the box 'Display pointer trails' to uncheck it. - Command Button: Pick one of the command buttons to close the Mouse Properties dialog box:
- Click on the OK button if you made changes that you want
to keep.
OR - Click on the Cancel button if you do not want to keep the
changes you made since you last clicked the Apply button.
Leave the Control Panel open for the next Step-by-Step.
You have now seen both styles for dialogs. Which do you like best? Is it because you are used to it? Or is there another reason?
|
|
| © 1997-2017 Jan Smith All Rights Reserved |
Site Map What's New |
Privacy Policy Terms of Service Copyright Acknowledgements |
~~ 1 Cor. 10:31 ...whatever you do, do it all for the glory of God. ~~
Last updated: April 25, 2017