
Jan's Working with Words
AutoTools: Format Whole Doc: Style Set
 The paragraph and character
styles that you see in the Style Gallery form a Quick Style
Set. The template that you chose when you created the document
included a set of styles as well as a color theme, a font theme, and an
effects theme. Word
comes with some other style sets. You can even create your own.
The paragraph and character
styles that you see in the Style Gallery form a Quick Style
Set. The template that you chose when you created the document
included a set of styles as well as a color theme, a font theme, and an
effects theme. Word
comes with some other style sets. You can even create your own.
The names of the style sets are not very helpful. Live Preview, however, works and that IS very helpful.
![]() Manually
applied formatting: If you apply formatting to text or
paragraphs directly and then select a new style set, your changes
may or may not be kept. It depends on whether or not you used existing
styles or themes. For example, if you change the font of Heading 2 to the
other theme font, then that font will change to the matching theme font in your
new style set. But, if you chose a font that is not a theme font, the font
will not change when you change to a new style set.
Manually
applied formatting: If you apply formatting to text or
paragraphs directly and then select a new style set, your changes
may or may not be kept. It depends on whether or not you used existing
styles or themes. For example, if you change the font of Heading 2 to the
other theme font, then that font will change to the matching theme font in your
new style set. But, if you chose a font that is not a theme font, the font
will not change when you change to a new style set.
Step-by-Step: Style Set |
|
| What you will learn: | to apply a different style set to make changes to styles to save changes to styles to save revised styles as a new style set |
Start with: ![]() , trip_planner4-Lastname-Firstname.docx
, trip_planner4-Lastname-Firstname.docx
Remove Blank Lines
It is probably clear to you now that the remaining blank lines that AutoFormat did not remove are not doing anything important. Let's get rid of them!
- Delete the following blank lines:
- 2 blank lines after the subtitles.
- 2 blank lines after the table
- blank lines after the lists for Package 1, Package 2, and Package 3.
- blank line above Name _____________
- 2 blank lines above last text paragraph
- 2 blank lines below last text paragraph
-
 Save as: trip_planner5-Lastname-Firstname.docx
- Maximize your Word window.
- On the Status bar, slide the Zoom slider until you can see all three pages.
Apply a Different Style Set
- Click in the document to be sure nothing is
selected.
- Inspect the available style sets:

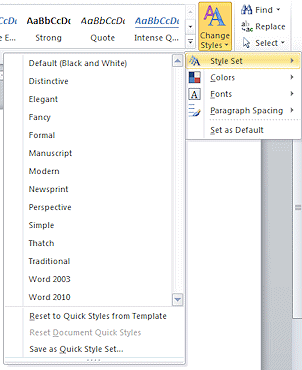
 Word 2007, 2010:
 - On
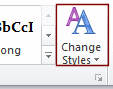
the Home tab in the Styles tab group, click on the button Change Styles.
A menu appears. Be careful to click on the button and not on the Dialog Box Launcher button just below it. - Click on Style Set in the menu.
A list of available style sets appears.
There are no thumbnails.
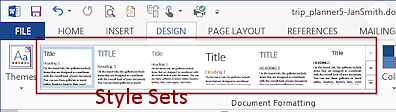

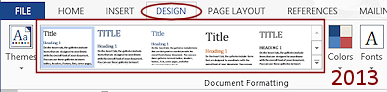
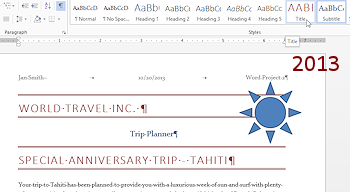
 Word 2013, 2016: On the Design tab in the Document Formatting tab group, look at the gallery of style sets.
- On
the Home tab in the Styles tab group, click on the button Change Styles.
-
 Experiment: Style Sets
Hover over each of the style sets in the list. Wait for a second or two. Live Preview will show what your document will look like if you choose this set.When you are ready to continue...
-
Click on the style set named below:
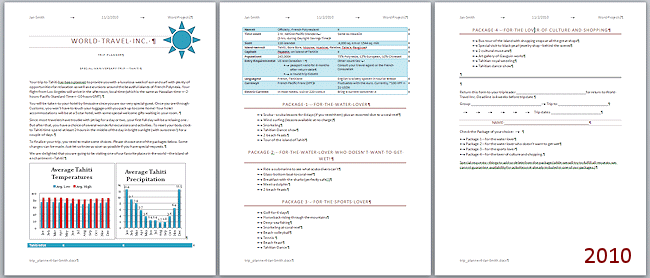
(You will be creating your own styles shortly.) Word 2007, 2010: Formal Word 2013, 2016: Centered This set is not perfect, but it's a start on creating an attractive set of styles for this particular document.
 What
issues to you see so far?
What
issues to you see so far?
Here are some of the things you will need to fix.
- The border lines around the title show through the transparent parts of the shape at the right.
- Package 2 title line is wrapping one word onto a new line
- Word 2007, 2010:
- AutoFormat applied a distracting border to the Name line.
- AutoFormat trashed the check boxes for which package the traveler wants to
choose. The customers need
a check box!
- Word 2013, 2016:
AutoFormat applied a heading style on the last page to the first item in the list with check boxes. That makes it look quite different from the rest of the list.
- Save.
[trip_planner5-Lastname-Firstname.docx]
Change Title Style
You will make some changes to adjust the look. You will save your changes to the Title style in the style set.
- Select the Title.
- On the Home tab, change the alignment to Left.
-
Word 2013, 2016: Changes:
Font Size = 22 pt
Color = Red, Accent 2, Darker 25% - Click the arrow on the Borders button
 to open the menu.
(The icon on the button shows what was used last. The illustration shows the icon for the dialog.)
- Click on Borders and
Shading... .
The dialog opens to the Borders tab.
-
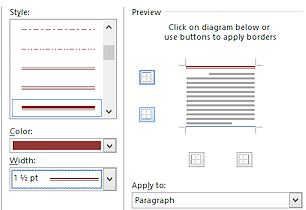 Change:
- Apply to: Paragraph
- Style = double line with the top line wider
- Color = Red, Accent 2, Darker 25%
- Width = 1½ pt.
- Click in the preview on the top border.
The new border is applied to the top of the preview.
-
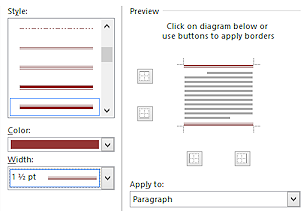 Change:
- Style = double line with the bottom line wider
- Color = Red, Accent 2, Darker 25%
- Width = 1½ pt.
- Click on the preview in the dialog on the bottom border.
The new border is applied to the bottom of the preview.
-
Click on OK to close the dialog and apply the border in the document.

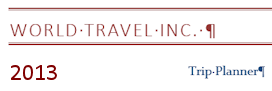
Be aware that screen shots that are reduced in size may not show the double borders clearly.
- Save.
[trip_planner5-Lastname-Firstname.docx]
Update Style to Match Selection
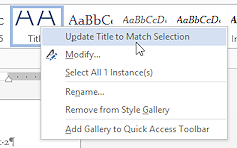 On the Home ribbon tab, right click on the Title style in the gallery of styles.
- From the menu, click on Update Title to Match Selection.
The menu closes and the Styles Gallery updates the thumbnail.
But wait! The thumbnail shows the text in red now, if you look carefully, but you cannot see the borders or the centering. The font size is too large for those features to show in the thumbnail.
How can you check to be sure your changes are in the style now? Let's use Live Preview on a different paragraph.
- Experiment: Style with borders
- Click on another paragraph besides the title or the first subtitle.
-
Hover over the Title style in the Style Gallery but do not click on it.
Live Preview changes that paragraph! Yes, the borders are definitely there!
- Try this with other paragraphs in the document.
 Now try Live Preview on the first subtitle, Trip Planner. Word applies the borders to the combination! Did you expect that?
- Move your mouse away from the Style Gallery to leave Live Preview.
- Save.
[trip_planner5-Lastname-Firstname.docx]
Change and Save Other Styles
Similarly to what you did for the Title style, you will now make changes and save the changes to the underlying paragraph style. Since the underlying templates were different, you will be making somewhat different changes, depending on which version you are working with. The resulting document will look much the same.. eventually. At least that is the goal!
-
 Subtitle:
Click in the first subtitle, Trip Planner, and make the following changes:- Alignment = Left
- Space After = 12 pt.
(Home ribbon in the Paragraph tab group, click the dialog launcher to open the Paragraph dialog)
-
Word 2013, 2016:
- Select the subtitle and change Font to Calibri Light at font size 14 pt.
- On the Home ribbon tab, click the dialog launcher for the Font tab group.
The Font dialog opens. - Click the box in the Font dialog beside All Caps.
 Change Case button: If you use the Change Case button on the Home ribbon tab to make the selected text All Caps, the change is not saved to the style when you update. Unexpected!
- Update the Subtitle style to match the selection
The second subtitle changes to match automatically.
- Heading 1:
 Select the line that starts Package 1,
which is in Heading 1 style, and make the following changes:
Select the line that starts Package 1,
which is in Heading 1 style, and make the following changes:
- Font Size = 13 pt.
(Type 13 in the Font Size box on the Home tab and press ENTER.) - Alignment = Left
-
Word 2013, 2016: All Caps in Font dialog
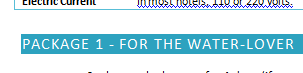
- Shading, picking from the top row of theme colors:
Word 2007, 2010: Turquoise, Accent 1 Word 2013, 2016: Aqua, Accent 5
- Apply Borders = No Borders
- Change font color to White, Background 1 - in the top row of theme colors.
- Update the Heading 1 style to match the selection.
The other Heading 1 paragraphs change to match the new formatting. In particular, the Package 2 paragraph now fits on one line. Yeah!
- Font Size = 13 pt.
-
 Heading
3:
Heading
3:
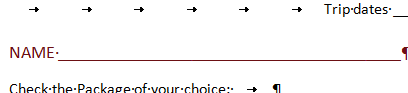
Click in the line on the last page that has Name followed by a long fill-in-the-blank.
Make the following changes:- Alignment = Left
-
Word 2007, 2010:
- Apply Heading 3 style.
- Remove the border.
(Click the Borders button down arrow and select No Borders.)
-
Word 2013, 2016:
- Apply Heading 3 style, if it does not already have this style.
- Change the color to Red, Accent 2, Darker 25%.
- Apply Heading 3 style, if it does not already have this style.
- Update the Heading 3 style to match the selection.
No other paragraphs have this style so the only change is to the thumbnail.
-
Word 2013, 2016: Heading 4
On the last page, AutoFormat incorrectly applied a different style to the first item in the list of packages than it did to the other items. You can use Format Painter to fix this, without having to know what style was applied.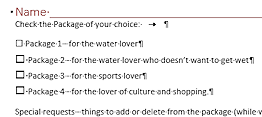 Click in the second item in the list of packages on the last page.
 - On the Home ribbon tab, click the Format Painter button and then click the first item in the list.
The item changes to match the rest of the list except that the square is a different size. That is because the font size for the square symbol in the other items is actually larger than the font size for the rest of the line. You can leave this problem alone for now. Later you will create a new bullet list style for this list.
- Update Normal Style with Modify Style Dialog:
AutoFormat changed some text to Body Text, some to List Paragraph,some to List, and left the text in the table as Normal. Body Text and List Paragraph are based on Normal. So if you update Normal, the others get updated automatically. This saves a lot of work! And, you don't have to hunt up a paragraph with Normal style.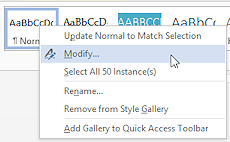 Right click the style Normal in the ribbon gallery and select Modify....
The dialog Modify Styles opens.- Change the font to Calibri.
- Change the font size to 11 pt.
 Inspect this dialog to see what else could be changed. Everything!
- Click on OK to close the dialog and save the style.
- Scroll the document to see what text is now updated.
-
Save.
[trip_planner5-Lastname-Firstname.docx]

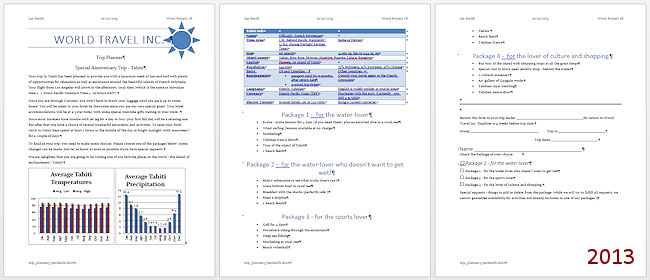
The document is close to the same in the different versions of Word now. The table and chart colors are still different. Do not worry if your document does not look exactly like the illustration at this point. For example, in Word 2016 the charts are on page 2 still. There are some differences between versions in the margins and spacing which we will deal with shortly.
Save Changed Styles as a New Style Set
After you have created some nifty paragraph styles, you might want to use them later. You can save the whole set, the ones you changed and the ones you did not change, as a new style set. Pick a name that will remind you of what you used them for!
-
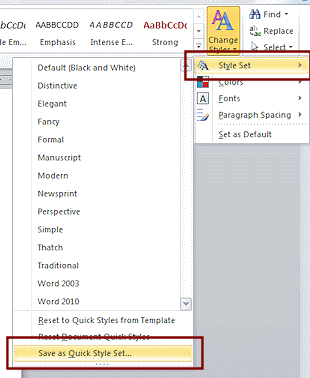 Open the list of Style Sets: Word 2007, 2010: On the Home tab, click on the Change Styles button and hover over Style Set to open the list. Then click on Save as Quick
Style Set... Word 2013, 2016: On the Design tab, click the More
Open the list of Style Sets: Word 2007, 2010: On the Home tab, click on the Change Styles button and hover over Style Set to open the list. Then click on Save as Quick
Style Set... Word 2013, 2016: On the Design tab, click the More  button for the gallery of Style Sets. Then click on Save as a New Style Set...
Alternate Method: Right click the thumbnail for the current style set (first one in the gallery) and then click on Save...
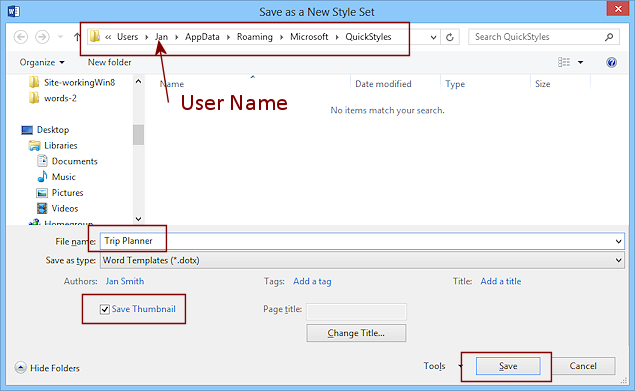
The Save Quick Style Set dialog opens to the folder where Word saves your custom Quick Style Sets. Very helpful!
- In
the File name text box, type Trip Planner.
- If necessary, click on the box beside Save Thumbnail to put a check mark it it.
-
Click on the Save button.
-
Open the list of Style Sets again.
Your new style set is in the list, ready for you to use on other documents.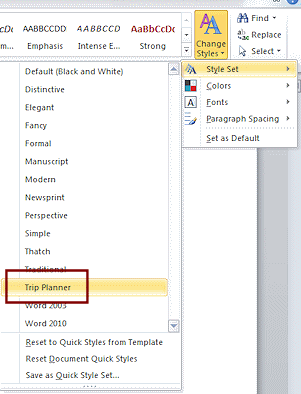 Word 2007, 2010: Trip Planner is in the alphabetical list.
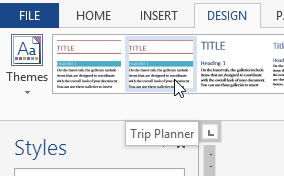 Word 2013, 2016: Lists the current style set first (which is Trip Planner now) and then custom sets, followed by the style sets from Office.
(If your new style does not show, click the More button to show the whole set of styles.)
- Save.
[trip_planner5-Lastname-Firstname.docx]
|
|
| © 1997-2017 Jan Smith All Rights Reserved |
Site Map What's New |
Privacy Policy Terms of Service Copyright Acknowledgements |
~~ 1 Cor. 10:31 ...whatever you do, do it all for the glory of God. ~~
Last updated: March 22, 2017