
Jan's Working with Words
AutoTools: Format Whole Doc: Themes
After applying AutoFormat, your document is still pretty bland. Happily, Word is eager to help you overcome that!
Themes
A new feature starting with Word 2007 is document themes. A theme includes colors, fonts, and effects for shapes and charts. A theme also includes the slide backgrounds and layouts for PowerPoint.
Besides a document theme, there are also separate themes for colors, fonts, or effects. Mix and match them until you get just what you want, or go create your own combinations. It's a colorful and flexible world in here!
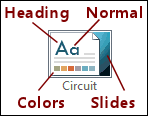 Theme
thumbnail: Each document theme thumbnail shows a capital A in the font for headings and a lower case a in the font for body text. The theme colors show across the bottom of the thumbnail.
Effects don't show at all. The
background behind the 'page' shows a title slide in PowerPoint slide. Other slides may have a very different look.
Theme
thumbnail: Each document theme thumbnail shows a capital A in the font for headings and a lower case a in the font for body text. The theme colors show across the bottom of the thumbnail.
Effects don't show at all. The
background behind the 'page' shows a title slide in PowerPoint slide. Other slides may have a very different look.
Manually applied formatting: If you add formatting and then apply a theme, your changes may or may not be kept. Only choices from existing themes and styles will be automatically updated. For example, if you apply a custom color, the color will not change when you apply a new theme. You have to pick one of the theme colors for the color to change when you change the theme. The same is true if you choose a font that is not a theme font or if you create a custom effect.
Themes in versions: Word 2010 includes the themes from Word 2007 plus more. Word 2016 has the same themes as Word 2013 plus 2 more, but these are all different from the themes in Word 2007 and 2010. No, I don't know why!
Using a theme from a previous version: You can open a document that used a theme from a different version of Word and then save the theme to your custom themes. Word automatically puts it in the correct (hidden!) folder. Or you can copy the theme's file and paste it to the folder where the other themes are, if you can find it.
Your own custom themes are in a subfolder of the folder for custom templates:
C:\Users\<user name>\AppData\Roaming\Microsoft\Templates\Document Themes
replacing <user name> with your own logon user name, of course.
This folder will not exist until you first save a theme yourself!
To complicate life even more, the AppData folder is hidden by default. In File Explorer on the View ribbon tab, check the box 'Hidden items' to make this folder show.
| |
Step-by-Step: Themes |
|
| What you will learn: | to apply a document theme to insert, size, and position an AutoShape to insert text from a file to apply themes for color, fonts, and effects to save changes as a custom theme |
Start with: ![]() , trip_planner3-Lastname-Firstname.docx
, trip_planner3-Lastname-Firstname.docx
Format with a Theme
Microsoft Office comes with a number of document themes, which are combinations of colors, fonts, and effects. The same themes can be used by all Office programs. Using the same theme, you can make a cover letter, spreadsheet, and PowerPoint presentation look like they belong together.
Live Preview can help you choose. The theme names won't help much!
-
 If
necessary, scroll to the top of the document.
If
necessary, scroll to the top of the document. - Click on the Themes button:

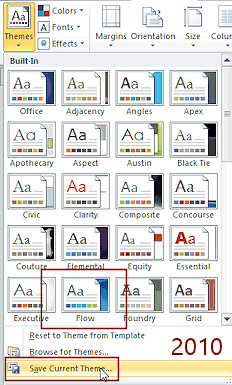
 Word 2007, 2010: On the Page Layout tab, in the Themes group.
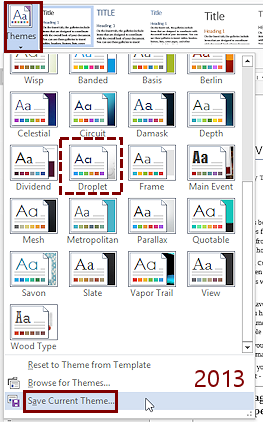
 Word 2013, 2016: On the Design tab, in the Document Formatting tab group.
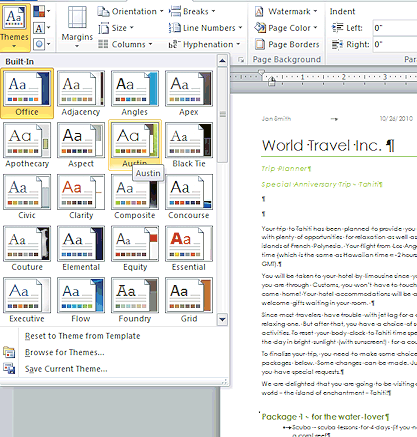
A gallery of theme thumbnails appears. There are more themes in Word 2010 than in Word 2007. Word 2013 and 2016 have entirely different themes!
- If necesssary, size the window (drag the edges) and the page (Zoom slider) so you can see the title and also Package 1 - for the water lover while the gallery of themes is open.
-
 Experiment: Themes
Hover over various themes and watch your document change. Be sure to scroll the gallery to see choices that are not in view at first. The alphabetizing is sometimes unexpected!
Live Preview has a good time showing you what the theme will do for you.
Notice how the text wrapping changes with different themes because of different fonts and font sizes. Font colors change for some themes.
Once you have created your own theme, there will be a Custom section at the top of this gallery. Word 2010 has a section at the bottom of the gallery for themes available at Office.com but that web site is shut down.
 Problem:
Themes gallery covers the part of the document I want to see in
Live Preview.
Problem:
Themes gallery covers the part of the document I want to see in
Live Preview.
Solution 1: Scroll the document down so that the part you want to watch is not under the gallery.
Solution 2: Resize the window so that the gallery misses enough of the document for you to see the effect.
Solution 3: Change the View to a different percentage, perhaps One Page, so that the gallery misses the document.
Once you have seen the effect of the themes...
-
Click on the theme:
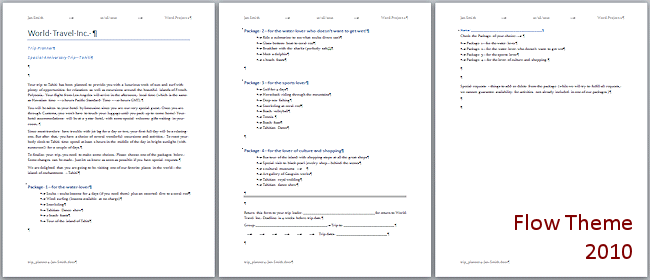
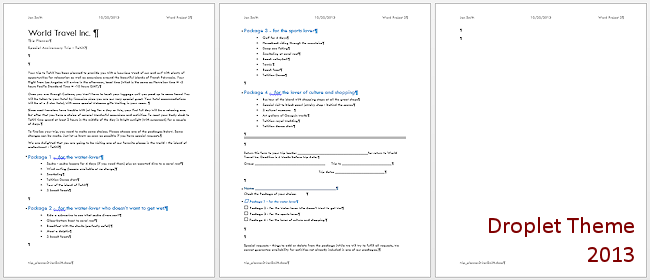
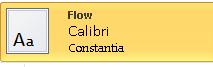
Word 2007, 2010: Flow Word 2013, 2016: Droplet -
Scroll through the document. What changed? Heading colors, fonts. There are no AutoShapes in the document yet so there are no Effects to change.
-
 Save
As: trip_planner4-Lastname-Firstname.docx to the word project2 folder on your Class drive. Your document should look similar to one of the illustrations below.
Save
As: trip_planner4-Lastname-Firstname.docx to the word project2 folder on your Class drive. Your document should look similar to one of the illustrations below.
Insert, Size, and Position an AutoShape
Effects don't apply to text but to shapes and charts. This document does not have any of those .... yet!
There are four kinds of handles for any AutoShape. Many shapes do not have an adjustment handle. Some shapes have more than one!
| Handle shape: | Changes: | |||
|---|---|---|---|---|
| Resize handle in a corner. | Both length and width at once. Proportions may change as you drag! |
|||
| Resize handle in middle of edge | Only one dimension - either length or width, depending on which edge the handle is on. | |||
| Rotation handle | Rotates the whole shape. | |||
|
|
Adjustment handle | Changes the size, proportions, or location of parts of the shape. |
-
 Put
the cursor at the right end of the first line.
Put
the cursor at the right end of the first line.
-
On the Insert tab in the Illustrations tab group, click on Shapes.
A gallery of shapes appears. The gallery in Word 2010, 2013, and 2016 (illustration is of 2013) has more shapes and a different order of the shapes than Word 2007.There is no Live Preview for this gallery since you are adding something to the document.
- Experiment: Shapes
Try out various shapes- Click on a shape in the gallery. The gallery closes and the mouse pointer
changes to the precision select shape
 .
This shape is used for graphics and two-dimensional work.
.
This shape is used for graphics and two-dimensional work. - Drag in the document. The shape appears and changes width and length as you drag. That's the "two-dimensional" part.
- Release the mouse button. Your shape floats in the document. It is selected and shows handles.
- Resize Corner Handle: Move your mouse over a handle on a corner. The pointer changes to a double-headed arrow. Drag. The shape gets wider or taller or both, depending on how you drag.
- Resize Side Handle: Drag using a handle in the middle of an edge. The shape gets wider or taller but NOT both.
- Rotation handle: Move your mouse pointer to the green circle (Word 2007, 2010) or curved arrow (Word 2013, 2016). The mouse
pointer changes to the Rotation shape
 .
. - Drag your pointer to rotate your shape. Can you do a complete 360 without releasing the mouse? Can you rotate it both clockwise and counter-clockwise?
- Adjustment handle: Does the shape have one or more yellow adjustment handles? Some shapes do not have an adjustment
handle. If yours does not, create another shape that does. Drag an adjustment
handle. What changes? What stays the same? It depends on the
shape!
Try the shapes Moon, Scroll, and Curved Up Ribbon (3 adjustment handles!).
- With the shape selected, press the DELETE key to remove it from your document.
- Try the steps above with several different shapes.
When you are ready to continue...
- Click on a shape in the gallery. The gallery closes and the mouse pointer
changes to the precision select shape
- Word 2013, 2016: AutoFormat did not add a blue border line for the Title paragraph like it would in Word 2007 and 2010. You will create one to help position the AutoShape you will add next.
 Click in the Title paragraph.
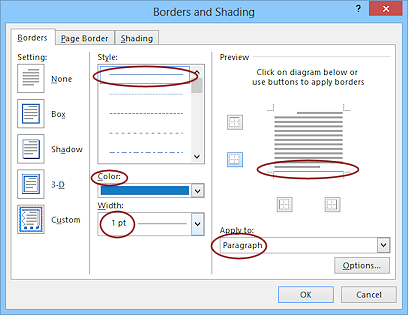
- Click the Borders button on the Home ribbon tab and select Borders and Shading at the bottom of the menu.
- Apply to the paragraph a bottom border using a 1pt line with color Blue, Accent 1, Darker 25%. Don't forget to click on the preview to apply your choices and then on OK.
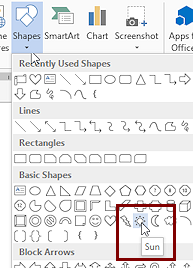
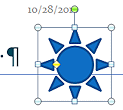
- In the Basic Shapes section of the Shapes gallery, click on the Sun shape
 .
.
The gallery closes and the mouse is in the precision selection shape.
-
 Drag in the top of the document (but not in the Header) to create a sun shape that is about 1" x
1".
Drag in the top of the document (but not in the Header) to create a sun shape that is about 1" x
1".
Look at the ruler as you drag. Don't worry about the exact size or the location! You will set those shortly.
Problem: 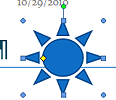
 Word
2007 does not fill in a color.
Word
2007 does not fill in a color.
You will have to do some configuring!
On the Drawing Tools: Format tab in the Shape Styles group:- Shape Fill Color: (5th column, top) Blue, Accent 1.
- Shape Outline: Color: (5th column, next to bottom) Blue, Accent 1, darker 25%;
- Shape Outline Weight: 1½
- Release the mouse button.
The shape floats in the spot where you dragged. It is selected, showing several resizing handles.
 At the far left is
an anchor icon
At the far left is
an anchor icon 
 ,
which shows where the image is attached to the document. You can
drag that anchor to another spot or even another page. Selecting
text can catch the anchor, too. This explains some unexpected moves!
,
which shows where the image is attached to the document. You can
drag that anchor to another spot or even another page. Selecting
text can catch the anchor, too. This explains some unexpected moves! 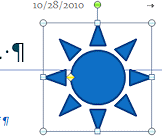
 In
the tab Drawing Tools: Format in the Size tab group, change the height and
width to 1.5" each.
In
the tab Drawing Tools: Format in the Size tab group, change the height and
width to 1.5" each.
The shape enlarges and more clearly shows its border lines.
Problem:
Size text boxes are not showing.
Are you looking at the tab Drawing Tools: Format? If so, then the window is too narrow.
Solution 1: Make the window wide enough that the Size group can enlarge.
Solution 2: Click the Sizes button to drop the list to fill in each part separately.
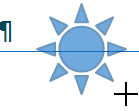
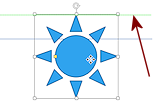
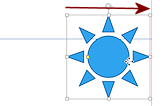
 Drag the image over to the right until:
- the blue border line runs through
the middle points of the sun shape
-
the end of the blue line is at the right edge of the circle part of the sun shape.
Word 2013, 2016: - The shape is too opaque to see the border line underneath as you drag. Watch for the tip end on the right to disappear.
- As you drag, a green line appears when the image's edge hits the margin. You can drag past those points but the image may seem to hesitate and then jump.
- the blue border line runs through
the middle points of the sun shape
-
 Save.
Save.
[trip_planner4-Lastname-Firstname.docx]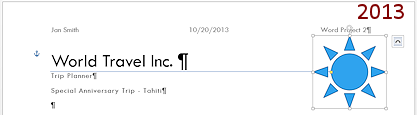
Insert Text from File
Before we can see all that themes can do, this document needs a chart or two and a table. That could take a while! Instead, let's learn how to steal stuff from other documents and use it here. This section is called "Insert Text from File" but the method will pull in stuff besides text, too.
- Move the cursor to the end of the paragraph that starts "We are delighted..."
- Press the ENTER key to get a new paragraph.
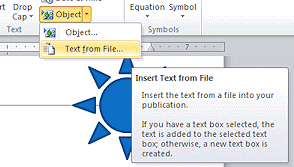 On the Insert tab in the Text group, click on
the arrow beside the Object button.
On the Insert tab in the Text group, click on
the arrow beside the Object button.
A short list drops.
- Click on Text from
File...
The Insert File dialog appears. Looks a lot like an Open dialog, doesn't it!
-
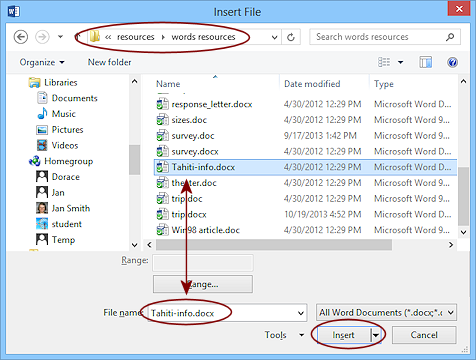 Navigate, if necessary, to your words resourcse files.
- Click on the file Tahiti-info.docx.
-
Click on the Insert button.
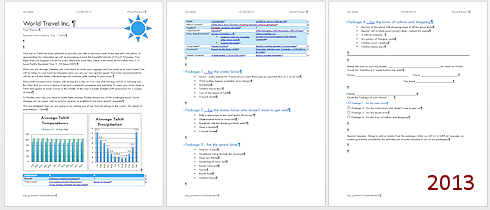
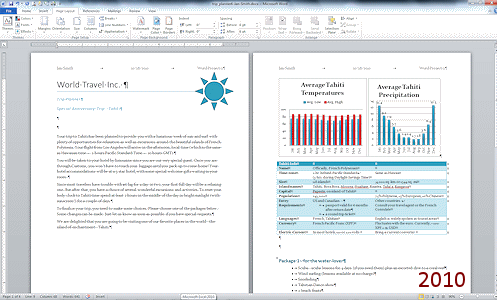
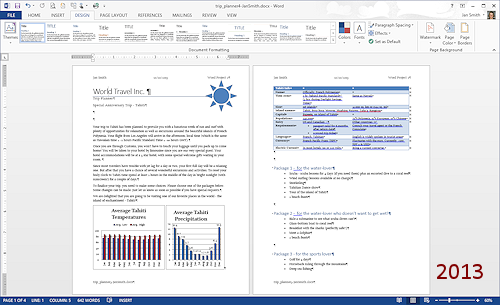
The text, charts, and table contained in Tahiti-info.docx are inserted at the cursor.If there is not enough room for the charts on the first page, everything moves over to the next page. That should happen in Word 2007 and 2010 but not in Word 2013 and 2016. The fonts and paragraph spacing are different.
Your Trip Planner is now either 3 or 4 pages and needs some work! We will get to that shortly.
- Save.
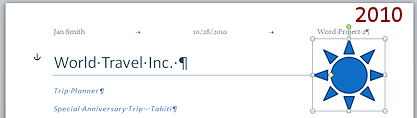
[trip_planner4-Lastname-Firstname.docx]
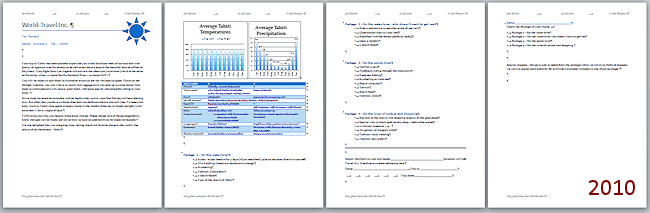
Trip Planner 4 after inserting text (and other stuff) from
Tahiti-info.docx
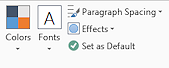
Themes for Color, Fonts, and Effects
In addition to the document theme, you can apply themes for colors, fonts, or effects separately. You may not see much change, depending on what was in the document to start with. For example, some of the colors and effects apply only to tables and charts. That why we inserted the new content in the previous section.
-
 On the View tab
in the Zoom tab group, click on Two Pages.
On the View tab
in the Zoom tab group, click on Two Pages.
Word 2013, 2016: Multiple Pages
-
If necessary, scroll or resize so that you can see the top of the first page, the charts, and the table.
Now you can see what Live Preview does with charts and tables as well as headings and autoshapes. Fun is awaiting!
- Switch to:
Word 2007, 2010: Page Layout tab. Word 2013, 2016: Design tab
- Experiment: Themes for Colors, Fonts, and Effects
 Since you have not applied any colors, fonts, or effects that are not part of the theme, changing the theme will automatically update through the whole document.
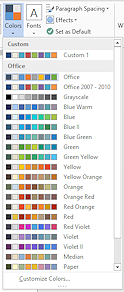 Click the Colors theme button to open the gallery of theme
color sets.
Click the Colors theme button to open the gallery of theme
color sets.- Hover over each of the color sets and Live Preview changes
your document. What parts of your document change colors and to
which color in the set?
Be patient. It may take a second or two for the changes to show up.
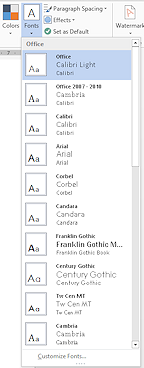
- Repeat with the Fonts themes.
For some Fonts sets, Live Preview changes the flow from page to page dramatically! Word will not let a chart start on one page and finish on another. That makes those charts hop back and forth enough to make you seasick!
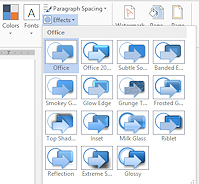 Repeat with the Effects themes.
As you hover over each Effects theme, the Sun shape changes its borders except in Word 2007. The charts change the look for the bar columns, sometimes a lot. Some changes are hard to see.
- Change the View to 100%. Repeat the Effects to see what the effect does to the Sun shape and to the charts. Watch the columns carefully. Some effects are subtle.
When you are ready to continue...
-
Select the following separate themes for color, fonts, and effects:

 Word 2007, 2010:
- Colors theme = Concourse
- Fonts theme = Flow
- Effects theme = Trek

 Word 2013, 2016:
- Colors theme = Office 2007 - 2010
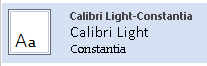
- Fonts theme = Calibri Light - Constantia
- Effects theme = Riblet
 What changed?
Color: shape, chart bars, table heading, colored table rows, heading text color.Font: No change in fonts in Word 2007/2010. The document theme was Flow already. But Word 2013 and 2016 change all the fonts.
 Effects: Border of shape changed in Word 2007/2010. The look of chart bars changed in all versions.
Which
theme is current?
Open each of theme galleries that you just used and look for usual highlight around the thumbnail for what is being used in the current document. The font and effect galleries clearly highlight what you chose. It is harder to see in the Colors gallery, which has only a thin line around the current Colors choice and, in Word 2013 and 2016, a sliver of highlighted background. Much harder to see. - Save.
[trip_planner4-Lastname-Firstname.docx]
Save a Custom Document Theme
Now that we have a look that we like, we can save it to use on other documents. The only hard part is picking a name!
-
 Click the Themes button to open the
gallery.
Click the Themes button to open the
gallery.Notice that the previous theme is no longer highlighted. That's because you made changes.
-
Click on Save Current Theme... at the bottom of the gallery.
The dialog Save Current Theme opens directly to the folder for your custom document themes.
A document theme has the file extension .thmx
-
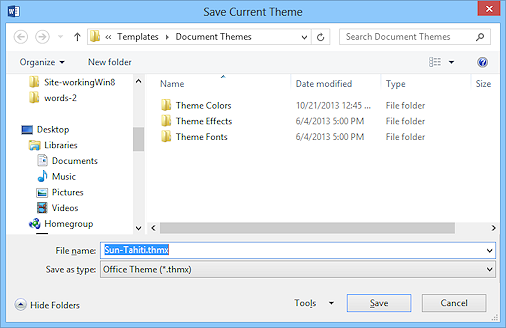 In the File name text box, type Sun-Tahiti and click on Save.
The dialog closes.
This name is not particularly great, but it will remind you where in the lessons you needed it.Notice that there are folders for separate custom themes:
Theme Colors, Theme Effects, and Theme Fonts.
-
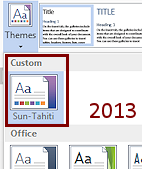
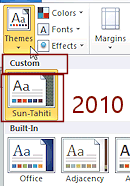 Click on the Themes button again.
At the top there is a new Custom section with your new theme selected.The fonts and colors in the thumbnail match what you picked out as Colors theme and Fonts theme. But, where did the slide peeking out in the back of the thumbnail come from? It's not what showed in the theme you applied earlier (Flow or Droplet). You certainly did not pick out a slide background. Very unexpected! Office is assigning a random (?) textured background for slides.
To set up the slide for this theme, you must be in PowerPoint, and then use this theme, set up the slide background and layout, and save your changes as a theme with this same name. Who knew!
|
|
| © 1997-2017 Jan Smith All Rights Reserved |
Site Map What's New |
Privacy Policy Terms of Service Copyright Acknowledgements |
~~ 1 Cor. 10:31 ...whatever you do, do it all for the glory of God. ~~
Last updated: March 22, 2017