
Jan's Working with Words
Templates: WordArt: Fill and Outline 


There are many, many features of your WordArt that Word 2010, 2013, and 2016 allow you to adjust. You can create shadows, reflections, glowing or soft edges, and add 3D depth. Each of these has features of its own like color, brightness, width, and rotation. Word 2013 and 2016 do not have the variety of pre-set combinations that Word 2010 has.
Text Fill
Text Fill allows you to choose No fill (which lets the background show through) or a solid fill or a gradient fill. A gradient fill uses a gradual change from one color to another. You have immense control over how the gradient works in Word 2010, 2013, and 2016.
The number of combinations possible might make you dizzy!
You now have much more control than previous versions of WordArt allowed, including using more than two colors.
![]() Using
pre-set colors or gradients as a start:
Using
pre-set colors or gradients as a start:
Pick a pre-set
color/gradient based on:
- Word 2010: Number of colors you plan to use
- Word 2010: Pattern of colors you want - smoothly
between just two colors or from one to another and then back, or multiple colors.
- Word 2013, 2016: Pattern of the gradient - linear, radial, spotlight
Then change the colors to the ones that you want and change the direction or shape of the gradient, if you wish.
The lesson below applies to Word 2010, 2013, and Word 2016.
|
|
Step-by-Step: WordArt - Text Fill and Outline |
|
| What you will learn: | to
modify text gradient fill to modify text outline |
Start with:
Word 2010, 2013, 2016:
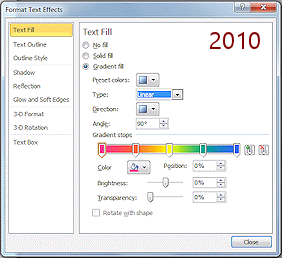
Format Text Effects: Text Fill - Gradient
The text and the shape holding the text in WordArt can have a fill. For text this can be a solid color or a gradient of colors. Shapes can also have texture or picture fills.
- If necessary, open letter3-Lastname-Firstname.docx.
 Save As letter4-Lastname-Firstname.docx to your Class disk in the word project2 folder.
- With the WordArt shape selected, click on the Dialog Launcher for WordArt Styles.
The dialog or pane opens.
In Word 2013 and 2016 the Format Shape pane can be docked or floating, depending on where it was the last time it was used. -
Click the dialog launcher for WordArt Styles.
A dialog or pane opens. Word 2010: The Format Text Effects dialog opens.
If necessary, click Text Fill in the dialog's navigation pane.Your WordArt uses five shades of blue in a Linear pattern.
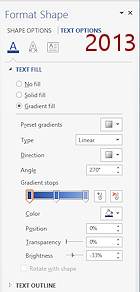
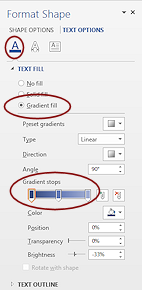
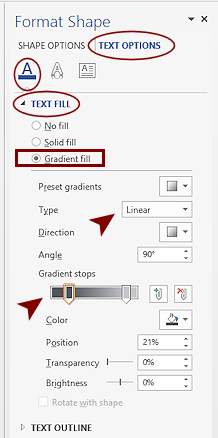 Word 2013, 2016: The Format Shape pane opens. Click Text Options at
top right of the pane and then on the icon for text at the left
Word 2013, 2016: The Format Shape pane opens. Click Text Options at
top right of the pane and then on the icon for text at the left  . Then click on Text Fill to expand that section.
The settings for the current gradient fill show.
Your WordArt uses two shades of gray in a Linear pattern.
You will be changing these settings!
(Be sure your effect was applied to all of the text. If the cursor was in the text, only one word received the effect.)
-
 Experiment: Pre-set gradient colors
A pre-set gradient can be a good way to start. Just pick a gradient that has the number of colors (Word 2010) or the direction (Word 2013. 2016) that you want. Then you can change the colors to suit yourself.-
Click the arrow beside the Pre-set gradients button to see the gallery.
Nothing is selected in the gallery even if the WordArt uses a pre-set gradient.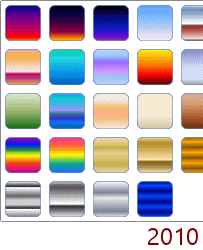 Word 2010: The gallery of Pre-set colors shows a
number of different effects based on the number of colors and the
number of gradient stops. The choices determine how subtle or sharp the
changes are and how many different gradients there are. These pre-set
choices may not be the most attractive! But they give a good starting
point for you to get artistic with.
Word 2010: The gallery of Pre-set colors shows a
number of different effects based on the number of colors and the
number of gradient stops. The choices determine how subtle or sharp the
changes are and how many different gradients there are. These pre-set
choices may not be the most attractive! But they give a good starting
point for you to get artistic with.
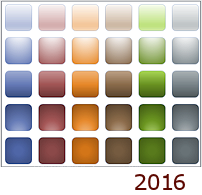
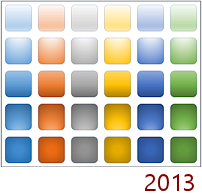 Word 2013, 2016: There are fewer pre-set gradients than in Word 2010. The theme colors are shown with different examples of gradient which are all based on two shades of the same color.
 - Hover over one of the gallery items.
Nothing happens. No Live Preview yet. - Click on a gallery item. Now Word changes the document and closes the gallery but does not close the dialog or pane. The Gradient stops color bar changes to show the new gradient.
- Try out different pre-set colors/gradients without closing the dialog/pane (but do not change other features). Observe which have a nice effect on the WordArt and which don't.
- Word 2010: Click on Close to close the dialog.
The WordArt keeps the last choice of color that you clicked on. -
Click on the Undo button once.
The WordArt returns to the original gradient, even though you tried several different ones. Unexpected! Word lumps together all selections for one feature.
 Getting
back to the original formatting: Each time you close
the Format Text Effects dialog (Word 2010) or Format Shape pane (Word 2013, 2016), you can get back to the original
formatting by clicking Undo once for each feature that you changed in the dialog/pane.
Getting
back to the original formatting: Each time you close
the Format Text Effects dialog (Word 2010) or Format Shape pane (Word 2013, 2016), you can get back to the original
formatting by clicking Undo once for each feature that you changed in the dialog/pane.For example, if you changed the color in several ways and you changed the rotation in several ways, you would need to undo only twice.
Some features have a Reset button. But be careful! You will reset more than just that feature!
-
- Experiment:
Type and Direction
Gradient Shape Linear 
Radial 
Rectangular 
Path 
Mimics the shape
from the center outYou can pick the type and direction of the gradient change: linear (a line) or radial (a circle) or rectangular or path (matching the shape of the container).
The current type is Linear.
Some changes do not show well with the current text.
- Open the gallery of Directions for gradients.
- Hover over a direction.
No Live Preview. - Click on each direction in turn and observe how the WordArt fill changes the angle measurement as you pick different Linear directions.
- Enter a number between 0 and 359.9 in the Angle box. Can you see that the gradient changed directions? Try again until you can see the difference. Many of these effects do not show well on the letters. They do better on larger areas.
- Change the Type to Radial and change the directions again.
- Change the Type to Rectangular and change the directions again.
- Change the Type to Path.
This pattern is the same as Rectangular #3. That is because the text box shape is a rectangle. That actually makes sense!!
- Which combinations made a noticeable difference in the fill for your WordArt? Which might be useful? Which are just weird or unattractive?
- Experiment:
Gradient stops
 A gradient stop is a color and location on
the color bar. Word automatically does the heavy math to figure out
how to evenly change from the first color at the left end of the
bar to the next color stop. You can also set the brightness and
transparency for each color stop.
A gradient stop is a color and location on
the color bar. Word automatically does the heavy math to figure out
how to evenly change from the first color at the left end of the
bar to the next color stop. You can also set the brightness and
transparency for each color stop.
 Subtle gradient, using 3 shades
of the same color
Subtle gradient, using 3 shades
of the same color

 Sharp gradient, using 7 different
colors
Sharp gradient, using 7 different
colors
You can drag the existing stops to new locations. You can change the color of each stop individually. Just click on the stop and use the controls below it to adjust its features. You can add more colors or remove colors with the buttons at the right end of the color bar.
- Click on the stop slider at the far left of the color bar.
- Change the brightness and transparency.
Live Preview works for this feature! Observe how the WordArt changes to match. - Click on another stop and drag it to a new location.
- Click on a stop and then click the arrow beside the Color button below the color bar. Pick a different color.
-
Try different combinations
When you are ready to continue...
- If necessary, open the Format Text Effects dialog or Format Shape pane again to Text Fill.
Change as needed to have the following settings:
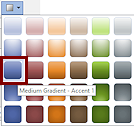
- Pre-set color:
Word 2010: Ocean
(2nd row, 2nd column) Word 2013, 2016:
Medium Gradient,Accent 1
(1st column, 3rd row)
 Type: Linear
- Angle: 90o
- Brightness: 0%
- Transparency: 0%
- Pre-set color:
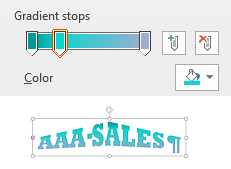
- Word 2013, 2016: Edit the gradient stops to more closely the illustration for Word 2010.
 With the Shape selected and not the text, click on the first stop and drag it to the far left of the gradient bar.
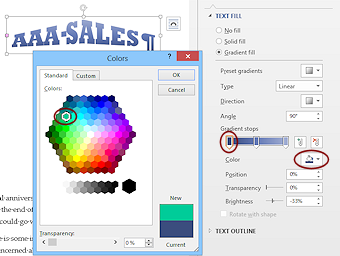
(If the text is selected, the gradient stop will not move.)- Click the Color control to open the palette of theme colors.
- Click More Colors...
- Click the Standard tab.
- Click the blue green that is on Row 4, 2nd on the row and then on OK.
 The first stop changes color and the gradient and the WordArt automatically update. Sweet!
 - Click on the gradient stop in the middle.
- Drag the new stop to the left until the position box shows 25%.
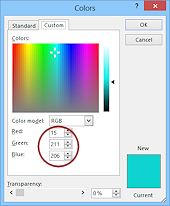 Open the Color dialog again but to the Custom tab.
-
Change the values in the Red, Green, and Blue text boxes to 15, 211, and 206.
These settings let you match another color exactly. A graphics program like Paint can tell you what numbers to use, if you have a sample of the color.
 Click on OK to close the Color dialog.
Again the gradient bar and WordArt update.
You can see that not much of the WordArt sticks up into the blue area. Some gradients work better with certain shapes.- Click the button Add gradient stop
 .
.
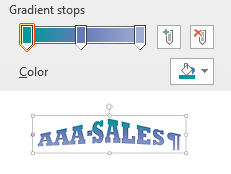
A new stop appears in the middle. 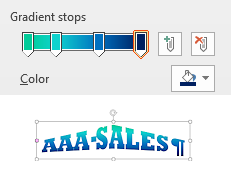 Open the Color palette again and click on the color Blue in the Standard Colors.
- Click on the last gradient stop at the right and set its color to Dark Blue in the Standard Colors.
- Save.
[letter4-Lastname-Firstname.docx]
Format Text Effects: Text Outline
Word 2013 and 2016 do not apply an outline automatically to the text when you apply a pre-set gradient. The outline is easy to adjust and can make a big difference in the overall look of the WordArt.
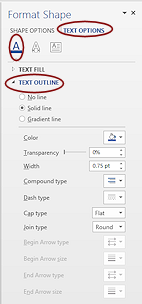 With the WordArt shape still selected, change the Format Shape pane to show Text Effects > Text Outline.
-
Experiment: Text Outline
Inspect the various choices for an outline - color, transparency, width, types, etc.Try several combinations of color and width and type. Can you see a difference?
Some choices require a wide line to show any difference. The outline color makes a difference in how you perceive the colors of the text. A darker outline makes the whole WordArt seem darker.
When you are ready to continue, undo any changes you made.
If necessary, select the following:
Solid line
Color =Indigo Accent 1
Transparency= 0%
Width= 0.75 pt
Compound type = solid line
Dash type = solid line
Cap type = Flat
Join type = Round- Save.
[letter4-Lastname-Firstname.docx]
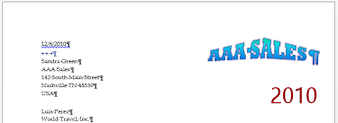
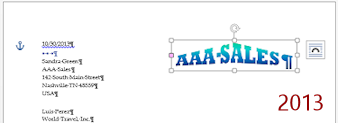
![]() Paragraph marks take space! Hide the marks or look at Print Preview. The WordArt resizes to fill the box, using the space taken by the paragraph mark. It makes a difference!
Paragraph marks take space! Hide the marks or look at Print Preview. The WordArt resizes to fill the box, using the space taken by the paragraph mark. It makes a difference!
The next lesson will add a 3D effect to the WordArt.
|
|
| © 1997-2017 Jan Smith All Rights Reserved |
Site Map What's New |
Privacy Policy Terms of Service Copyright Acknowledgements |
~~ 1 Cor. 10:31 ...whatever you do, do it all for the glory of God. ~~
Last updated: March 27, 2017