
Jan's Working with Words
Templates: WordArt: 3D 


The Format Text Effects dialog and Format Shape pane allow you a lot of control over the look of your WordArt. So much so that in Word 2010 you usually will want to start with a pre-set style to get at least some of the choices out of the way first. The pre-set styles are fewer and less complex in Word 2013 and 2016.
The earlier versions of Word has more pre-designed WordArt styles that created complex effects for you, including the one these directions use for Word 2007. The new versions of Word give you a lot more control. It's a trade-off!
In this section you will create the illusion of depth to the letters by adjusting the 3D Format. You must also add some 3D Rotation so that you can see that depth. Did you expect that it would take two features? I certainly did not! Word 2007 had a pre-designed effect that did depth for you. So this section applies to Word 2010, 2013, and 2016.
|
|
Step-by-Step: WordArt - 3D |
|
| What you will learn: | to
create 3D effect for WordArt |
Start with:
Word 2010, 2013:
Format Text Effects: Create 3-D Depth
 If necessary, open letter4-Lastname-Firstname.docx and save it as
letter5-Lastname-Firstname.docx to the word project2 folder on your Class disk.-
With the WordArt selected, on the Drawing Tools: Format tab in the WordArt Styles tab group, click the Dialog Box Launcher

 to open the Format Text Effects dialog (Word 2010) or the Format Shape pane (Word 2013, 2016) set to Text Options.
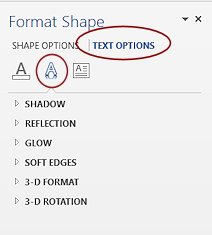
You worked with the Text Effects in the last lesson, including Text Fill and Text Outline.
-
 Experiment: Format Text Effects Dialog or Format Shape Pane
There is limited Live Preview. Once you click a selection, the document is updated.In the dialog (Word 2010) but NOT in all parts of the pane (Word 2013, 2016), there is a Reset button for some effects. That button returns all of the changes in that part back to where they started. Once you close the dialog, Reset will not be available when you open the dialog again.
Inspect each of the features that can be changed. So many!!!
Try a few.
In Word 2010's dialog you may need to click on Close to apply the changes. Undo your changes and open the dialog again and experiment some more.
When you are ready to continue, undo all of your changes!
-
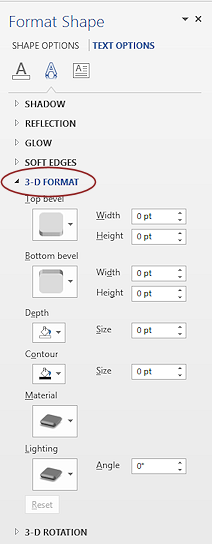
Click on 3-D Format.
Look at all of the choices. So many!!
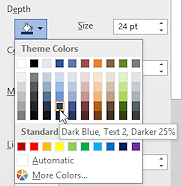 Click
on the arrow beside Depth: Color to open
the gallery of theme colors.
Click
on the arrow beside Depth: Color to open
the gallery of theme colors. - Click on the color Dark Blue, Text 2, Darker 25%
Remember, there is no Live Preview.
-
Change the Depth of the color to 24 pts.
This controls how deep the 3D letters are.Leave the other settings alone.
- Word 2010: click
on Close to apply the changes.
Surprise! Not much change at all!You must apply some Rotation to tilt the letters so that you can see the depth of the letters.
-
Save.
[letter5-Lastname-Firstname.docx]
Format Text Effects Dialog: Rotation
The depth or thickness of the letters doesn't show if you are looking at them straight on. They need to be at a slight angle. You need to add some rotation. You can rotate the letters around each of the X-, Y-, and Z-axes. In other words, you can swing the letters horizontally, or tilt them vertically, or rotate them like a propeller on an airplane. A combination of these changes creates the effect of depth or thickness for the letters.
Word 2010, 2013, and 2016 work the same here.
-
If necessary, with the WordArt selected, on the Drawing Tools: Format tab in the WordArt Styles tab group, click the Dialog Box Launcher
to open the Format Text Effects dialog -
Click on 3-D Rotation, which is below the 3-D Format section.
-
Experiment: Rotation
Try some of the pre-set rotation styles. Set X, Y, and Z to different numbers one at a time and then in combination. 360 degrees is a complete turn.Do you see what each axis affects?
Undo your changes.When you are ready to continue...
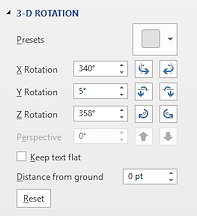
Set the Rotation of X to 340 degrees.
The letters now show the depth that you created in the last section. Who knew it took both of these to see the effect??
Set the Rotation for Y to 5 degrees.
The small amount of tilt lets us see the top of the letters. They are really looking like separate objects now.
Set the Rotation for Z to 358 degrees.
Check out the bottom edge of the letters now. Does it look flat to you?? It does to me! What a difference a degree or two makes!-
Save.
[letter5-Lastname-Firstname.docx]
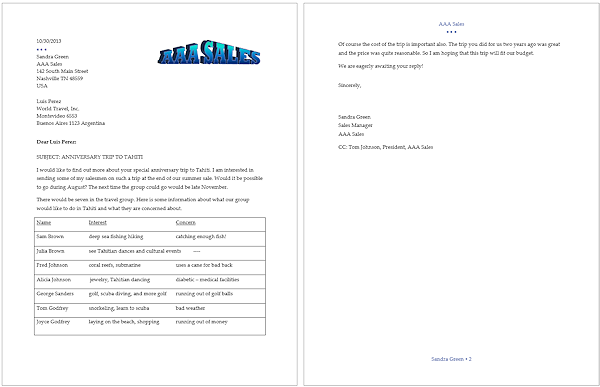
Resulting letter:
|
|
| © 1997-2017 Jan Smith All Rights Reserved |
Site Map What's New |
Privacy Policy Terms of Service Copyright Acknowledgements |
~~ 1 Cor. 10:31 ...whatever you do, do it all for the glory of God. ~~
Last updated: March 27, 2017