
Jan's Working with Words
Report: Finish: Shrink
When your page is just a little too wide or a little too long, you can use some tools and tricks to shrink your document to use fewer pages.
Ways to Shrink Document Size
- Reduce line spacing, space before, and/or space after
- Resize tables and images
- Reduce font size
- Reduce page margins
- Shrink to Fit command
The Shrink to Fit (also called Shrink 1 Page)command has one specific goal and uses one technique to get there. It tries to reduce the length of the document by 1 page by resizing all the text in the document's body. This command works best with documents of just a few pages when there is just a small amount of text leftover on a page.
When you apply Shrink to Fit, you may lose the formatting you applied yourself outside a paragraph style. This is another example of how using paragraph styles helps.
| |
Step-by-Step: Shrink a Document |
|
| What you will learn: | to increase font size for the whole document at once to show styles plus manual formatting in the Styles Pane to use Shrink to Fit to reduce margins with Page Setup to adjust spacing |
Start with: ![]() , report-WorldTravelInc6-Lastname-Firstname.docx
, report-WorldTravelInc6-Lastname-Firstname.docx
You will use several methods to reduce the number of pages for your document and then you will save each result with a new name.
Change Font Size for All
The template you used to start up this report uses rather small font sizes. Let's size everything up at once and see if that works well.
 Save as report-WorldTravelInc7-Lastname-Firstname.docx on
your Class disk in the folder word project4.
Save as report-WorldTravelInc7-Lastname-Firstname.docx on
your Class disk in the folder word project4. - Put the cursor in the document somewhere.
 Use the key combo CTRL + A to Select All.
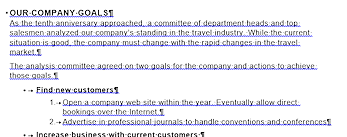 On the Home ribbon tab, click the Increase Font Size button once.
After a short pause, you may see wavy blue lines under most of the text because you applied a manual formatting change to text that already had a paragraph style.
-
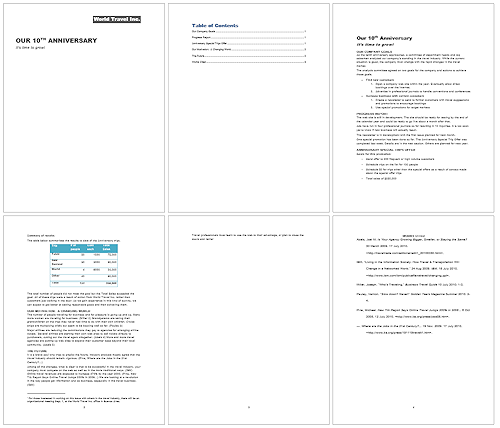 Switch to Print Preview.
How many pages are there now? You should have 6.
 Problem: Only 5 pages or no text is on the new page 5
Some part of page 4 is the wrong size, either text or the table or the margins.
Solution: Switch back to Print Layout view. Verify that the Heading 1 and Body Text styles were applied. If they were, you need to enlarge the table a bit to match the directions. Change the Zoom so you can see the table and the top of the next page. Drag the resize handle of the table (bottom right corner) down until the last two text lines move over to another page. Check Print Preview again.
- Save
[report-WorldTravelInc7-Lastname-Firstname.docx] - Switch back to Print Layout view.
Styles Pane: Show Styles plus Manual Formatting
- Click in the paragraph that follows "Our Company Goals" and
check the font size.
It was 9 pt before and should now be 10 pt.
 In the Style pane, scroll the long list of styles.
You should see the template's original styles like Body Text and Heading 1.
You may or may not see styles that show manual formatting added to a style. You can make the Styles pane show that!
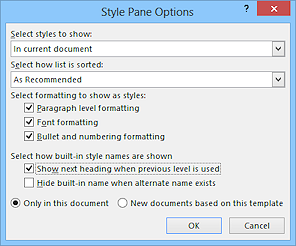
- Click on the Options link at the bottom of the pane.
The Style Pane Options dialog opens.
- If necessary, make changes to match the illustration:
- In current document
- As Recommended
- Check the three boxes to show formatting as styles
- Check the box Show
next heading when previous level is used
 Click on OK.
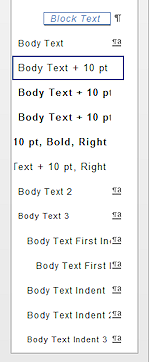
These choices tell the Styles Pane to also show styles like Body Text + 10 pt. and Heading 1 + 12 pt and Bulleted List Bold when you have added manual formatting to a style.
- Click in different parts of the report and check the Styles Pane for what style or variation on a style is being used.
- Scroll through the document and inspect it
but do not try to make any changes yet.
- Did
the header, footer, and footnote font sizes increase also?
No, they did not! "Select All" included the different sections in the report, but did not include the header, footer, or footnote areas. You have nothing in the header yet and only the page number in the footer. The footnote is above the footer, not in it. But Word does not consider the footnote to be part of the report for the Select All command. Interesting and important to know! - Are the page numbers in the Table of Contents still correct?
No! The Works Cited page should be page 4 now. Depending on exactly what you did, you may even see all of the page number in the Table of Contents set to 1! The table of contents is a field and does not automatically update!
- Did
the header, footer, and footnote font sizes increase also?
-
Save.
[report-WorldTravelInc7-Lastname-Firstname.docx]
Next you will practice some ways to reduce the document back to 5 pages. You will be using this document several times but saving with a new name. Be careful to save with the new name!
Shrink to Fit
When it works, Word has a one-button fix for documents that are just a tiny bit too long. This feature is called Shrink to Fit or Shrink One Page. This button reduces all font sizes one step.
- Find and use the Shrink to Fit button:
 Word 2007:
- Switch to Print Preview.
- Click on
 the Shrink One Page button.


 Word 2010, 2013, 2016:
Click on the button

 Shrink to Fit on the Quick Access Toolbar.
(You placed it there in an earlier lesson in Word Basics.)This one-button method is great... when it works. But sometimes it makes the fonts too small for easy reading. There can be better ways to get excess text tidily onto a smaller number of pages.
Problem: No Shrink to Fit button on the Quick Access Toolbar
Solution: Add the button.- Click on the More button at the right end of the Quick Access Toolbar and select More commands...
- Change the Choose commands from: box to show All commands.
- Scroll the list and click on Shrink One Page to select it.
- Click the Add>> button to move the command over to the Quick Access Toolbar list.
- Click on OK.
- Back in Page Layout view, click on the new
button Shrink to Fit on the Quick Access Toolbar.
(Yes, the popup tip for the button does not match the name in the commands list. Go figure!)
- Save As with the name
report-WorldTravelInc7shrink-Lastname-Firstname.docx
Your document is back to where it was before you increased all of the font sizes.
-
Close the document without closing Word.
Change Margins
Reducing the width of the side margins leaves more space for text. When you have paragraphs that have a short last line, the extra width for text can reduce the number of lines in the document
The report has several sections, separated by a Section Break. Each section can have different page numbering, different headers and footers, and different margins.
- Open report-WordTravelInc7-Lastname-Firstname.docx from the Recent files.
- Save As report-WorldTravelInc7margins-Lastname-Firstname.docx
- Inspect the sections and find look at the rulers to see what the page margins are for each section.
(Look for a section break. A page break does not count!)
Page 1 has different margins from the other sections. -
 Experiment: Margins for section using ruler
 Use the ruler to change the margins by dragging the border between the white and gray parts of the ruler. The mouse pointer must change to a double -headed arrow. It can be tricky at the left margin if the indention arrows are near the margin. You can temporarily move the indention arrows if they are in your way.
Your changes will apply only to the current section of the document (the one where the cursor is). Play around until you understand which pages are affected.
When you are ready to continue, Undo all margin changes.
- Put cursor
in the text on page 3 somewhere.
- On the Page Layout tab in the Page Setup tab group, click the dialog box launcher
 .
.
The Page Setup dialog opens.
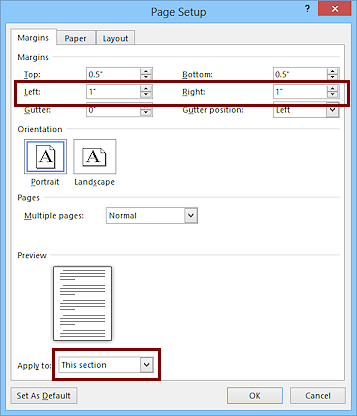 On the Margins tab, change the Left and Right Margins to 1" and choose to apply to This section .
-
Scroll through the document and look at the page margins in the ruler or with the Page Setup dialog.
The three pages of the report text and the Works Cited page should all show 1 inch for left and right margins. The first two pages did not change margins. They are in different sections. -
Check the Table of Contents.
Are the page numbers at the right correct yet? No.Well, not unless you jumped the gun and told Word to update the Table of Contents field. You will do that as one of the last chores before finishing.Your document should be back to a total of 5 pages.
Problem: Extra page with no text
Solution: Click to the left of the Page Break at the top of the blank page. Press the DELETE key. The page break is gone. -
Save.
[report-WorldTravelInc7margins-Lastname-Firstname.docx]
Change Spacing
Another way to adjust the length of a document is to change the white space. You can resize or remove blank lines or adjust the spacing before and after paragraphs.
- Open report-WordTravelInc7-Lastname-Firstname.docx from the Recent files.
- Save As report-WorldTravelInc7spacing-Lastname-Firstname.docx
- On
the page numbered 1 (not the cover page), click in the Title, Our 10th Anniversary.
-
Experiment: Paragraph Spacing
On the Page Layout tab in the Paragraph tab group, look at the two spacing text boxes.
This paragraph has a large Space Before.Try out various sizes for the Space Before and Space After for the Title, Headings, and other special spots until you are happy with the results. The final document should still be 5 pages.
Changes to styles will apply to ALL sections.
[Your document may not look like documents by other students!]
- Update the field for the Table of Contents.
- Switch to Print Preview.
How many pages now? Only 5. Mission accomplished!
Notice that changing margins and spacing does not produce the same text wrapping as Shrink to Fit did.
- Save.
[report-WorldTravelInc7spacing-Lastname-Firstname.docx] - Close the document without closing Word (if you are going to continue to the next lesson)
|
|
| © 1997-2017 Jan Smith All Rights Reserved |
Site Map What's New |
Privacy Policy Terms of Service Copyright Acknowledgements |
~~ 1 Cor. 10:31 ...whatever you do, do it all for the glory of God. ~~
Last updated: March 22, 2017