 |
Step-by-Step: Access Settings |
 |
|
What you will learn: |
to configure with Customize dialog
to configure AutoCorrect
to open a recently used file
to configure with Options dialog
to configure with Page Setup dialog |
Start with:
 , Access
open but no database open.
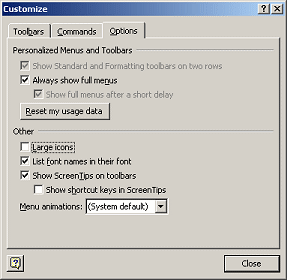
Dialog: Customize
This dialog allows you to customize toolbars and menus.
These lessons will assume that you are using the default toolbars and
menus. One change that you may need to make is on the Options tab. These
lessons assume that you will see the full menu, instead of just the most
recently used commands.
 The
choices on the Options tab apply to all of your Microsoft Office programs,
not just Access.
-
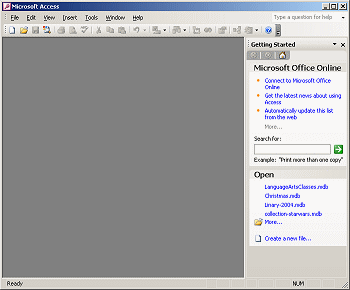 If necessary, open Access
with no database open. A
task pane is open at the right.
For Access 2002 the pane is the New File pane. For Access 2003 it is the
Getting Started pane.
-
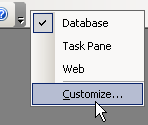 Right
click in a blank area at the end of a toolbar or menu. A popup menu
appears.
Or from the menu select Tools.
-
 Click
on . The Customize dialog appears.
-
If necessary, click on the Options
tab.
-
Verify that your dialog matches the illustration:
Always show full menus
List font names in their font
Show ScreenTips on toolbars
-
Click on Close to close the dialog and save
your changes.
Dialog: AutoCorrect
Microsoft Office programs can automatically correct
certain kinds of typing errors like two initial capitals in a word.
AutoCorrect can also replace an abbreviation with longer text. In Access,
AutoCorrect works in datasheet and form views only.
In Access the AutoCorrect dialog has only 1 tab, unlike
other Office programs which have 3 to 5 tabs for this dialog.
 Your
choices here will apply to all of your Office programs.
-
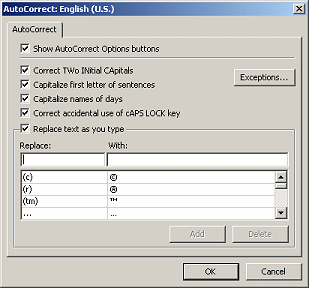 From
the menu select | .
The AutoCorrect dialog opens.
-
Verify that there is a check mark in all boxes.
-
Click on OK to close the dialog and save
your changes.
Open Recent File
You must have a database open in order to view the
next dialog we want to look at, the Options dialog. In the previous lesson you opened a database from your
resource files. So it should still be on your list of recent files.
-
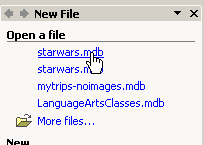
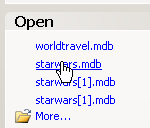
In the task pane, click on
starwars.mdb at the bottom of the menu. The
database opens.
 No
starwars.mdb in the list:
Either you did not do the previous lesson or, since then, you have opened other databases which moved
starwars.mdb off the recent files list.
Solution: Click on the More files... or
More... link in the task pane and use the Open dialog
to navigate to where you
saved starwars.mdb in the
previous lesson and open it. Or open
any another Access database.
Dialog: Options
The Options dialog has many choices that change
the way Access behaves.
-
Once a database is open, from the menu select | .
The Options dialog opens with its many tabs.
-
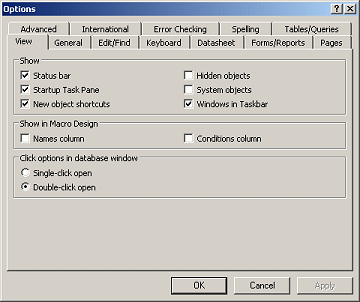
View tab: If necessary, click on the View tab.
These settings control what you see in an Access window.
-
Verify that the choices match those shown in the image above:
Show: Status bar, Startup Task Pane, New object shortcuts, and
Windows in Taskbar.
Click options in database window: Double-click to open.
-
General Tab: Click on the General tab.
This tab holds items that do not seem to fit anywhere else.
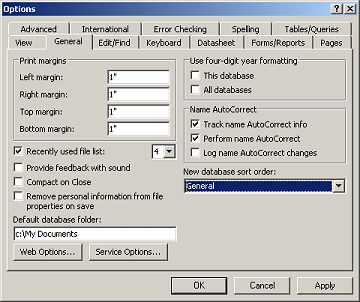
- Verify that your settings match the following:
- Print margins: 1" for all.
These are the default margins for all Access print-outs.
You can also change the margins in the dialog Page Setup but your choices
apply only to the current object.
- Recently used file list: 4
- Default database folder:
Type in the path to the folder in which you usually save databases.
For these lessons that might be
e:\complit101\databases if you use a flash drive. If you work
with other databases regularly, you might want to use
c:\My Documents or some other folder.
Unfortunately, you cannot browse to the folder that you want. You must
type in the path yourself.
- Keyboard tab: Click the Keyboard tab.
These settings control how you navigate Access by using the keyboard.
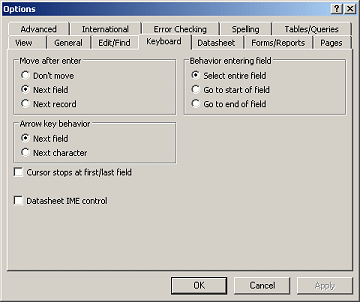
- Verify that your settings match the illustration:
Move after enter = Next field
Arrow key behavior = Next field
Behavior entering field = Select entire field
- Click on each of the remaining tabs to see what they
can control, but do not make changes.
- Click on OK to close the Options dialog and save your
changes.
Dialog: Page Setup
The Page Setup dialog is only available when a database
is open and a printable object is selected. Page Setup choices apply to
the selected object only. They are saved when you save a form or report, but not
for other objects. So, for a table or query, you have to choose your page
settings whenever you print or else accept the default settings.
-
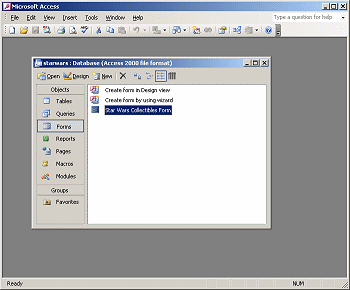
With a database open in
Access, if necessary, click on Forms and then on a form
to select it.
 Database
has no forms: If you did not open starwars.mdb
and your database does not have a form, click on Tables in the list of
Objects and then on a table listed at the right. Click on the Open button
in the Database Window to open the table. Now you have selected a
printable object.
-
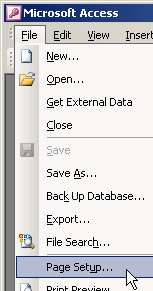 From the menu select | .
 Page Setup is not available:
You must select a printable object for this command to be available.
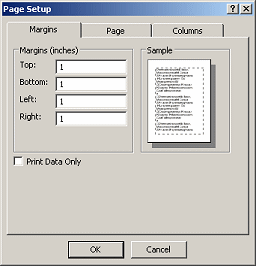
The Page Setup dialog appears with its three tabs.
-
If necessary, click on the Margins
tab.
 Default
Access margins: | | General tab.
Saving changes to Page Setup: Any changes you make in Page Setup
only apply to the selected object. They will be saved only
for a form or report.
For other objects, you have to make any changes in Page Setup every time
you print the object. How awkward!
-
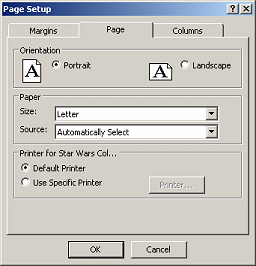 Click
on the Page tab.
You will often want to change the orientation of the print-out to
Landscape for datasheets.
-
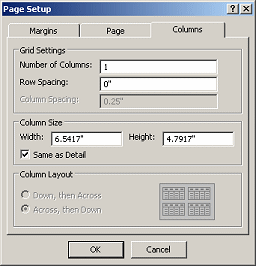 Click
on the Columns tab.
This tab is most often used to format a report into two or more columns.
Getting columns to work correctly can be tricky because the report itself
also has measurements. The two sets of measurements have to work together.
-
Click on OK to close the dialog and save
any changes.
-
Close the database.

