 |
Step-by-Step: Relationships |
 |
What you will learn: |
to view a relationship between two tables
to delete a relationship
to create a relationship between two tables
to print relationships
to view a subdatasheet
to see referential integrity in action
|
Start with:
mytrips.mdb from previous lesson
View Relationships
There is a special window for viewing Relationships. In the previous lesson,
the Lookup Wizard said it needed to create a relationship. Let's look at
that relationship.
-
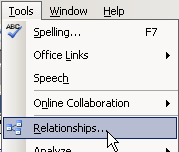 From
the menu select |
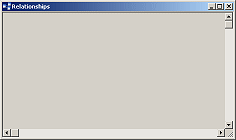
The Relationships window opens. It may be blank or it may show the
existing relationship created by the Lookup Wizard.
 or
or
If the window is blank, you can tell Access which tables to display in the Relationships window.
For practice, let's look at how to create a relationship.
-
If the window is not empty, click on each table in the
Relationships window and press the Delete key.
 When you delete a table from
the Relationships window, you do not delete the table itself. You do not
delete any relationships either. You have changed only what is shown in
the window.
-
 Click
on
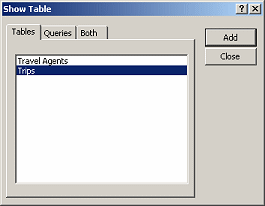
 the Show Table button on the Relationships toolbar.
A dialog appears from which you can choose
tables and queries to put in the Relationships window.
- Select the table Travel Agents and click the
Add button.
The Relationship window now shows a list of all the
fields in the table.
If necessary, drag the Show Table dialog to a position where you
can see the list in the Relationships window.
- Select the table Trips in the Show Tables dialog and
click the Add button.
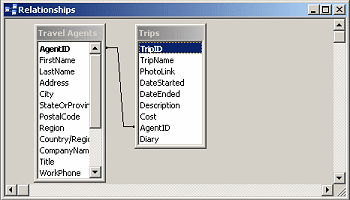
When the Trips table appears in the Relationships window, a line appears
that connects the two tables.

- Close the Show Table dialog by clicking the Close button.
- If necessary, drag the bottom edge of the Trips table
down until you can see the field AgentID.
The field AgentID from Travel Agents is connected to the field
AgentID in Trips. This is the relationship
that the Lookup Wizard created! Once the tables were displayed, Access
already knew about the relationship.
 Fields
must have the same data type to be used to create a relationship between
tables. Usually the field is the primary key in one table.
-
 Close
the Relationships window.
A message box appears asking if you want to save the changes to the
layout.
- Click Yes.
Access will now remember which tables were showing and their sizes and
arrangement for the next time you view Relationships.
Delete a Relationship
Why would you want to delete a relationship? If you need to make changes
to the table design, Access may not let you while there is a relationship
to another table. Of course, you need to be careful that the relationship
will still work after you make your changes!
-
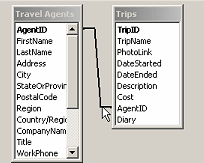 In
the Relationships window, click on the line connecting the two
tables. The line gets thicker.
-
 Press
the Delete key or click the Delete button on the toolbar.
A message box appears asking if you are sure.
-
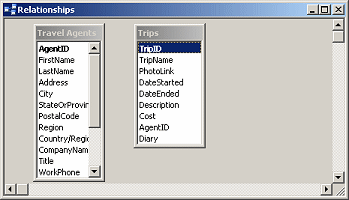 Click
Yes.
The line vanishes but the tables are still displayed.
Create a Relationship Manually
To create a relationship manually is a simple drag and drop action. You will
create a new join between the two tables, but it will not be quite like
the earlier one.
- Drag the field AgentsID
from the Travel Agents table and drop it on the AgentsID field in the
Trips table. (Be careful to drop on the correct field!)
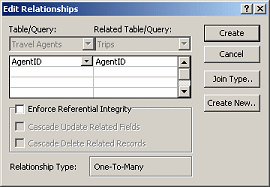 The
Edit Relationships dialog appears, showing the table names and the field
names.
-
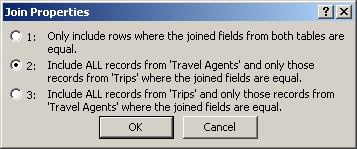 Click
the button Join Type...
The Join Properties dialog appears. There are three choices for how
records will be matched up in a query.
- Choice 1 will show only agents that have trips and trips that
have agents. There must be a match in the other table!
- Choice 2 will show all of the agents and match them
with the trips that share their agent ID number. It will show agents that do
not have any trips. It will not show trips that do not have an assigned
agent.
- Choice 3 will show all of the trips and match them
with the agents. It will show trips that do not have an assigned agent. It
will not show agents who don't have any trips yet.
- Click on the 2nd choice =
Include ALL records from 'Travel Agents' and
only those records from 'Trips' where the joined fields are equal."
This is the right choice since each travel agent can arrange more than one
trip, but each trip should have only 1 travel agent.
- Click on OK to close the Join Properties dialog.
-
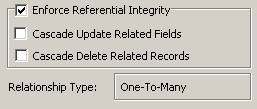 In
the Edit Relationship dialog, click in the box Enforce Referential
Integrity. This choice tells Access not to allow changes that would break
the connection between these tables.
In
the Edit Relationship dialog, click in the box Enforce Referential
Integrity. This choice tells Access not to allow changes that would break
the connection between these tables.
Leave the other boxes unchecked this time.
-
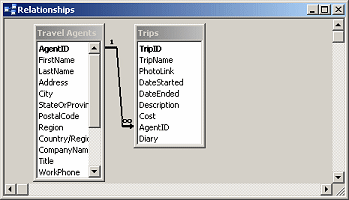 Click
on the button Create.
The line between the tables reappears, but this time it has symbols on each
end that tell you it is a One-to-Many join and that referential integrity will
be enforced
- Click on
 the
Save button on the toolbar to save this layout.
Print Relationships
The Print button on the Relationships toolbar is grayed out. Unexpectedly,
the File menu does contain a command for printing this window, Print
Relationships.
-
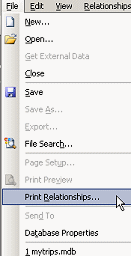 Click
the File menu to open it and select
This command does not show unless the Relationships window is active.
Access creates a report that show the tables and joins that are in the
Relationships window.
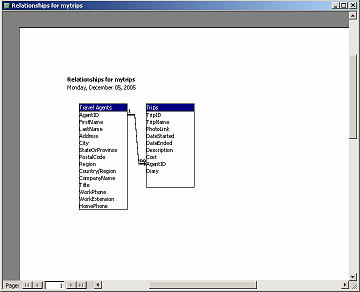
- Click the Print button on the Print Preview toolbar to print
this page.
- Close the report. Choose No when asked if you
want to save the report.
 Press
the F11 key to switch to the Database Window. (A useful shortcut when
that window is covered up by others!)
View/Edit Subdatasheet
A table that is in a One-to-Many or One-to-One relationship has a new feature. Each record
on the "One" side
has a subdatasheet that shows the related records
from the other table.
- Open the Travel Agents table.
-
 Click
the expand button
 at the left
end of the record for Jorge Martinez.
- Repeat for Hector Chavez.
A subdatasheet opens for each travel agent. It shows
the related records in the Trips table. This feature is available for the
records in the "One" side of a "One-to-Many" relationship.
You can actually edit the Trips record from here!
-
 In
the subdatasheet for Hector Chavez, change the
TripName to Italy tour and press the
down arrow on the keyboard to move to the next record. Your change is
saved automatically.
- Collapse each of the subdatasheets by clicking the
 collapse button at
the left of the record.
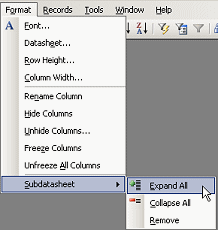
 How
to see or hide all subdatasheets at once:
|
Choices are Expand All, Collapse All, Remove. The Subdatasheet item will
not be available if the focus is in a subdatasheet.
Test Referential Integrity
Let's see what Access will do now that it must enforce referential integrity
on your new join.
-
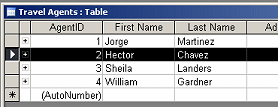 Select
the record for Hector Chavez by clicking the record selector at
the left end of the record.
-
 Press
the Delete key to delete the record.
A message appears. Access will not let you delete the record because it is
related to records in the Trips table.
 Changing a related record:
You can change anything about a record that is related to records in another
table, like Hector Chavez, except the field that is shared. In
this exercise the shared field was an AutoNumber field, which you cannot
change anyway!
 Deleting an unrelated record
from a related table: Access will allow you to delete a record in a table
that has a relationship as long as that particular record is not referred to
by another table.
- Close Access.

