
Jan's Working with Databases
Basics: Access Objects: Print Datasheet
Producing a useful, readable print-out takes some planning.
The Page Setup dialog and the Print dialog let you pick settings for how you want the datasheet to print.
The biggest problem with printing datasheets is how wide they are. If the datasheet has several columns, it probably is wider than letter-size paper in Portrait orientation and may be wider than Landscape orientation. Having a record stretch across multiple pages makes the data hard to read!
Page Setup Dialog
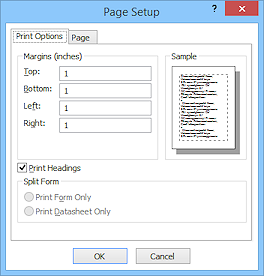 The Page Setup dialog for datasheets has two tabs instead of the three that forms and reports have. You can control the margins, orientation of the paper, the size of the paper, and which printer to use.
The default margins are 1" for a datasheet.
Print Dialog
 The Print dialog lets you choose a printer, whether to print all page or only certain pages or only selected records, and the number of copies.
The Properties button opens the dialog that comes with the selected printer. Use that dialog to access special features of your printer, especially when using special paper like card stock or photo paper or envelopes.
| |
Step-by-Step: Print Datasheet |
|
| What you will learn: | to change page margins to change orientation of paper to print all records in a datasheet to select multiple records in a datasheet and print |
Start with: mytrips-Lastname-Firstname.accdb from a previous lesson
Learning to use Print Preview, the Print dialog, and the Page Setup dialog will help you save a lot of wasted paper. Look before you print!
Datasheet: Print Preview - Margins, Orientation, ribbon Print Button
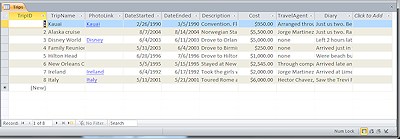
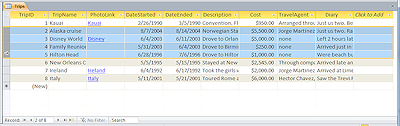
 Open the table Trips in Datasheet View.
 Switch to Print Preview.
 Access 2007:
 > Print > Print Preview

 Access 2010, 2013, 2016:
File > Print > Print Preview-
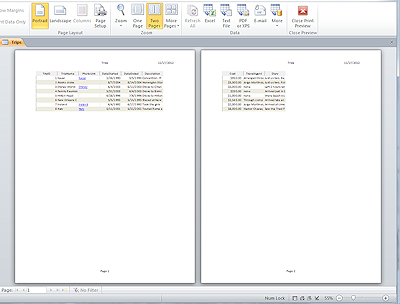
Click on
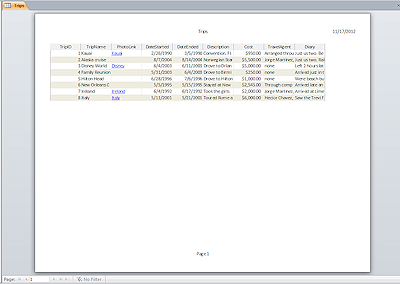
 the Two Pages button on the Print Preview ribbon tab.
The preview shows that in portrait orientation it will take 2 pages to print the table.
The Navigation buttons at the bottom are grayed out, meaning that all pages are showing.
The page header shows the table name in the center and the current date at the right.
The page footer shows the page number in the center.
You can show or hide the header and footer in the Page Setup dialog but you cannot change what will print in them.
-
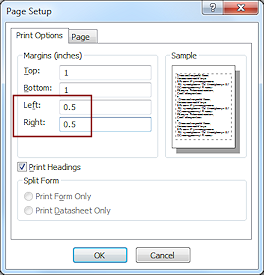 Click the button Page Setup
  on the Print Preview ribbon tab.
The Page Setup dialog appear with the default margins of 1".
-
Change the Left and Right margins to 0.5 inches and click on OK.
Leave Print Headings checked.
You return to the preview. It still will take two pages but there is less on the second page.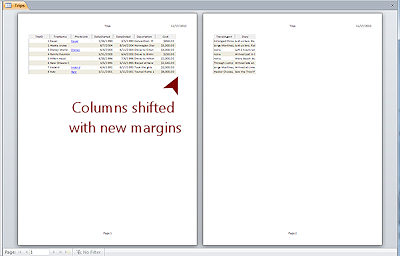
- Click the Landscape button
 on the Print Preview ribbon tab.
The preview switches to show the page in Landscape orientation.
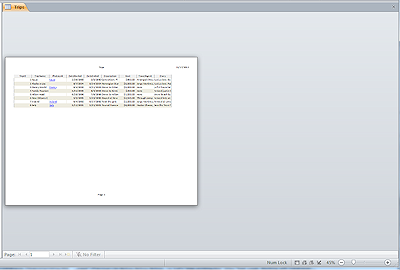 Now you have just one page in the preview but the preview is still set to show 2 pages. That's why you see a page over to the left.
 -
 Click on
 the Print button on the Print Preview ribbon tab.
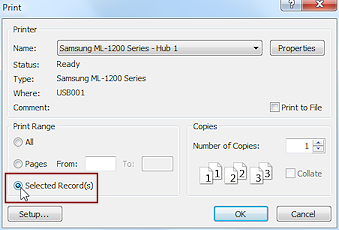
The Print dialog opens.
-
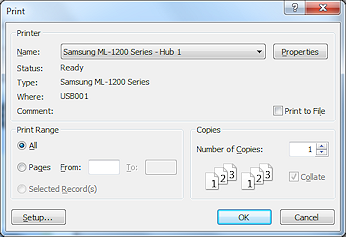 If necessary, select the printer you want to use from the drop list.
Leave the Print Range at All and the Number of Copies at 1.
-
Click on OK to print the datasheet.
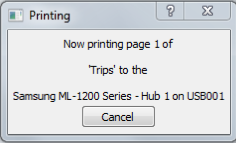 You may briefly see a dialog flicker by. This dialog reports the progress of the formatting of the
document for printing. It goes out of sight quickly for such a short and
simple document.
You may briefly see a dialog flicker by. This dialog reports the progress of the formatting of the
document for printing. It goes out of sight quickly for such a short and
simple document.
Note how long it takes to print this page in landscape orientation. Is it slower than normal?
 Quick Print: The Quick Print button that you can put on the Quick Access Toolbar starts
printing right away. You will have no choices of what to print or how. Be
sure you know what is going to happen! Unlike earlier versions of Access, this button no longer shows by default.
Quick Print: The Quick Print button that you can put on the Quick Access Toolbar starts
printing right away. You will have no choices of what to print or how. Be
sure you know what is going to happen! Unlike earlier versions of Access, this button no longer shows by default.
-
Inspect your print-out.
Which columns are too narrow to show all of the data?You could improve this print-out by adjusting the column widths and row heights. However, you cannot get all of the Memo/Long Text fields (Description, TravelAgent, and Diary) to show all of their text without wasting a lot of paper. We will use a different approach shortly.
- Click the Close Print Preview button

 on the Print Preview ribbon tab.
You are back to the Datasheet View.
Datasheet: Select Multiple Records, Print Selected Records
You don't have to print the whole table if you only want to print certain records. It's easy to select records that are adjacent to each other and then print just the selection.
![]() Records are not adjacent: To get the records you want into a sequence when they are NOT adjacent, sort or filter first. For complex choices, create a query that picks out exactly what you want and then print the query results datasheet.
Records are not adjacent: To get the records you want into a sequence when they are NOT adjacent, sort or filter first. For complex choices, create a query that picks out exactly what you want and then print the query results datasheet.
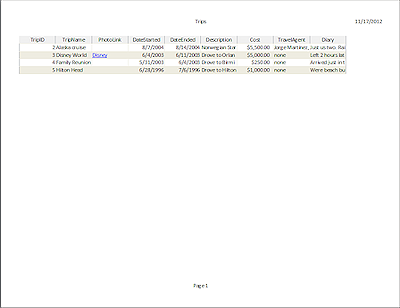
 In Datasheet View, click on the record selector at the left of the Alaska trip, record #2,
and drag down to record #5, Hilton Head.
In Datasheet View, click on the record selector at the left of the Alaska trip, record #2,
and drag down to record #5, Hilton Head.
Four records are selected.
-
 Open Print Preview.
The preview still shows Landscape orientation and all of the records and still has the choices you may in Page Setup. -
 On
the Print Preview ribbon tab, click the Print button .
On
the Print Preview ribbon tab, click the Print button .
The Print dialog opens. -
Select to print Selected Records by clicking its radio button.
There is no Print Preview button in this dialog to see what your print-out will look like now.
-
 Click on OK to
start printing.
Click on OK to
start printing.
Your page should be in landscape orientation with just 4 records showing.Be sure to write your name on the print-out if you turn it in to your instructor. It's a shame that Access won't let you add anything to the page header or footer.
-
 Experiment: Arrange for Printing
Switch to Datasheet View and experiment with different column widths and row heights. What does it take to get all of the memo fields to show all of their text? (Hint: the Diary field for the Ireland trip has the most text.)You will probably find that only one record will fit on a page and there will be lots of empty space. There are better ways to get a printed copy of these records that shows all of the text!
- Close the table without saving your changes.
|
|
| © 1997-2017 Jan Smith All Rights Reserved |
Site Map What's New |
Privacy Policy Terms of Service Copyright Acknowledgements |
~~ 1 Cor. 10:31 ...whatever you do, do it all for the glory of God. ~~
Last updated: March 22, 2017