 |
Step-by-Step:Save As |
 |
What you will learn: |
to use Pack and Go
to save as a Web page
to view your new versions |
Start with:  ,
nz-finish-xxx.ppt where your initials replaced xxx,


 3 empty floppy disks or other
removable media with 3.5 MB available
For PowerPoint 2003, skip to
Package for CD.
 Pack and Go
PowerPoint 2002 uses the same wizard as previous versions to create a
package containing your presentation and the files it needs to run on a
different computer.
PowerPoint Viewer: It's big! You will need at least 3 floppy disks or other
removable media with at least 3.5 MB free. But, it can save you from an
event disaster when the computer you need to use does not have the right
version of PowerPoint installed.
Fonts: The last slide now uses the font Matura MT Script Capitals,
which is not a standard font. If that font is not on the computer running the
show, you don't know what you will see instead! It might be an acceptable plain
font. But you might see an cutesy, elaborate, not-appropriate font! It would be
wise to embed the fonts with the show. Even your ordinary fonts might be
missing for some strange reason.
-
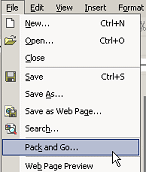 From the File menu,
select The wizard opens.
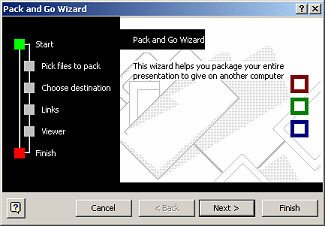
-
 Click
on Next.
- Select just Active presentation.
You could browse to a different presentation or to include several in the same
package.
-
 Click
on Next.
- Select or browse to the location to which you want to
save the package.
Oddly, on my computer the floppy drive A: and the Zip drive H: were listed but
the two USB drives that were plugged in were not listed.
Spanning disks: If there is not enough space on your removable media
for the whole package, you will be prompted to insert a new disk to continue
saving the file. You will need all disks used and know their order to extract the files to
the new computer. Label your disks and include a disk number!
-
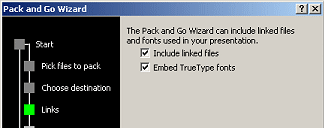 Click
on Next.
- Click in the box for Embed True Type fonts.
You do not have any linked files, but it does not hurt to leave that box
checked.
-
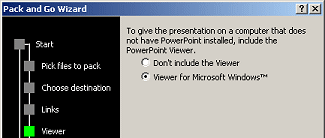 Click
on Next.
- Click in the radio button for Viewer for
Microsoft Windows. This is the PowerPoint Viewer.
 Grayed out: The
Viewer choice will be
grayed out if your computer does not have the viewer installed on it already.
If necessary, you can
download viewer from Microsoft and then install it.
-
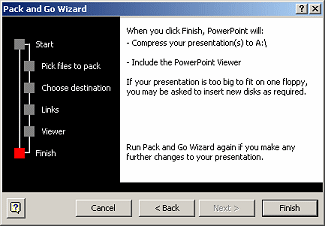 In the final screen
you can review what you chose. If this are not correct, use the Back button
to move back through the wizard steps and make changes.
-


 Click
on Finish.
Pack and Go will create two files at the location you selected. The total file
size is bigger than just the presentation, of course.
These files will NOT fit on a single floppy disk. You will be prompted to
insert a new disk as each one is filled up.
 How to handle a full Class disk
 Test: Unpack
Before going off with your packaged presentation, make sure you know how it
works!
-
 Open an Explorer window to the location where you saved the
package.
- Double click the file PNGSETUP.EXE. The
Pack and Go Setup dialog appears.
-
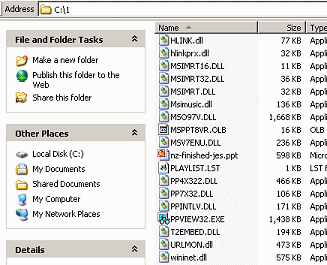 Navigate
to a location where you want to put the unpacked files and click on OK.
The packed files are extracted to the location that you chose.
If you needed multiple disks to save the package, you will be prompted to remove the current disk and
insert the next one in the set.
 A
message box asks if you want to run the slide show now.
- Click on Yes. Make sure your presentation opens up.
Your presentation will run in PowerPoint since your computer already has
PowerPoint installed.
 Package for CD
With PowerPoint 2003 the choices are mostly the same, but the look is
quite different.
More and more computers are being delivered without a floppy disk drive.
People are burning CDs or are using other kinds of removable drives to transport
large files like presentations.
-
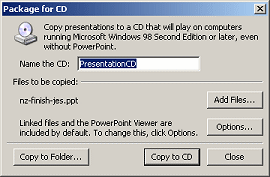 From
the File menu, select .
The dialog opens with the default name for the CD = PresentationCD. Boring!
- Change the name to NewZealand-xxx ,
where xxx is replaced with your own initials.
-
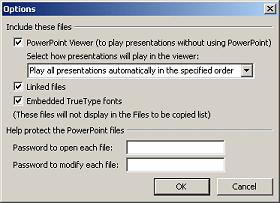 Click
on the Options... button.
The Options dialog appears with several choices.
- Include PowerPoint Viewer
- How to play
- Linked files
- Embed fonts
- Password to open each file
- Password to modify each file
- Click on Embedded TrueType fonts so that
your fonts will be available to the presentation.
- Do not create a password.
-
 Open
and read
the drop list of methods for playing the presentation.
This list is more helpful when there are going to be several presentations on
the CD.
-
Leave the original choice: Play all presentations automatically in the specified order.
-
Click on OK to close the Options dialog.
You are now ready to choose where to save the packaged files.
-
Check with your instructor on where to save your package.
- Save your package to CD or to a folder:
 While writing to a CD, do
not do anything else on the computer. Turn off automatic actions, like
checking for email, before you start to write the CD. Sometimes
other computer tasks interfere enough with the CD writing to corrupt the file.
- Folder: If you do not wish to burn a CD at this time,
click on Copy to Folder and choose a folder on your
hard disk or on a removable media disk. (You will not be able to write to
floppy disks.)
- CD: If you wish to burn a CD, you must have a CD burner
and a blank writable CD. Click on Copy to CD. Follow the prompts to insert a
blank CD. Wait for the CD to spin up and then click Retry.
- Once the CD has been created, click the Close button to
close the Package for CD dialog.
 Test: Run from CD
- Insert your new CD back into the CD drive.
After the CD spins up to speed, the presentation opens in a new window and
runs automatically.
 CD does not start up
automatically: Perhaps the CD did not get written correctly or perhaps you
chose for the CD to not start automatically.
- Open an Explorer window to display the contents of the CD drive.
- Double-click the presentation file. Your presentation should open in
PowerPoint. If the computer cannot find PowerPoint, you will need to use the
PowerPoint Viewer as in the next section.
Test: PowerPoint Viewer
Be wise! Practice how to open the presentation from PowerPoint Viewer.
-
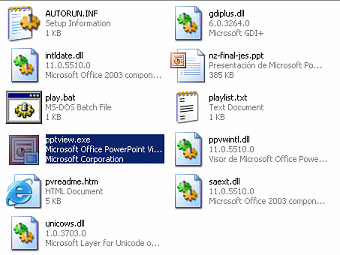 If necessary, navigate in Explorer to the files that you
unpacked or that you saved with Package for CD.
-
Double-click
the file PPTVIEW.EXE. A dialog appears
listing the presentation(s) that you just unpacked.
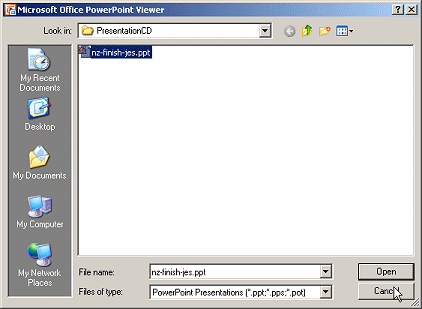
- Click on the presentation you want to show.
- Click the Open or Show button. The show begins.
- Advance through the whole show.
 There
may be changes!
- Font smoothing is off.
- No fades
- Images appear before text instead of after
- Light speed animation is not applied to clip art.
- Clip art rotation and flip is gone.
 Planning for
 PowerPoint Viewer:
If you expect to have to play your show with PowerPoint Viewer, be extra
careful in your choices for transitions and animations and the order of
animations. Be sure that all works reasonably well in the viewer.
Web Options
If you want to show your presentation over the Web, you have to make some
choices. There are Options that affect how PowerPoint saves your presentation as a web
page. The default choices are fine for most situations.
-
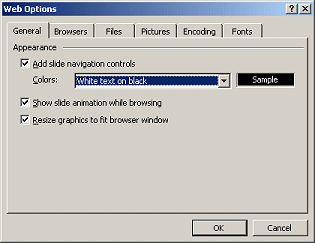 From
the menu select |
and click on the General tab and then on the Web Options button.
The Web Options dialog appears.
- Check the box for Show slide animation while
browsing and the box for Resize graphics to fit
browser window.
- Click on each of the other tabs and read what your choices
are. No need to change any of these this time.
- Click on OK to close Web Options and then on OK to
close the Options dialog.
Save As Web Page
To make your presentation available on the web, you can Save As Web Page, in
two different ways - as a single file or with a HTML page plus a folder of
related files. Both ways work well but some features may be lost.
- From the File menu, select
The Save As Web Page dialog appears, with the file type already set to HTML
page. You may need to navigate to where you want to save the documents.
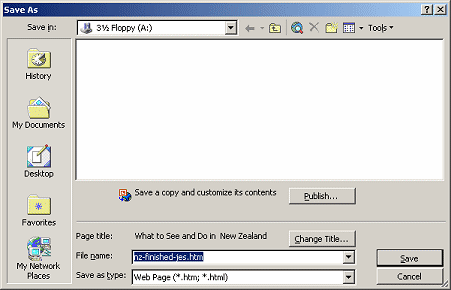
 Click on Save
and save to your Class disk. Accept the offered file name and page title.
PowerPoint creates an HTML page and saves images of the slides into a folder. It will take quite a while to write
to a floppy disk.
Total space used is about 792 KB. These need to all be on the same disk.
 How to handle a full Class disk
Test: Web Page
What will viewers of your new web page see? It depends on what software is on
their computer.
-
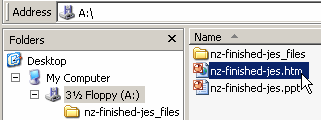 In
an Explorer window, navigate to the files you just saved.
- Double click on the HTML page. The browser opens to a framed page
with the outline at the left.
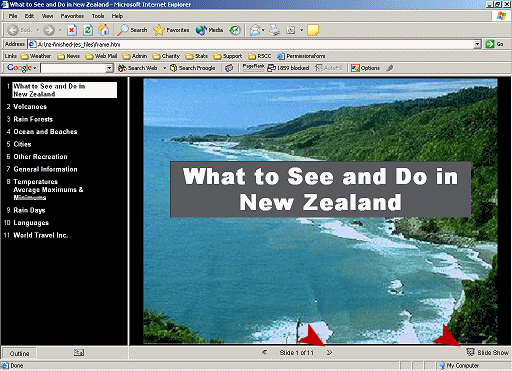
Everyone can see this framed view of your slides.
- Framed Page: Advance through the whole presentation by clicking on the right arrow below the slide or in the outline. There are changes!
- No transitions
- No animations
- No font smoothing
- No partial transparency
- Slide Show: Click on
 the Slide Show button at the bottom right of the
framed page. Your viewers may see the same static images as in the outline
interface.
Animations will play in the Slide Show IF the computer has:
~~ 1 Cor. 10:31 ...whatever you do, do it all for the
glory of God. ~~

