 |
Step-by-Step:Content Template |
 |
What you will learn: |
to use the
AutoContent Wizard
to delete a slide in Slide Sorter view
to delete multiple slides in Slide Sorter view
to replace temporary text
to duplicate slides
|
Start with:
 (PowerPoint open to a blank document)
The Story behind this presentation:
World Travel Inc. is a fictional travel agency in Buenos Aires,
Argentina. As part of an anniversary celebration, they offered some of their
best customers some special trips.
What you will create:
An on-screen presentation to summarize the results of the special offer
and to offer recommendations for the future.
You will use the AutoContent Wizard to get you started on a
presentation for World Travel Inc. that is similar to the one you created
earlier from blank slides. Two approaches to the
same problem.
AutoContent Wizard
-
Close any open presentations.
-
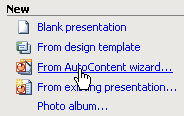
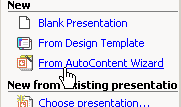

 In
the New Presentation task pane in the New section, click on From AutoContent
Wizard.
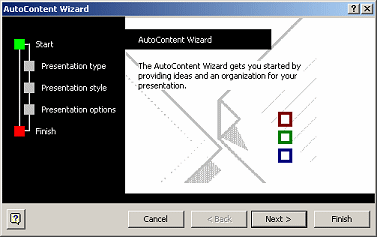 The wizard opens,
listing its 3 steps at the left. These items are not links, however. You
must use the buttons at the bottom.
-
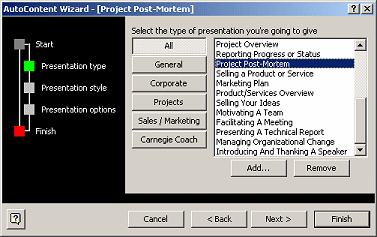 Click on the Next button to advance to the
first step in the wizard.
-
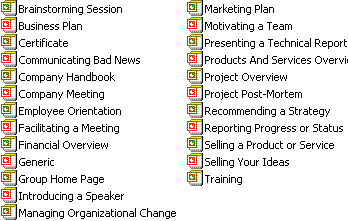
Click on the All button and scroll the list
of presentations available. Quite a choice!
-
Select
Project Post-Mortem. This presentation analyzes how a project turned out - good parts, bad parts,
recommendations for the future.
-
Click on the Next button. The next step
appears - Presentation style.
-
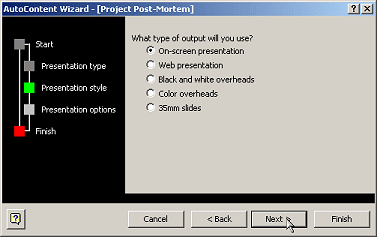 Select
On-screen presentation. Your choice of output
type here affects the dimensions of the slides. Make you choice based on
the primary use for the presentation.
-
Click on the Next button. The next wizard
step appears - Presentation options.
-
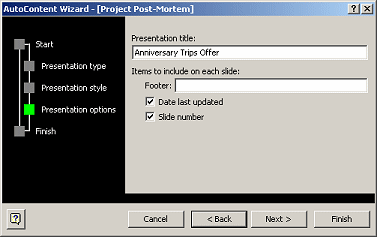 For
the Presentation title type Anniversary Trips
Offer and then click the Finish button. The new
presentation opens, ready for your editing.
Wow! This presentation is a lot prettier than your previous plain-text
one. You will learn later how to use design templates to
add formatting to your existing presentations.
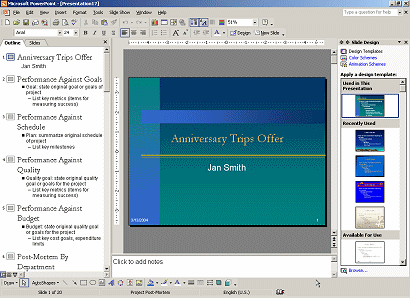
 The subtitle is the User from the Options dialog:
||.
Changing the User information in this dialog changes it for
all Office programs. To change the User name for just this presentation,
use |
| and change the Author.
Since the wizard is already finished, the subtitle will not change.
- If necessary, edit the subtitle to show your own name.
- View all of the slides and read what is on
them, the suggestions about
what should go on the slide.
Delete Slide
You don't need all of the topics that the wizard put into the
presentation. You need to delete many of the
suggested slides. The Slide Sorter view is great for this, if you can read the
titles.
-
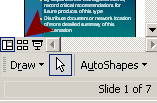 Click
Click
 the Slide Sorter button in the Views bar at the bottom of the Navigation pane.
The view switches from Normal view to Slide Sorter view.
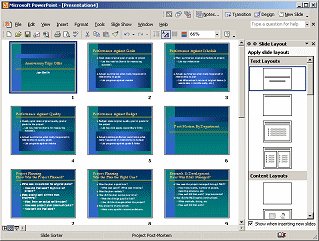
 If the Slide
Sorter thumbnails are too small to read, increase the Zoom percentage with the
toolbar's Zoom control.

-
Scroll the thumbnails. There are 20 slides. Far too
many for your purpose.
-
Click on Slide #3: Performance against Schedule
to select it.
 The thumbnail
of a selected slide has a dark blue border.
-
Press the Delete key on your keyboard. A
confirmation message box appears. Click on OK. TaDa!
The slide is removed and the remaining slides are re-numbered.
Delete Multiple Slides
You can use the same key combos to manage slides that you
use to manage files.
-
 To select neighboring slides: Click on the first slide. Hold the SHIFT key down
and click on the last slide. All in between are also selected.
-
 To select non-adjacent slides: Click the first slide. Hold the CTRL
key down and click on each of the other slides that you want to select.
Once you have multiple slides selected, you can move,
delete, or copy them all at once.
-
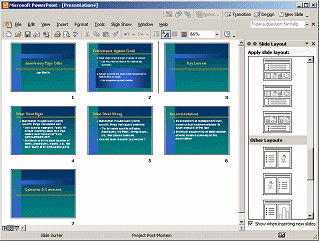
While still in Slide Sorter view, click on what is now Slide #3, Performance against
Quality.
-
Hold the SHIFT key down and click on
Slide #14: Sales. (You may need to scroll
to see Slide #14. A good time to use a key combo instead of dragging to
select!).
All of the slides between the two you clicked are selected.
-
Press the DELETE key. All of the selected
cells vanish. No confirmation box!
Change Temporary Text
The AutoContent Wizard has included temporary text on the slides. You don't want to show
that to your
audience! You must replace it all.
-
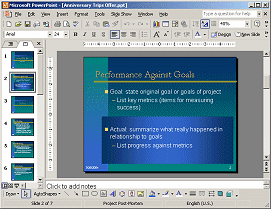 Double-click
on Slide #2: Performance against Goals to open it in
Normal view so you can edit the slide.
This suggested slide states a goal and the actual result.
-
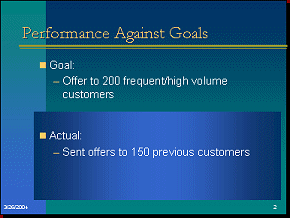
Edit the slide to read:
Goal:
- Offer to 200 frequent/high volume customers
Actual:
- Sent offers to 150 previous customers
You need three more slides about Goals. You can duplicate this one and then
edit the text. Super!
Duplicate Slide: Performance Against Goals
You will need duplicates of the Performance Against Goals slide so you can
put one goal and result on each slide.
 This action will work not only in Slide
Sorter view, but also in the Outline and Slide thumbnails.
- Click on the thumbnail of the
current slide.
 On the keyboard, hold
the CTRL key down and press the C key. The selected slide
is copied to the Windows Clipboard.
 On the keyboard, hold
the CTRL key down again and press the V key. A copy of
the selected slide appears beside the selected slide.
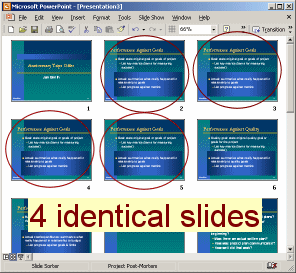
- Repeat twice. You now have 4 identical slides titled Performance
Against Goals.
Edit Text: Performance Against Goals
- Change the text on the duplicate slides as follows:
| Slide #3: |
Goal:
-Schedule 100 people on trips
Actual:
-Scheduled 124 people
|
| Slide #4: |
Goal:
-Schedule 40 other trips as a direct result
of offer
Actual:
-Scheduled 6 other trips
|
| Slide #5: |
Goal:
-Total sales of $250,000
Actual:
-Total sales were $269,000
|
Duplicate Slide: What Went Right
You need two slides about what went right with the project. It's a good thing
that slides are so easy to copy!
- Select the thumbnail of Slide #7: What Went
Right.
- Copy and paste it without changing the selection. Slide #8 is now
selected.
Edit Text: What Went Right
-
Click
on the thumbnail of
Slide #7: What Went Right to select it.
-
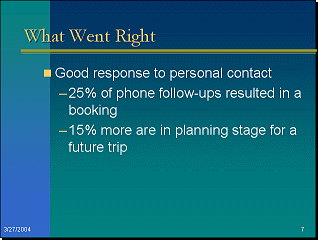
Edit
Slide #7: What Went Right to read:
Good response to personal contact
- 25% of phone follow-ups resulted
in bookings
- 15% more are in planning stage for a future trip
- Select Slide #8: What Went Right (that
still has the temporary text).
-
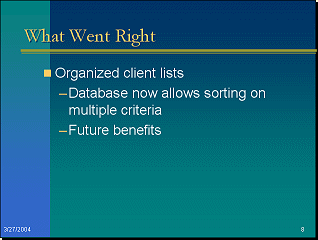
Edit the text to read:
Organized client lists
-Database can now sort on multiple criteria
-Future benefits
- Select Slide #9: What Went Wrong
-
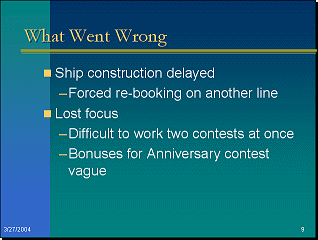
Edit the text to read:
Ship construction delayed
- Forced rebooking on another line
Lost focus
- Difficult to work on two contests at the same time
- Bonuses for Anniversary contest vague
-
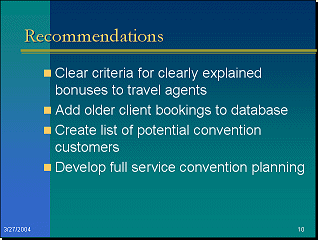
Select
Slide #10: Recommendations.
-
Edit the text to read:
Clear criteria for clearly explained bonuses to travel agents
Add older client bookings to database
Create list of potential convention customers
Develop full service convention planning
Save
-
 Click
the Save button
 .
The Save As dialog appears since this presentation has not been saved
before. Use the name Anniversary Trips Offer.ppt
and save it to your Class disk.
 How to handle a full Class disk
~~ 1 Cor. 10:31 ...whatever you do, do it all for the
glory of God. ~~




 The wizard opens,
listing its 3 steps at the left. These items are not links, however. You
must use the buttons at the bottom.
 Select
 For
the Presentation title type
 Click
Click


 Double-click
on


