
Jan's Working with the Web
HTML & CSS Basics: Exercise Web 2-3
 In this exercise you will
use Copy and Paste to convert an existing document to a web page. The document
was prepared for the newsletter Computers Today. In the original newsletter
the article appeared on a two column page and continued onto another page. The
image took up the width of the column. You will make the changes necessary
to make the document work well in a browser by itself.
In this exercise you will
use Copy and Paste to convert an existing document to a web page. The document
was prepared for the newsletter Computers Today. In the original newsletter
the article appeared on a two column page and continued onto another page. The
image took up the width of the column. You will make the changes necessary
to make the document work well in a browser by itself.
This method avoids the huge mass of code that Word includes when you use Save As to save a Word document as a Web page.
Why might Computers Today want such a web page? If there is an online or PDF version of the newsletter, the page you will create would be good to use as a Printer Friendly version of the article since it is all on one page without any extra parts.
Exercise Web 2-3: Convert & Position
| What you will do: |
Copy and paste a Word doc to Notepad Add HTML tags Add CSS styles to format Float image Change background to use a side border Use a positioned DIV to keep text off border Use @media print |
Start with: ![]() Word, Notepad, resource files
Word, Notepad, resource files
Create and Tag
When you copy from a word processing document or spreadsheet, etc. and paste into a text editor, the formatting is wiped out almost entirely. Any images are just gone. On the positive side, you don't get the huge mass of complex styles and code that Word creates when saving as a Web page.
- Open in Word:
File Ergonomics.doc from your resources files on your hard diskOr download it from the web site

Or from your Class disk in the Exercises folder
<drive for Class disk>:\class\web project2\Exercises\Ergonomics.doc
This article was written to be printed in a newsletter in two columns. A similar file is used in Working with Words: Brochure: Ex. 3-1
. - If necessary, change to Print Layout view in Word.
-
Use the key combo CTRL + A to select the entire document.
-
Copy.
-
Switch to a blank document in Notepad and Paste.
The formatting and image are lost for now. You will have to add all of the HTML tags yourself in the steps below.
If you pasted to a program that kept the image or the formatting, then it kept Word's complex formatting. Switch to Notepad and paste again. We don't want to deal with the overly complex styles that Word creates!
 Save As with the name ex3-ergonomics-Lastname-Firstname.htm to save the
file as a Web page, to the <drive for Class disk>:\class\web project2 folder of your Class
disk, where you saved the various versions of Hector's page.
Save As with the name ex3-ergonomics-Lastname-Firstname.htm to save the
file as a Web page, to the <drive for Class disk>:\class\web project2 folder of your Class
disk, where you saved the various versions of Hector's page. - Close Word.
- In Notepad, add HTML tags for a basic HTML page around the pasted material:
<!DOCTYPE html>
<html><head>
<title>Ergonomics - edited by Your Name</title></head>
<body>
[pasted text is here]</body>
</html>
Don't forget to use your own name in the TITLE tag!
-
 Add HTML tags around
document parts:
Add HTML tags around
document parts:
Line 1 = Heading 1
Line 2 = Heading 2
Line 3 = P
Other paragraphs:- "When your wrist.... comfortable and safer"
- "You may wonder... ruin your day."
- "Carpel tunnel... computer improperly."
- "According to...work station."
Lines "Posture" and "Design Features" = Heading 3.
Make bulleted lists of the lines under Posture (4 bullet points) and Design Features (5 bullet points). You must delete the black discs that Word used for the bullets. The browser will add a symbol itself.
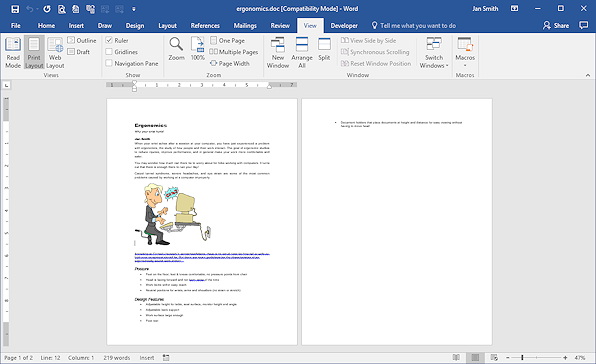
- Image:
In File Explorer, copy the image ching.gif from the Exercises folder and paste it in the web folder where your ergonomics page is.
Use File Explorer to find the correct dimensions for this image.
Put your cursor before the word When, like <p>|When. Add an IMG tag for ching.gif, using the dimensions you found above.
Include an ALT attribute of your own text.
Do not leave a space on either side of the IMG tag.
-
Link: Add an anchor tag around the text "Cornell University's recommendations" with a destination http://ergo.human.cornell.edu/ErgoTips2002/home.html
-
Save and
view the page in your browser.
[ex3-ergonomics-Lastname-Firstname.htm]
Compare to the illustration above. The text wrapping will be different for a different size browser window.
Style
Now that you have the document parts re-created, you can add styles for formatting. You may not be able to use the exact same styles as in a Word document. Font sizes need to be larger for screens than for printed documents. You must consider whether or not the fonts are available to the browsers.
-
 Style IMG:
Add an inline STYLE attribute to the IMG tag to float it at the right, with a margin left and right of 5px.
- Style the Page:
Create an internal style sheet and write a BODY style with the following properties:
- font-family: Calibri, Arial, Helvetica, sans-serif;
- font-size: medium;
- background-color using a custom color with red=241, green=224, blue=187
- text-align:justify;
This property value makes the text line up evenly on the right side as well as on the left.
- Style Headings:
In the internal style sheet, create H1 and H2 styles:
- H1: font-family: "Arial Black", Arial, sans-serif;
- H2: font-style: italic;
- Create a class in the internal style sheet
named .author with properties
font-weight:bold; and font-style:italic;
Note that the value is italic, not italics!Add the class author to the P tag containing your name.
- Save as ex3-ergonomics2-Lastname-Firstname.htm.
- Switch to your browser, Refresh, and inspect:
Make sure that your web page looks like the illustration, except of course for the text wrapping.
Resize the browser window to check wrapping around the image and the justification.
If necessary, switch back to edit to remove extra spaces, blank lines, bullets, closing tags, etc.
How well will this document work in a browser? What needs to be changed? - Save, if there were any changes.
- Refresh in the browser and inspect again!
 Always
inspect again after a save. It is amazing how easy it is to
fix one problem only to create another one!
Always
inspect again after a save. It is amazing how easy it is to
fix one problem only to create another one! -
 Print Preview in the browser.
The article should fit on one sheet of paper.
- Print.
Print error? Did a second page print? Either your margins are too wide in Page Setup or you have extra blank lines at the end of your source code. Fix and try again.
Positioning
Next you will change the background to an image background. You will have to scoot the page contents over to keep the text clear of the left side images that are part of the background.
-
 Copy the file border-computer.gif from the Exercises folder and paste it in the folder with ex3-ergonomic2-Lastname-Firstname.htm.
 -
Edit the BODY style for the web page to use this image instead of the background-color.
This background will run a line of computer images (the newsletter's logo) down the left side of the page. You now need to move the text over. -
Create a DIV that surrounds all of the elements in between the BODY tags. Give this DIV the id "pagecontents".
- Create a style in the internal style sheet for this DIV with margin-left:120px;.
-
Save As with the new name ex3-ergonomics3-Lastname-Firstname.htm
-
 Maximize your browser
window and view the new version.
Maximize your browser
window and view the new version.
Whoops. The background image is 1024 pixels wide. That is not wide enough to prevent repeating across the page for many monitor screens. Not a good look!
The solution would be to use a graphics program to make the image wider to the right, with the same color as it has now. Or you can restrict the width of the DIV. But what if the window is narrower than the DIV? Decisions, decisions! For this exercise, we will leave it alone.
-
 Open Print Preview.
Hmmm. Looks odd with the wide white area on the left. Of course if the viewer chose to print the background, it would look fine. Unfortunately you as a web author cannot force backgrounds to print. At least it still fits on one page! -
 @media print:
Add an @media print section to the internal style sheet.
In that section, write a new version for the #pagecontents style:#pagecontents {margin-left:0px;}Be careful to have matching sets of braces, { }.
- Print.
|
|
| © 1997-2017 Jan Smith All Rights Reserved |
Site Map What's New |
Privacy Policy Terms of Service Copyright Acknowledgements |
~~ 1 Cor. 10:31 ...whatever you do, do it all for the glory of God. ~~
Last updated: May 12, 2017
You need some resource files to create the web pages in the exercises. If you have not already installed these on your Class disk, do so now.
Individual files can be downloaded as you need them from http://www.jegsworks.com/Lessons/resources/web resources/HTML/Exercises/ They should be saved to your Class disk in the folder
[drive for Class disk]:\class\web project2\Exercises