
Jan's Working with Windows:
Help: Vista, Win7, Win8: Contents
The table of contents for Help for Windows shows categories of topics. "Getting started" is a good place to start!
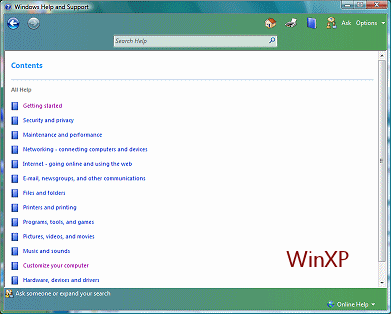
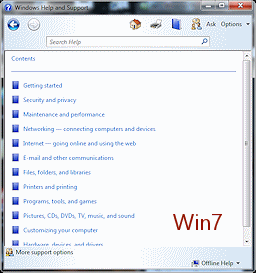

Table of Contents for Help: Vista; Win7, Win8
Step-by-Step: Help Contents - Vista, Win7, Win8 |
|
| What you will learn: | to open Windows Help and Support to navigate the Table of Contents to find a topic to navigate the topics and related topics |
![]() To
work with Help in WinXP, go to WinXP Help
To
work with Help in WinXP, go to WinXP Help
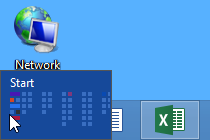
Start with: ![]() Desktop and Taskbar showing
Desktop and Taskbar showing

 Open Help and Support Center: Start Menu
-
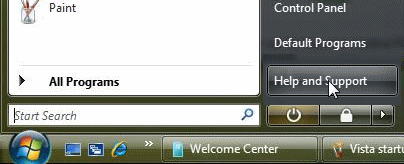
 Click on the Start button to open the Start menu.
- Click on Help
and Support. The Help and Support Center window opens to its Home page.
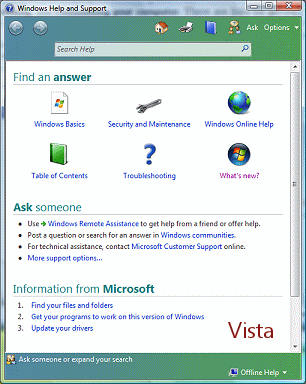

Initial Help screen

 Win8, Win8.1: Open Help and Support Center: Start Screen
- If necessary, switch to the Start screen.
Method 1: Press the Windows key, or
or  or
or  .
.
 Method 2: (Win8) Hover over the bottom left of the Taskbar until the thumbnail of the Start screen appears. Click the thumbnail.
Method 3: (Win8.1) Click the Windows button at the far left of the Taskbar.
The Start Screen shows with tiles for your apps.
-

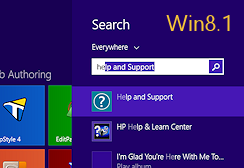
Type help.
The Search view appears with your typing in the Search box.
Apps whose names match your typing appear on the left in Win8 and below in Win8.1. Help and Support is probably at the top of the list. -
If Help and Support is already selected, press the ENTER key.
If Help and Support is not selected, click on Help and Support.
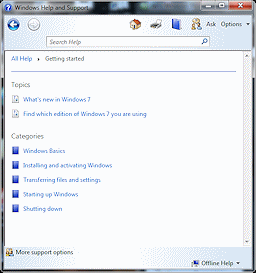
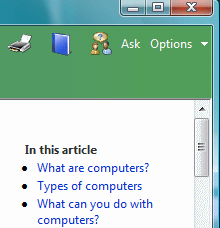
Windows switches to the Desktop and opens a window for Windows Help.The page for Help Home shows three categories: Get started, Internet & networking, and Security, privacy & accounts.
Table of Contents
-
Open the table of contents:
Vista: Click on 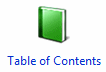 the icon for Table of Contents or
on
the icon for Table of Contents or
on  the Browse Help button in the Help toolbar. (Wonder why these icons are green and blue
instead of both the same color??)
the Browse Help button in the Help toolbar. (Wonder why these icons are green and blue
instead of both the same color??)
Win7: Click on  the link Browse Help Topics or on the Browse Help button in the Help toolbar.
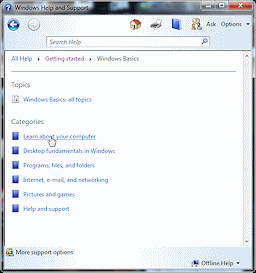
The window changes to show the table of contents of Help article categories.
The links to articles behave just like web links. Blue means an unvisited page. Purple means a page that you have visited before, but Windows will not remember forever what you have seen.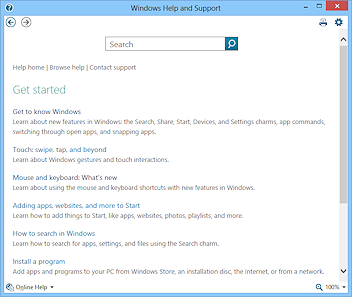 Win8, Win8.1: Click on the Get Started category.
A list of articles appears.
Navigate to an Article
![]()
![]() Vista/Win7: Open a Help article
Vista/Win7: Open a Help article
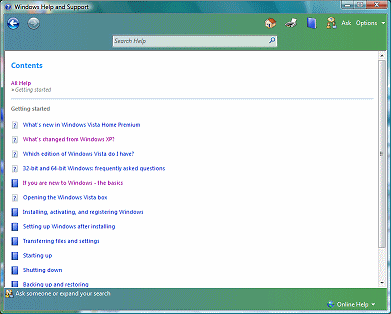
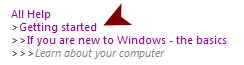
- Click the link 'Getting started'.
The window changes to a new page which lists articles in this category.
An icon
 or
or  with a
question mark is a link to an actual article.
with a
question mark is a link to an actual article.
An icon shaped like a book is a link to a list of links to articles or other lists.
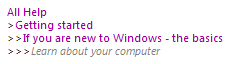
Bread crumbs: At the top of the page, a set of bread crumbs

 shows you where you are in the structure of a set of web pages. This name
comes from the fairy tale about Hansel and Gretel, who tried to leave a trail
through the forest by dropping crumbs of bread. Their trail vanished when the birds ate the
crumbs, so they could not get home!
shows you where you are in the structure of a set of web pages. This name
comes from the fairy tale about Hansel and Gretel, who tried to leave a trail
through the forest by dropping crumbs of bread. Their trail vanished when the birds ate the
crumbs, so they could not get home! For this page, the bread crumbs tell you that within the Help pages (All Help) you are at the Getting started page, which is in gray/black in the bread crumbs because it's page you are looking at.
- Click the link If you are new to Windows - the basics or Windows Basics.
The window changes and the bread crumbs get another level .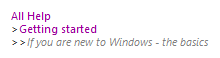
This page has one link directly to an article. The rest lead to lists. <sigh>
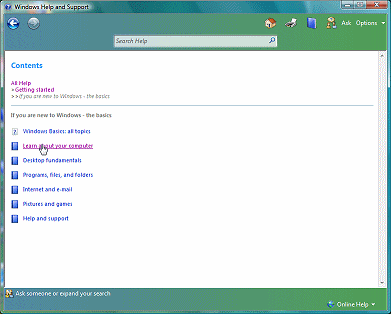
- Click the link Learn about your computer. The window changes again and another level of
bread crumbs appears.

All of the links on this page are to articles. At last!!

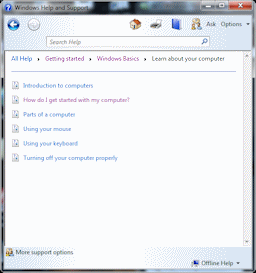
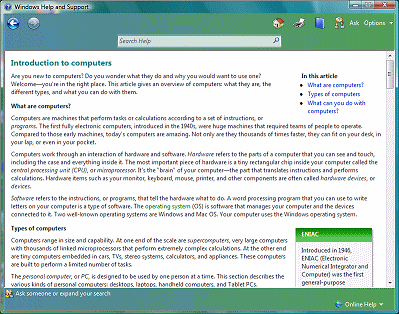
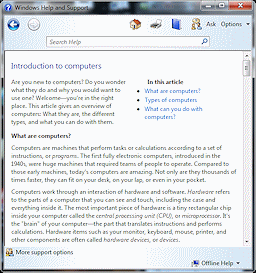
- Click the link Introduction to computers.
Finally, the window changes to show a page with information! But the bread crumbs have vanished! Just like for Hansel and Gretel!
This article can be opened from other pages, so there is more than one path to get to it.
![]()
![]() Win8, Win8.1: Open a Help article
Win8, Win8.1: Open a Help article
-
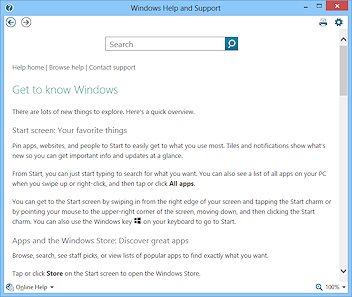 Click the link 'Get to know Windows'.
The article opens.
These Help articles are plain with few illustrations.
The window does not show the bread crumb navigation that previous versions had.
There is no article about computers in general like the Introduction to computers
 article that was listed by previous versions of Windows. I guess we are all supposed to know how computers work already! (If you don't, go through my Computer Basics
 lessons.)
Navigating Inside an Article
When an article is too long to fit into your window, how do you get to the part that is out of sight? There are several methods which you will find useful.
Scroll
-
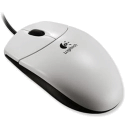 If
you have a scroll wheel on your mouse:
If
you have a scroll wheel on your mouse:
With the article open and the mouse pointer over the article, turn the scroll wheel on your mouse. How many lines does the page move at a time? The
default is 3.
How many lines does the page move at a time? The
default is 3.
You can change this behavior in the Mouse Properties dialog, which opens from the Control Panel.Which way do you roll the mouse wheel to see something further down the page? Further up the page?
-
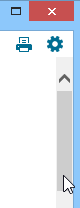
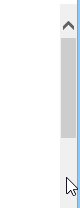
 Drag the vertical scroll box at the right edge of the window.
The height of this box shows the percentage of the article that is showing. For example, if half of the article is showing, then the scroll box is half as tall as the scroll bar.
-
 Click in the scroll bar itself, but not on the scroll box or on the scroll
arrows.
How far does the page shift?
Click in the scroll bar itself, but not on the scroll box or on the scroll
arrows.
How far does the page shift? 

 Click on the scroll arrows at the top and bottom of the scroll bar.
How
far does the page shift?
Click on the scroll arrows at the top and bottom of the scroll bar.
How
far does the page shift? - Scroll back to the top of the article.
Vista, Win7: Links
 At the upper right of the article are some links to
subtopics in article. A link to a place in the same document is called a bookmark.
At the upper right of the article are some links to
subtopics in article. A link to a place in the same document is called a bookmark.
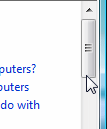
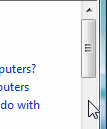
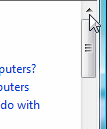
- Click on the third link at the top right of the article: What can you do with
computers?
The page jumps to the beginning of that section, which is at the bottom of the page.
 Keyboard
 Several keys on your keyboard can help you navigate around the page.
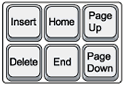
- Press the Home key on your keyboard.
The page jumps to the top of the document.
- Press the End key on your keyboard.
The page jumps to the bottom of the document.
- Press the Page Up key.
The article shifts by the amount that will fit in the window to show text that came before what you were looking at. So for this purpose a "page" is what fits in the window, not what would fit on a paper page.
- Press the Page Down key.
The article shifts by the amount that fits in the window to show what follows the current text in the document.
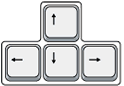
- Press the Up arrow key several times and then the Down arrow key several times. The arrow keys move the document by one line.
- Use the method of your choice to return to the top of the article.
- Read the article.
Vista, Win7: Definitions
Words in green in a Help article have a popup definition.
-
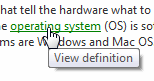 In the article, move your mouse over the green words, such
as operating system, and let the
mouse hover. A screen tip appears that says "View definition".
In the article, move your mouse over the green words, such
as operating system, and let the
mouse hover. A screen tip appears that says "View definition". - Click on the green words.
A definition appears as a screen tip floating over the page.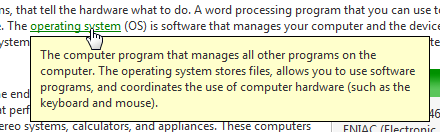
- Click again to hide the definition in the article.
![]() In other
situations a screen tip pops up as soon as you hover over
the magic spot and vanishes when you move the mouse away.
In other
situations a screen tip pops up as soon as you hover over
the magic spot and vanishes when you move the mouse away.
Try it: Hover over the green phrase "screen tip" in the line above. The definition of the phrase appears. No clicking necessary!
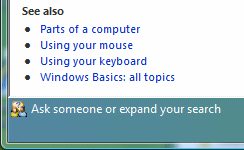
Vista: Related Links
At the bottom, some articles have a list of related articles in a list called See also.
-
 Use the method of your choice to move to the end of the article.
- Click on the link Parts of a computer.
A new article opens in the window.
- Read the article.
Return to a Previous Page
Articles do not have bread crumbs and there is no history list that you can view. There is no obvious reason why!
You will have to use the Back button on the toolbar to get back to the previous page.
- Click (multiple times if necessary) on the Back button

 on the toolbar until you have returned to the list where you started:
If you are new to Windows - the basics
or Windows Basics
or Get Started.
- Open another article and read it, like 'Parts of a computer' or 'Touch: swipe, tap, and beyond'.
There are no bread crumbs for this article.
- Return to the list using the Back button .
- Read each of the
remaining articles in this list.
As you open these articles, the links will change color from blue to purple. To change links
back to blue:
To change links
back to blue:
The pages you open are remembered by your browser's History list. If you want to change all the links back to blue, you must make Windows forget where you have been by deleting the browser's History list entirely. This will remove ALL of the pages that your browser remembers, including pages on the Internet. The History that you can see in your browser does not show the History items for Help files. Once again, no obvious reason! -
 If your Windows version shows bread crumbs, on the page Learn about your computer, click on the link Getting Started in the bread crumbs
You jump straight to that page and then...
-
 Experiment: Practice moving around in the Table of Contents sections and
jumping back to a previous page with the bread crumb links.
Experiment: Practice moving around in the Table of Contents sections and
jumping back to a previous page with the bread crumb links.
|
|
| © 1997-2017 Jan Smith All Rights Reserved |
Site Map What's New |
Privacy Policy Terms of Service Copyright Acknowledgements |
~~ 1 Cor. 10:31 ...whatever you do, do it all for the glory of God. ~~
Last updated: March 22, 2017