 |
 |
Step-by-Step: Report Template |
 |
What you will learn: |
to create a new document using a template
to remove unnecessary parts of the template
to replace temporary text
to insert a file into a document
to update style automatically
|
Start with:   ,
Professional Report template, report.doc
from resource files ,
Professional Report template, report.doc
from resource files
Open New Document from Template
-

 From the menu select | .
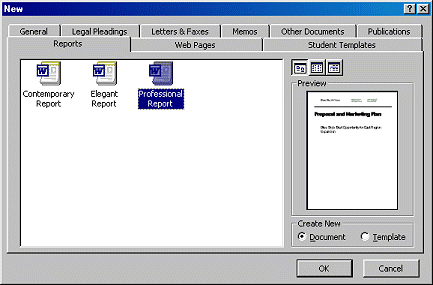
The New dialog opens. Click on the Reports tab, and choose the template Professional Report , and click on OK.
  From the menu select | .
The New Document task pane opens. Click on
 General Templates link
or General Templates link
or  On
my computer... and
then the Reports tab. Choose the template Professional Report
and click on OK. On
my computer... and
then the Reports tab. Choose the template Professional Report
and click on OK.
Your dialog may show different tabs.
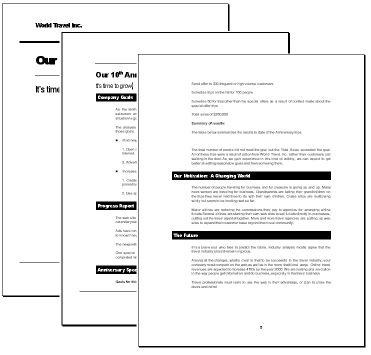
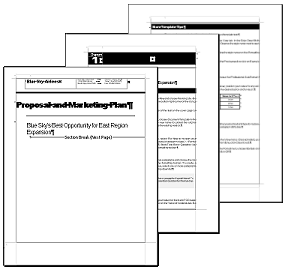 The 3-page template opens with sample text. You
will modify this a lot, but it is a big help to have a base plan to work
with. The 3-page template opens with sample text. You
will modify this a lot, but it is a big help to have a base plan to work
with.
-
Read through the template. The main text explains
how this template works. (You may print this if you would like to keep the tips handy for
later.)
Replace Titles
-
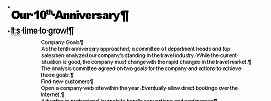
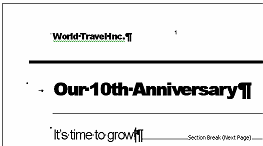 On the first page change the top to read just World Travel Inc.
instead of Blue Sky Airlines; the main title to Our 10th Anniversary ; the subtitle to It's time to grow! On the first page change the top to read just World Travel Inc.
instead of Blue Sky Airlines; the main title to Our 10th Anniversary ; the subtitle to It's time to grow!
- On page 2 of the report, delete the part at the top that contains Chapter 1
to get rid of all the black across the top. Your
document won't be long enough to break it into chapters. (Aren't you
glad!?)
 In Word 97 Chapter 1 is
in a frame. Select the frame and press the DELETE key. In Word 97 Chapter 1 is
in a frame. Select the frame and press the DELETE key.
   In Word 2000/2002/2003 Chapter 1 is in a table. If you just delete
the text, you will still have a big black area across the top of the
page. Click in the table and from the menu select Table | Select
| Table .
Then from the menu select Table | Delete | Table. In Word 2000/2002/2003 Chapter 1 is in a table. If you just delete
the text, you will still have a big black area across the top of the
page. Click in the table and from the menu select Table | Select
| Table .
Then from the menu select Table | Delete | Table.
-
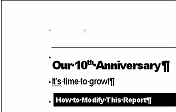 On page 2, change
the title and subtitle to match what you did on page 1. On page 2, change
the title and subtitle to match what you did on page 1.
Replace Body Text
The main text for the document has already been
written for you. But first read what the template's
text explains about how this template works. Then you can replace the
temporary text with the report text, as described below.
- Select the rest of the temporary text and press DELETE to remove it from
the document.
- If necessary,
create
a blank line below the subtitle.
 Save on your Class disk in the folder
word project4 as report-WorldTravelInc1.doc .
If you need to start over after a while, you won't have to start at
the very beginning. Save on your Class disk in the folder
word project4 as report-WorldTravelInc1.doc .
If you need to start over after a while, you won't have to start at
the very beginning.
 How to handle a full disk
- Position the cursor on the first line after the subtitle on page 2.
-
 From
the menu select |
. The Insert File dialog opens. From
the menu select |
. The Insert File dialog opens.
- Navigate to your resources files
and select report.doc in the word folder.
The full path is:
c:\My Documents\complit101\word\report.doc
if
you used the default location for the resource files.
All of the text in report.doc is pasted into your document at the cursor
location.
Alternate method: Open the document you
want to include and select all of its contents. (CTRL + A or | .) Copy. Switch to the
template and paste in the new location.
Apply Styles
- Select all of the pasted text and apply the Body Text style. This style starts with the
Normal style and adds Justified, Line space after 12 pt, and Line
spacing at least 12 pt.
- Use CTRL + ALT + 1 to apply the Heading 1
style to the following lines:
Company Goals , Progress Report , Anniversary Special Trips Offer , Our Motivation: A Changing World The Future
- Apply the style List Bullet from the Styles list
to two lines:
Find new customers
Increase business with current customers .
This style uses the square bullet and
sets no additional indention.
 Finding a style in the
list: The list of
styles is long. If you start typing the name of a style in the Styles
box, the list will scroll to the next item that matches what you typed. Finding a style in the
list: The list of
styles is long. If you start typing the name of a style in the Styles
box, the list will scroll to the next item that matches what you typed.
  It is easier to use the Styles and
Formatting Task Pane than to use the Styles box for long lists. It is easier to use the Styles and
Formatting Task Pane than to use the Styles box for long lists.
 In Word 97 the list not in strict
alphabetical order. It can be hard to find the style that you know
is there ... somewhere. Another method to use in Word 97 is to open the Style
dialog from the Format menu, select from the alphabetical list there, and Apply it. In Word 97 the list not in strict
alphabetical order. It can be hard to find the style that you know
is there ... somewhere. Another method to use in Word 97 is to open the Style
dialog from the Format menu, select from the alphabetical list there, and Apply it.
-
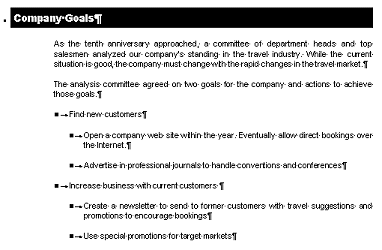 For the actions named underneath each line you just formatted
with List Bullet, apply the style List Bullet 2. This style also uses the square bullet and adds some
indention. For the actions named underneath each line you just formatted
with List Bullet, apply the style List Bullet 2. This style also uses the square bullet and adds some
indention.
-
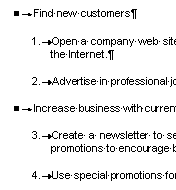 Put the cursor
in the paragraph Open a company web… and click the Put the cursor
in the paragraph Open a company web… and click the
 Numbering button to change from
bullets to numbers. The indention changes. Numbering button to change from
bullets to numbers. The indention changes.
The style List Bullet 2 is automatically be updated for all 4
paragraphs with this style as you make changes.
- Click
 the Indent button to indent
the paragraph back to where is was before you changed to numbering.
(Yes, it is a bit silly to use numbers but still call the style List
Bullet 2. But it proves a point - the name is not magic!) the Indent button to indent
the paragraph back to where is was before you changed to numbering.
(Yes, it is a bit silly to use numbers but still call the style List
Bullet 2. But it proves a point - the name is not magic!)
Hmmm. We have problems. In some cases, the lines do not indent at all. Also,
the four lines using the List Bullet 2
style are numbered 1, 2, 3, 4 instead of 1, 2 and then 1, 2. Not what we want. The automatic features are not going to work right in this case.
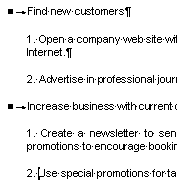
- Click
 the
Numbering button to toggle off the numbering. The lines shift back to
the left. the
Numbering button to toggle off the numbering. The lines shift back to
the left.
- Click
 the Increase
Indent button to indent
them one tab stop to the right of the bulleted paragraphs. the Increase
Indent button to indent
them one tab stop to the right of the bulleted paragraphs.
- Type the
numbers yourself at the left of the 4 paragraphs. (Sometimes brute force
is necessary to get the results you want!)
-
 Make Bold the line Goals for this promotion and Summary of Results Make Bold the line Goals for this promotion and Summary of Results
 Save on your
Class disk as report-WorldTravelInc2.doc . Save on your
Class disk as report-WorldTravelInc2.doc .
 How to handle a full disk
If you are using floppy disks, your
disk is probably getting full. You may want to start using a
blank one now. We will still call whatever floppy you are using to save
your files to your Class
disk.
|

