
Jan's Working with Databases
Forms & Reports: Forms: Data Properties
So far you have worked primarily with the Form Design View. You have already learned how to navigate between records in Form View and how to enter data in a form. Next you will look at some of the Data properties of a form that can affect how Form View works.
-
Read-Only form
Allows users to view existing records but prevents them from creating new records or editing or deleting records.An example of a read-only form is what a police officer sees when looking up someone's driving record or arrest record. The form may look exactly like the data entry form but the officer cannot edit or delete the record.
-
Data entry form
Designed for entering new records. It does not show any existing records.One example of a data entry form is one that a customer uses to enter their own contact and credit card information. That person should not be allowed to view records for other people.
| |
Step-by-Step: Data Properties |
|
|
What you will learn: |
to make the form read-only |
Start with: ![]() , resource files, worldtravel-Lastname-Firstname.accdb from folder databases project4 as updated in the previous lesson
, resource files, worldtravel-Lastname-Firstname.accdb from folder databases project4 as updated in the previous lesson
Create a Read-Only Form
Sometimes there are users who need to see data, but they don't need to edit the records.
The Property Sheet for the form is your friend for this task. Just a few changes and the whole form becomes read-only. In fact, you could create a database that links to your tables but which contains only read-only forms. That would certainly keep "accidents" from happening to your records. Keep in mind that a user can still copy data and paste it to a different document.
- Back up the database before you start!
 Switch to Form Design View for the form Staff-format control.
 Save the form as Staff-Read Only.
 -
 If
necessary, open the Property Sheet for the
whole form.
If
necessary, open the Property Sheet for the
whole form. - Change the Caption property to Staff-Read Only.
- Click on the Data tab.
-
Click in the Property Sheet on each of the properties listed below and press F1. (You must be online.)
Data Entry
Allow Additions
Allow Deletions
Allow Edits
An article about writing code for the property opens in your browser. But part of the page is helpful to understand how the choices work. (You may need to click on a link in the page that appeared to get to the actual article.) Problem: No article, just an error page in the browser
You did not click in the property's box but on the arrow or somewhere else.
Solution: Click in the property's box and try again. - Read the first paragraph of the article for the
property:
The 'Allow' properties act as expected. "No" means that the action is not allowed. You would usually want all three to be "Yes" or all three to be "No" - add a record, delete a record, edit a record.
But a 'Yes" for the Data Entry property makes your form a special kind of form. A data entry form does not show existing records at all. It just provides a blank form for a new record. The default choice is "No". That's good for a Read-Only form, for sure! No one wants to stare at a blank form that you cannot change!
- Set the value to No for all four properties.
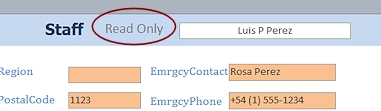 Add a Label control to the Form Header that has "Read-Only" as its text.
You may need to move the calculated control to the right to make more space.- Enlarge the font to 14 pt.
 Switch to Form View.
-
Try to make a change in a value.
If you made the changes above, you can select data but you cannot make any changes.Is it clear now why you added the warning label to the header? It's to avoid driving the users of the form crazy!
- Save the form.
[Staff-Read Only]
Create a Data Entry Form
A data entry form is a form that is specifically designed for entering new records. Sometimes you need a special form to keep things simple for the person entering the data. The order that data for new records comes in may not be the order that you want to use for viewing it later. Two different logics may be at work. Two different forms is the solution!
Besides having a different order for the controls, a data entry form opens directly to a blank record. That is what the form's Data Entry property is for!
- Switch to Form Design View.
- In the Property Sheet for the form, change the property Data Entry to Yes.
- Change the Caption for the form to Staff-Data Entry.
- Delete the Read Only label from the Form Header.
- Save the form as Staff-Data Entry
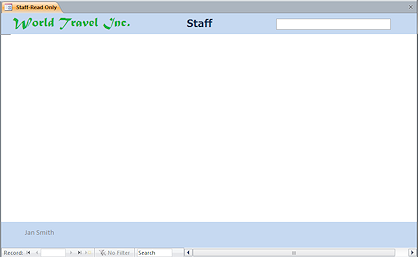 Switch to Form View.
Whoops. The form has no controls for entering data. That would be because we left the Allow... properties at No!
- Switch to Form Design View.
-
 Change the properties Allow Edits, Allow Deletions, Allow Additions to Yes.
-
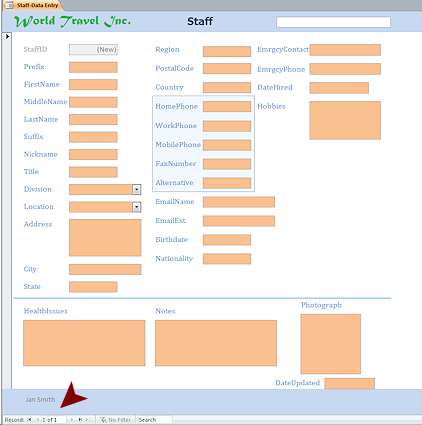
Switch to Form View.
Better! Now you can use this form to enter new records.
Notice the navigation buttons at the bottom of the form. There are no other records available! This form will only show the records entered in the current session.
- Save the form.
[Staff-Data Entry]
|
|
| © 1997-2017 Jan Smith All Rights Reserved |
Site Map What's New |
Privacy Policy Terms of Service Copyright Acknowledgements |
~~ 1 Cor. 10:31 ...whatever you do, do it all for the glory of God. ~~
Last updated: March 22, 2017