
Jan's Working with Numbers
Excel Basics: Getting Started: Page
The way your spreadsheet fits onto paper can be controlled from the Page Setup dialog and the Page Layout ribbon tab. You can select the size and orientation of the paper, the width of margins, what goes in the header and footer of each page, and the order of printing cells for sheets that will take several pieces of paper. All in all, there are a LOT of choices. There are so many choices that we will use a separate lesson page for each tab in the dialog.
| |
Step-by-Step: Setup the Page |
|
| What you will learn: | to use the ribbon and dialog to set - page orientation scaling paper size |
Start with:![]() ,
, ![]() budget-chart-2010-Lastname-Firstname.xlsx from
your Class disk in the folder excel project1
budget-chart-2010-Lastname-Firstname.xlsx from
your Class disk in the folder excel project1
Changes in this lesson are not saved. Your instructor may or may not have additional instructions about screen shots to submit.
Page Setup: Page Layout Ribbon Tab
-
 Open budget-2010-Lastname-Firstname.xlsx to the Budget sheet.
- On the Status bar, click on the Page
Layout button.
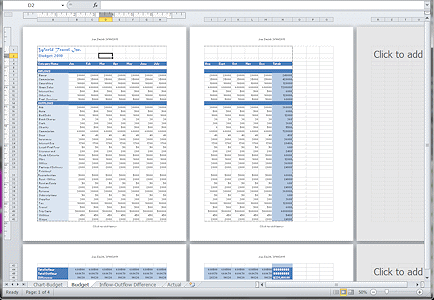
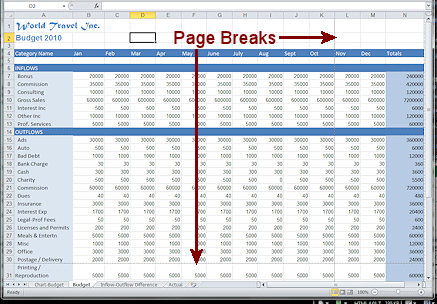
What do you see?- Pages are in Portrait orientation.
- Four pages showing
Only two pages will print.
(Check the border lines. Are your eyes good enough to see the difference? It is not easy in Excel 2013 and 2016!)You set the print area to not print the totals rows in a previous lesson.
-
Blank pages to which you could add data.
The illustration shows a window with Zoom reduced to show more pages.
- Switch to the Page Layout tab.
There are buttons here for margins, orientation, paper size, and more. -
 Experiment: Page Layout tab
Click each of the buttons in the Page Setup tab group and inspect the choices.
Do not make any choices at this time.The buttons are great if you want to change just one feature. The Page Setup dialog (next section) is better if you are changing or checking on several features at the same time.
When you are ready to continue...
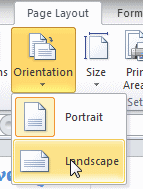 Click the Orientation button
and select Landscape.
Click the Orientation button
and select Landscape.
The same size window as before.
 What do you see:
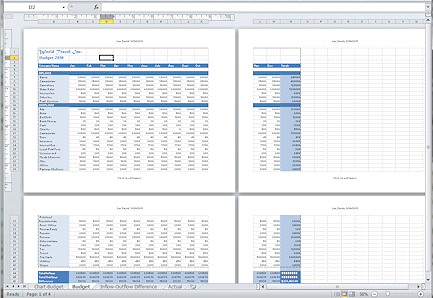
- Pages are in Landscape orientation.
- Four pages showing
- Four pages will print but part of the data will not print.
(Check the border lines)
-
 Click the Status bar button
  to change back to Normal view.
Only the dashed lines for page breaks changed. Now they show breaks based on Landscape orientation.
Page Setup: Dialog
The Page Setup dialog is more convenient than the ribbon when you want to make several changes. Some settings in the dialog are not available on the default ribbon.
-
 On the Page Layout tab, click the dialog box launcher
  for the Page
Setup tab group.
for the Page
Setup tab group.
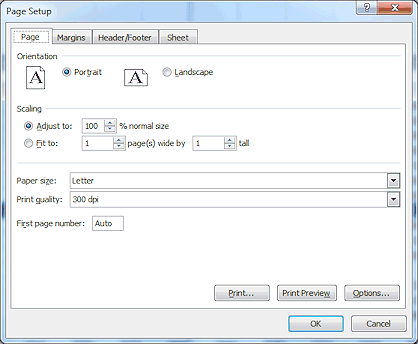
The Page Setup dialog opens. Most of these settings are on the ribbon but it is convenient to use the dialog when you want to look at several different settings.
The default settings are shown in the illustration. Orientation = Portrait;
Scaling = 100%;
Paper size = Letter
Print quality = 300 dpi;
First page number = AutoLandscape orientation is often used with spreadsheets since you can show more columns. The Print quality default setting may be different for you. It depends on your printer. Outside the USA, the default paper size might be A4.
 The Options button in the Page Setup opens the Printer Options dialog and not Excel's Options
dialog. Options, options, options! Anyone need more options??
The Options button in the Page Setup opens the Printer Options dialog and not Excel's Options
dialog. Options, options, options! Anyone need more options??
-
Click the radio button for Fit to: 1 page(s) wide by 1 tall.
Fit to is most
helpful when your data is just a column or two too wide or a row or two too
tall. Things get too tiny if there is a lot of data to shrink down to one
page. Warning: When you change the Scaling from 100% or use the Fit to setting, your previous page breaks are
lost.
Warning: When you change the Scaling from 100% or use the Fit to setting, your previous page breaks are
lost. -
 Click on
  the Print Preview button in the Page Setup dialog.
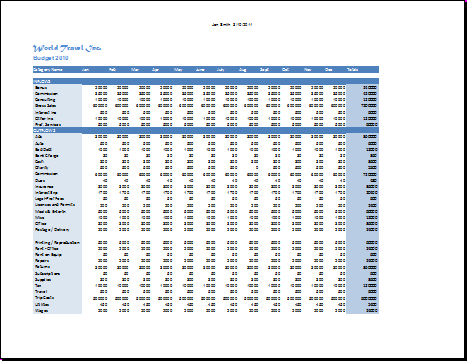
Print Preview opens. Excel 2007 and Excel 2010 handle print preview differently.Only the data in the print area shows, sized down to fit onto one sheet of paper.
- Close budget-chart-2010-Lastname-Firstname.xlsx without saving your changes.
You were just making sure of your settings in this lesson.
|
|
| © 1997-2017 Jan Smith All Rights Reserved |
Site Map What's New |
Privacy Policy Terms of Service Copyright Acknowledgements |
~~ 1 Cor. 10:31 ...whatever you do, do it all for the glory of God. ~~
Last updated: March 22, 2017