 |
Some programs do not work with
embedding and linking. These are usually older programs. To get data from such a
program into another program you must resort to brute force - use an image.
There are actually advantages to using a picture of your
sheet! Sometimes you actually want a fixed copy of your sheet instead of
one that can be changed and updated. A picture cannot be accidentally changed. A
picture shows how things were at a particular point in time.
|
 |

Where you are:
JegsWorks >
Lessons >
Numbers
Before
you start...
Project 1: Excel Intro
Project 2: Excel Basics
Project 3: Format & Arrange
Project 4: Groups & Formulas
Project 5: Design
Analysis

What If...
Logical Tests
Sharing Data

 Embed Embed
 Link/Icon Link/Icon
 Picture Picture
 Document Properties Document Properties
Summary
Quiz
Exercises
Search
Glossary
Appendix |
|

|
Step-by-Step: Picture
|
 |
|
What you will learn:
|
to insert a sheet as a picture
|
Start with:
 trips37.xls
(saved in previous lesson)
and sharedata.doc (saved in
previous lesson)
You will continue building your Word document, adding
another method of sharing data from Excel.
Picture: Create object
-
 Open sharedata.doc, if necessary. Open sharedata.doc, if necessary.
- Put the cursor on the line below the icon. Type Picture and press
ENTER.
- Switch to Excel with trips37.xls open and select the
Tickets Sold Chart again, and Copy.
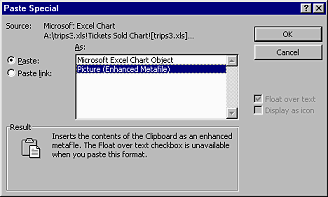
- Switch back to Word and in share data.doc, with the cursor on the line
below the word Picture, select | and choose
As: Picture (Enhanced Metafile).
The chart is now an image on your sheet.
- Resize the picture to about the size of the other two charts
so that all will fit on one page. If necessary, drag it below the word
Picture.
-
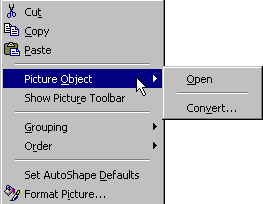
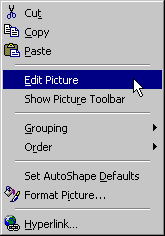 Right-click on this newest chart. The popup menu shows commands about pictures. Choose . Right-click on this newest chart. The popup menu shows commands about pictures. Choose .
  Word
opens a new window and turns the image into a
Drawing object made up of lots of separate parts. You can now edit all of the
parts.
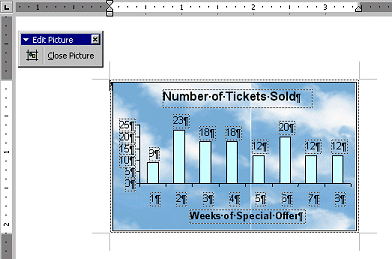
  Excel
2002/2003 allows you to edit the Drawing object in place. Excel
2002/2003 allows you to edit the Drawing object in place.
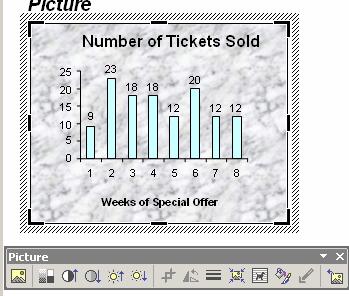
The screen may blink several times as the picture is converted, redrawn,
and framed for editing.
 The picture will remain a Drawing object after you finish. If you look
carefully, you can see that the fonts have been changed a bit. The picture will remain a Drawing object after you finish. If you look
carefully, you can see that the fonts have been changed a bit.
 Excel may not be able to turn some images into
Drawing objects. If that happens, you can edit the image only in a graphics
program. Excel may not be able to turn some images into
Drawing objects. If that happens, you can edit the image only in a graphics
program.
-
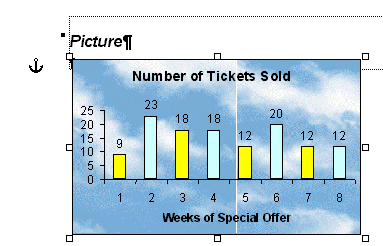
 Click on the first bar on the left of the chart.
Handles appear around it. Click on the first bar on the left of the chart.
Handles appear around it.
- Use
 the Fill button to change its color to Yellow. Repeat to change
alternating bars in the chart. the Fill button to change its color to Yellow. Repeat to change
alternating bars in the chart.
-
   Close
the Drawing object window by clicking the Close button.
  Click
on a blank area of the document. Click
on a blank area of the document.
Again the screen may flicker and redraw.
-
 Right click on the third chart
(the one you just edited). Right click on the third chart
(the one you just edited).
  The popup menu
has choices for a Object now instead of just a Picture. The popup menu
has choices for a Object now instead of just a Picture.
   The
command is grayed out
on the popup menu. Click on a part of the chart and you will see that it
is still a Drawing object. The
command is grayed out
on the popup menu. Click on a part of the chart and you will see that it
is still a Drawing object.
These
context-sensitive menu are neat, but confusing at times!
 Do not save yet.
This file is probably too large to fit on a floppy disk! Do not save yet.
This file is probably too large to fit on a floppy disk!
-
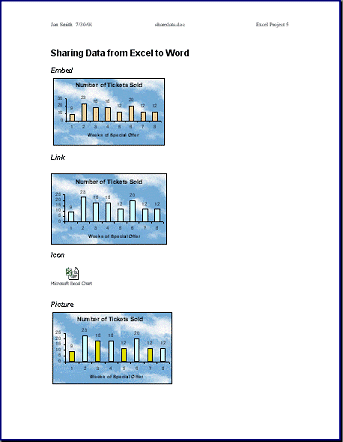 Prepare to Print:
Create a header with your name and the date on the left, the
file name [Insert | Field | FileName] in the center, and Excel Project 5 on the right.
Spell Check. Print Preview. Prepare to Print:
Create a header with your name and the date on the left, the
file name [Insert | Field | FileName] in the center, and Excel Project 5 on the right.
Spell Check. Print Preview.
 Print. Your linked object
will be updated before printing, under the default Word settings.
 Try to Save.
[sharedata.doc] Try to Save.
[sharedata.doc]
You should get a message that the disk is full!
-
Save As to the hard drive. [sharedata.doc]
Your teacher may have set up a special folder for students. If so, use
it now. Otherwise, save to the My Documents folder. Remember where
you saved so you can delete the file later. Other students may be saving
their own sharedata.doc file there, too!
Next you will look how you can reduce the size of the file, most of the
time.
|

![]()