
Jan's Working with Windows:
Files & Folders: Exercise Win 2-1
Now that you have gone through the Step-by-Step exercises, it's time to practice what you have learned. The following exercises will not have as much detail in the directions. Look back at the Step-by-Step pages if you need a refresher on how to do something. There are new methods and information in these exercises. They are not just review!
New terms:
- Screen shot/Screen capture:
- Getting an image of the whole monitor screen or just part of it.
- Crop:
- Cutting off part of a picture
Exercise Win2-1: Print Screen Capture of Folder Structure
| What you will do: | Paste image into Paint Add text to the image Print the image |
Start with: ![]() and have finished Files and Folders: Windows Project 2.
and have finished Files and Folders: Windows Project 2.
Show Folder Structure
-
 If
necessary, insert your Class disk into its drive or port.
If
necessary, insert your Class disk into its drive or port.
- Open Explorer and expand its branches to show contents of folder win project2 in the right pane.
- Scroll the folder tree to put your disk as close to the top as you can.
- Collapse any expanded folders or drives except your
removable disk.

Folder tree structure: Vista, Win7
Screen Capture
-
 Capture
full screen: Press the PRINT SCRN (print screen) key on the top row on your keyboard.
Capture
full screen: Press the PRINT SCRN (print screen) key on the top row on your keyboard.
This will place on the clipboard (Windows' temporary storage location) a copy of what you see on your computer screen.
OR
Capture
active window: Hold the ALT key down and press the PRINT SCRN key to get a copy of only the
active window. -
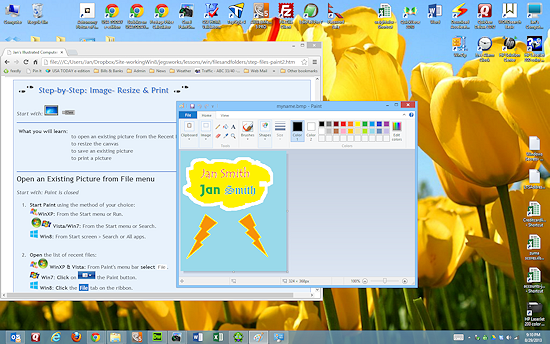
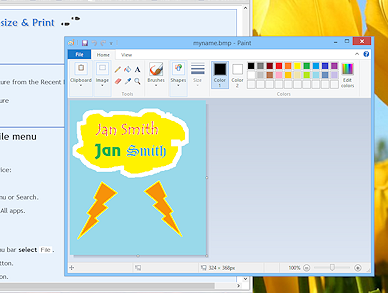
 Open Paint and use the key combo CTRL + V to paste from the Clipboard.
In recent versions of Paint, the canvas automatically resizes to hold your image, but you can't see all of it. It is bigger than the Paint window. Look for the scrollbars.
Crop Image: Work Around Method
Unlike most other graphics programs, older versions of Paint do not have a crop feature. You will use a work-around method to cut off part of the screen capture. Train your brain to think of alternate ways to do things!
- Scroll the image (and resize the window if necessary) until you can see all of the folder tree for your Class disk and the contents of the right pane, with the folder win project2 near the top.
-
 Click on the Select tool
on the toolbar or ribbon.
Click on the Select tool
on the toolbar or ribbon.
This tool will let you remove part of what you pasted and save it as a new image. Notice that Paint in Win7 and Win8 has a crop button that makes this action easy.
- Move the new pointer over the image of Explorer and drag to select enough to show the folder tree for
the drive and the contents of the folder win project2.
- To copy the selected area to the clipboard, press the keys CTRL + C.
- Open a new document in Paint:

 WinXP, Vista: >
 Win7: Paint button
  > .
> .

 Win8: Click the File tab on the ribbon and then .
A message box appears, asking if you want to save the changes to the current image.
- Choose No.
A new blank canvas opens. 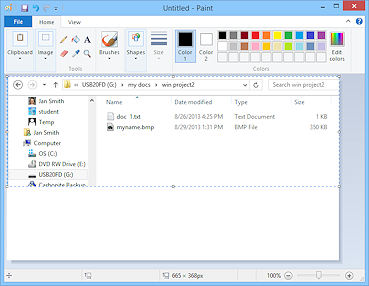 Use the key combo CTRL + V to paste the image that is stored on the clipboard.
- If you don't have any white space below the image:
- Click in a blank area to remove the selection.
- Move your pointer over the handle that is in the center of the bottom edge of the image.
- Drag it downward about an inch to increase the white space below the folder tree image.
You have managed to crop your screen capture without using a special tool. This method has an advantage over using a Crop tool on an image that has already been saved. You won't accidentally save the cropped version in place of the original.
Add Label to Image
 Click on the Text tool
  and then in the white space below the
folder tree image.
and then in the white space below the
folder tree image.- Change the font to Arial and the font size to 12.
If necessary, take off Bold and Italics by clicking on their buttons to deselect them. - Type your name and two spaces and then win2-1 .
 Save your image
to your Class disk in folder win project2 with the name win2-1.bmp .
Save your image
to your Class disk in folder win project2 with the name win2-1.bmp .
You may have to navigate in the Save As dialog to get to the correct folder. You may have to select the correct file type. Missing document(s): What happened to your file doc 1.txt from the previous lesson that used Notepad? It does not show in the list.
 Does your dialog show the image file you saved previously, myname.bmp? The Save As dialog will only show files that match the current file type at the bottom of the dialog! The default file format for recent versions of Paint in PNG. You don't have any files with that file type.
In a Save As box you must choose a particular file type or you can't save. In an Open dialog box, you usually also have the choice of 'All files', which shows you everything.
Be sure to always check the Page Setup and Print Preview when printing from a graphics program. Some programs have default settings that you might not expect.
- View Page Setup:
WinXP, Vista: >
Win7: > > .
Win8, Win8.1: File - Inspect the settings and make any changes that seem necessary. Try to conserve ink!
- Then click on the OK button.
- View Print Preview:
WinXP, Vista: >
Win7: >
Win8, Win8.1: File
- Click on the Zoom In button twice to enlarge the print preview so you can
see your image clearly.
Be sure only 1 page is needed to print. -
 If all looks good here, click the Print button. The Print dialog box appears.
What you see in your printer's dialog varies with the particular printer.
Printing in color: If you have a color printer and wish to print in color, click on the Properties or Preferences button. Find the area or tab that controls whether to print in color or not. Be sure that Color graphics or Automatic is selected in the dialog box. Otherwise you will get a black and white print-out.
- After the print job has completed successfully, get your page from the printer and check it.
- If all is well, close Paint and your Explorer window.
|
|
| © 1997-2017 Jan Smith All Rights Reserved |
Site Map What's New |
Privacy Policy Terms of Service Copyright Acknowledgements |
~~ 1 Cor. 10:31 ...whatever you do, do it all for the glory of God. ~~
Last updated: March 25, 2017