
Jan's Working with Windows 10:
Folders: Create & Arrange
 What is a folder? It's just a way to group files together, like putting various paper documents into a file folder and then into a file drawer.
What are the basic tasks about folders that you need to learn?
Obviously you must first create a folder or two. You will change the way your folders display in the window.
Most of these tasks work the same for files as well as folders. You will deal with files a bit later, after you create some.
| |
Step-by-Step: Create & Arrange |
|
| What you will learn: | to show the contents of a drive to create a folder using the ribbon button to create a folder using the context menu to arrange folders with sorting and grouping |
Start with: ![]() , File Explorer window open
, File Explorer window open
![]() Missing expected command: The ribbon and context menus change depending on what is selected or what you are doing. So when a command or button that you expect to see is missing, first check to see what is selected.
Missing expected command: The ribbon and context menus change depending on what is selected or what you are doing. So when a command or button that you expect to see is missing, first check to see what is selected.
![]() Check boxes: You may see a small check box beside or at the top left of what you select. Those boxes are useful when you need to select several scattered items. The default settings do not show the check boxes. You can turn them on or off in the dialog Folder Options > View tab > Use check boxes to select items.
Check boxes: You may see a small check box beside or at the top left of what you select. Those boxes are useful when you need to select several scattered items. The default settings do not show the check boxes. You can turn them on or off in the dialog Folder Options > View tab > Use check boxes to select items.
Open a Drive
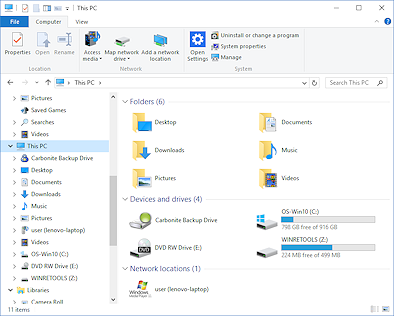 Open a File Explorer window to show
the drives on the computer.
Open a File Explorer window to show
the drives on the computer.
You may need to select This PC in the folder tree.Your window will, of course, look different from the illustration.
-
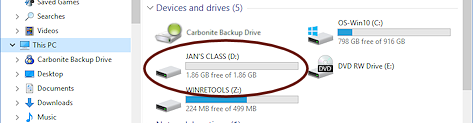 If necessary, attach your removable drive to the computer.
The window should refresh automatically to show the newly attached drive. It may take a few seconds.This drive was named in the previous lesson with your own choice of names.
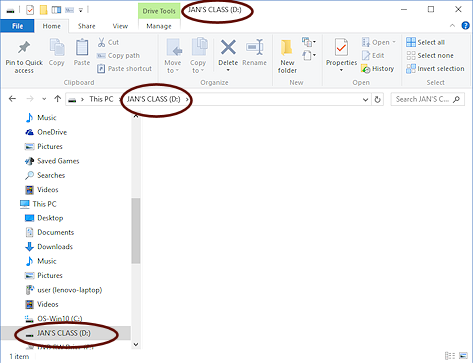
 Double-click on the icon for the removable drive.
The display changes or a new window opens, depending on the computer's settings.
Blank or not: A new USB flash drive is usually blank but some drives (like U3 Cruzer flash drives) come with software already on the drive.
It does not matter for these lessons if there are already folders and files on the disk. Just be careful not to delete or move any pre-installed files or folders without knowing the consequences.
 Right click in a blank area and select and then so that your window is ready for the next
steps.
Right click in a blank area and select and then so that your window is ready for the next
steps.
Create and Name a Folder: Ribbon
 If necessary,
  click on the Home ribbon tab.
- Click the New folder button.
A new folder appears in the Contents pane with the name New Folder, which is highlighted
 , ready for you to type. You really do want to replace this unhelpful name!
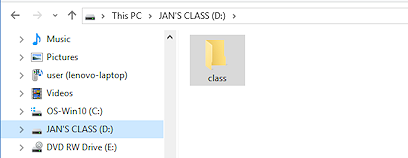
While the folder label is still highlighted, type class as the new name for this folder and press the ENTER key.
The folder is renamed. Problem:
You lost the highlighting before typing.
Problem:
You lost the highlighting before typing.
The folder name is now New Folder. You must have clicked somewhere else.
Solution 1: Right click on the folder icon and choose to get the highlighting back. Then you can type to replace the name.Solution 2:
Click on the folder name, pause, click again.
The highlighting returns. Type.
Don't click too quickly the second time or the computer will treat it as a double-click which will open the folder.Solution 3:
Click on the New Folder folder to select it. On the Home ribbon tab, click the button Rename. The name is selected, ready for your typing.
Create and Name a Folder: Context Menu
![]() Menus: An arrow following a menu item like
Menus: An arrow following a menu item like ![]() means that another menu will cascade from it.
means that another menu will cascade from it.
Three dots following a menu item like ![]() means that a dialog will open,
containing choices for you to make.
means that a dialog will open,
containing choices for you to make.
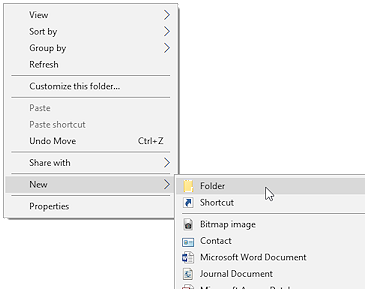 Right click in a blank spot in the window to see the context
menu.
Right click in a blank spot in the window to see the context
menu.
This will automatically deselect the label you were just typing.
- Hover over the menu item .
The menu slides out. - Click on .
A new folder appears in the window with its name ready for your typing.
-
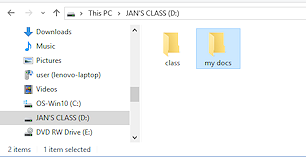 While the folder label is still highlighted, type the name my docs as the name for this new folder and then click in a blank spot in the window.
Now you have 2 folders: class and my docs
Open Folder in New Window
When you open a folder from the Contents pane, do you want the folder's contents to show in the same window or do you want it to open in a new window? It probably depends on what you are doing! There is a context menu and a dialog to help you out.
-
Double-click the folder my docs.
The folder is empty so far. Did you get a new window?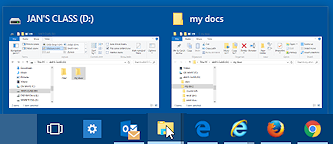
 How to tell if its a new window: If you cannot see a new window, move the pointer over the Taskbar icon for File Explorer. How many thumbnails show? Do you see one for the drive and one for my docs?
Problem:
You did not get a separate window automatically.
The Folder Options is set to open in the same window, which is the default.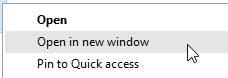 Solution 1: New window this time
Click the Back button on the Address bar to return to the view with your two
new folders.
on the Address bar to return to the view with your two
new folders.
Right click on the my docs folder and select .
 Solution 2: New window every time
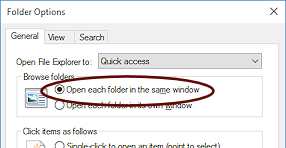
Open the Folder Options dialog by clicking the Options button on the Home tab. Change the default setting on the General tab to the one your prefer.
-
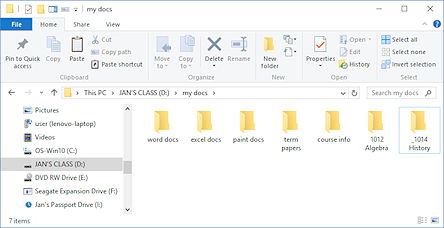 Using the methods you just learned, in the folder my docs, create new folders - in the following order:
word docs
excel docs
paint docs
term papers
course info
1012 Algebra
200 English
_1014 HistoryAs you create new folders or files, they are added to the end of the list at first. You must refresh the window to get the contents sorted again with the current sorting choices. Don't refresh just yet.
Don't worry. Making things neat is the next topic.
Refresh: When you refresh a File Explorer window, you make File Explorer look at the contents and apply the current view and sorting. This command is not on the ribbon! Easiest ways to refresh:
- F5 key
- Click the Refresh button
 at the right end of the Address box
Arrange Icons
AutoArrange arranges icons into neat rows and columns, starting from the top left. This feature just straightens up the lines of icons. In Windows 10 there is no easy way to turn AutoArrange off for File Explorer.
 Experiment: Moving folder icons
-
 Try to drag the folder icons around so that they are not in order
and are not lined up in a row.
Try to drag the folder icons around so that they are not in order
and are not lined up in a row.
Your folders will not change position, even when the folders are not in the current sorting order, which is alphabetical order. Did you expect that! Old versions of Windows made it easy for you to do your own arranging. The Desktop is the only folder in Windows 10 that allows that.
-
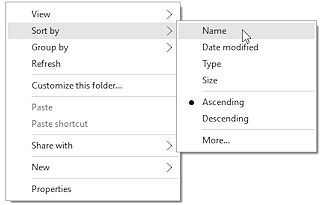 Right click in a blank spot in the window and choose from the
context menu.
Right click in a blank spot in the window and choose from the
context menu.
A submenu expands.
 Click on ,
even if it is already selected (a dot showing at the left).
Click on ,
even if it is already selected (a dot showing at the left).Did any folders switch positions?
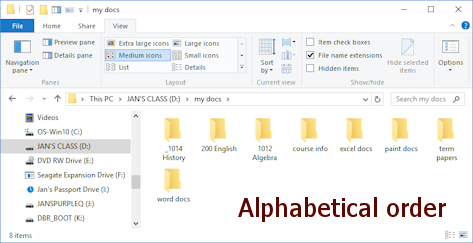
The folders will be in alphabetical order, _1014 History, 200 English, 1012 Algebra, course info, excel docs, paint docs, term papers, word docs, if Name did NOT have a dot beside it already.
Alphabetical order: Characters like the underscore character come before numbers and numbers come before letters. There is a specific order for characters. Numbers in Windows 10 are in numerical order but in particular programs they may not be sorted that way. When numbers are treated as text, 1012 comes before 200 because all of the numbers that start with 1 (including large ones like 1012) come before 2!
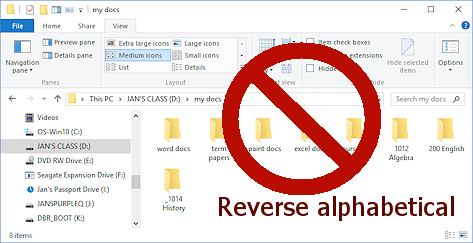 If the folders are in reverse order, repeat the last step to put the folders in alphabetical order.
-
Experiment: Sorting and Grouping Folders
With just a few folders, sorting and grouping is not as exciting as when there are 50 or 100 items, but you can see the choices and a bit about how these features work. Previously you sorted and groups in Details view. The same techniques work in other views and for folders.- Right click in a blank spot in the window and select in turn each of the different choices for sorting and grouping.
(These choices are also on the ribbon. Look for Sort by and Group by.)You only have a few folders, so some choices may not look very different.
-
When you are done... let you last choice be to sort by Name in ascending order with no grouping.
-
Repeat the same sorting and grouping choices in the Windows folder which contains many folders and files. Be careful not to move or delete any of these folders. Very bad things can happen when you tinker with Windows files!!
 Did having more items to sort and group show you anything that the smaller set of folders did not?
Arrange by: The right click menu for a folder in a library has yet another item, . This opens a short list of common properties for items in that type of library. Choosing one of these will group your files based on that property, such as by author or date created for documents, day or month for photos, type or length for videos.
|
|
| © 1997-2017 Jan Smith All Rights Reserved |
Site Map What's New |
Privacy Policy Terms of Service Copyright Acknowledgements |
~~ 1 Cor. 10:31 ...whatever you do, do it all for the glory of God. ~~
Last updated: April 27, 2017