 |
Step-by-Step: Clip Art |
 |
|
What you will learn: |
to insert clip art with Microsoft Clip Gallery or Organizer
to resize an image
|
Start with: ,
flyer-World Travel
Inc.doc
 Selected image: Selecting an image changes many
of Word's commands. This can be quite frustrating and confusing if you
don't know that you have an image selected. For example, an image remains
selected after you have imported it into the document. You may have to
click off the image somewhere to remove the selection before you can go on
to other tasks.
Open Clip Gallery/Organizer
To help you find the right image quickly, Microsoft Clip Gallery and Clip
Organizer group images in categories/collections.
 Word cannot
find the Clip Gallery/Organizer or any images: The clip art software may
not have been installed or Word may be looking for the images on a CD that is
not in the CD drive.
If you do not have Clip Gallery/Organizer installed, read
through the directions anyway. In this case you will need to do the Resize an Image
and Adjust to One Page
sections below later, after inserting an image from a file (the next lesson page).
- Click on line 3, which is
blank. This puts the cursor in that line. You will put an image on this
line.
-
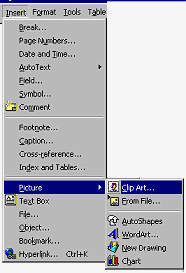
 From the menu select | | .
What happens next depends on your version. Click on the link for your
software version to see the next steps.
 Word 97 with Clip Gallery 3.0:
The Clip Gallery opens showing thumbnails of the images you can choose from.
 Word 2000 with Clip Gallery
5.0: The Clip Gallery opens showing thumbnails of the images you can choose
from.

 Word 2002/2003 with Clip Organizer:
The Task Pane opens at the right with the Clip Art search pane showing
Resize an Image
Your image is usually not quite the size you want. One of the great features of modern word processors is the ability to change the size of images in your documents.
 If you enlarge any image beyond the size it was originally created, it may look jagged. Vector format images change size more smoothly than bitmaps.
- Select the image in the document by clicking on it. Handles appear at the
corners and in the middle of each side.
-
 Center the image while it is
still selected. If you need to select the image again, just click on it
once.
 Word 97: Drag the
image to the center.


 Word 2000/2002/2003: Click
 the Center button.
[In Word 95 you must put a
frame around your picture by selecting the picture and then inserting a
frame and then dragging the frame. Whew!]


 Word 95/97:
If you accidentally double-click an image in Word 95 or 97, you
are asking Word to edit it. Your image will be put in a new
document by itself to edit. Bitmaps images must be opened in a different
program to edit them, but images from the Clip Gallery can be modified
using the tools on the Drawing toolbar. Note the four gray corners
surrounding the image.
Don't panic if this happens accidentally. Just close the new document
and you'll be tossed back to where you were.
 If you switch back to your document
while this editing document is open, your image has a
different look in the original document! It will print normally.


 Word 2000/200/2003: Double-clicking an image opens a Properties dialog
instead.
- Move your pointer to the bottom right corner handle until it changes to the Diagonal Resize shape.

Dragging with a corner handle changes the width and height at the same time without changing the proportions of the image.
- Drag
to the lower right to enlarge
the image. When you let go, the image re-centers (except in Word 95). Drag again until the image is about as
wide as the subtitle "Anniversary Specials". You may need several tries to get the size right.
That's normal. To reduce the size, just drag a bottom corner
handle up and to the left.
[In Word 95
you can drag one side and then the other and then Center again,
if necessary. The image does not re-center automatically because it is in
a frame.]
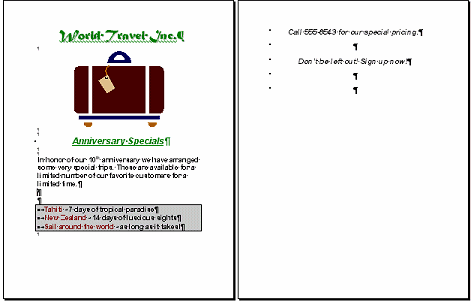
The lines at the bottom of the page all popped over onto a second page together when you enlarged the picture. But there is still some room on the first page. What happened??
These lines have a heading paragraph style, so they will be kept
together. It's logical; a heading should not be split up.

Adjust to Fit One Page
You now have a situation to deal
with. Your text has moved onto a second page and your flyer must use just one page. Read the
directions below very carefully. You will tighten up the spacing by getting rid of unnecessary blank lines. Later you will learn how to change some other characteristics to reduce the length of a document.
- Delete
the blank line between the last two lines of text.
- Delete
the last blank lines in the document.
- Delete
the blank line above the list of trips. Finally you are back to one
page!
- If you still have two pages, resize
the graphic just a tiny bit smaller.
 Save.
Save.
 How to handle a full disk

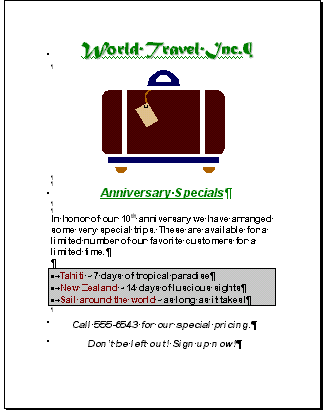
Flyer after inserting image - on one page again!

