Spreadsheet Design:
Object:
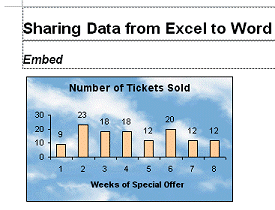
Embed

Did you want Working with Numbers: 2007,2010,2013,2016 or
español![]()
|
|
Spreadsheet Design:
|
|
||||
|
|
||||||
|
|
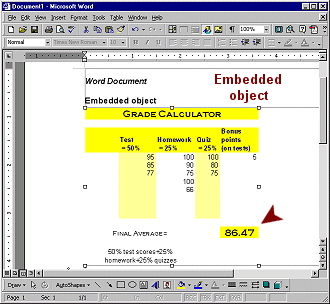
An embedded object in a document looks like it is just a normal part of the document. You can edit it, however, with the original program using all the original's toolbars. This is a major convenience. You don't have to switch programs and re-paste the changed material. Just double-click on the object and it pops up in a small window, ready for editing. You are not editing the original source.
Sheet embedded in Word document If nothing happens when you click, you can view the images on this page. The embedded object looks a little different from the sheet in Excel. The row and column headings do not show. The Final Average cell E13 shows 2 decimal places to the right instead of just 1. After the edit window closes, the cell goes back to 86.5. An odd quirk. |
|
Project 5: Design Search Glossary Appendix |
|||||||||
Start with:
You will create a Word document that illustrates the ways you can share data from Excel in another program.
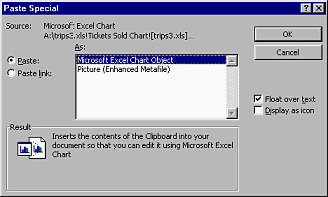
Embed: Create object
Embed: Open in Excel for editingYou have two options for working with an embedded object- back in the original program or in place. Which you choose may depend on how much space you need to work with. In place editing has a window that is the size of the object. First let's look at how you can edit back in the original program.
Notice that the File menu has different items on it from usual. If necessary, switch back to Word. You will see the revision in your Word document. Your changes apply only to this document, not to the source that you pasted from originally. It can get confusing! Embed: Edit in placeNext you will see how to edit "in place". The advantage is that you do not have to switch windows.
|
||||||||||||
|
|
~~ 1 Cor. 10:31 ...whatever you do, do it all for the glory of God. ~~ |
 On the first line type
 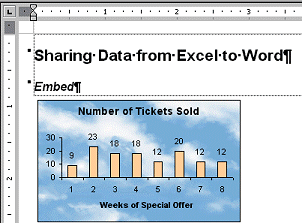 Resize the chart by dragging the bottom right
corner up to the left until the chart is only as wide as the title in line
1 up to the W. (With this size chart, the whole set that you are going to
create will fit on one page.)
Resize the chart by dragging the bottom right
corner up to the left until the chart is only as wide as the title in line
1 up to the W. (With this size chart, the whole set that you are going to
create will fit on one page.)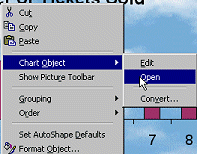 Right-click on the chart. From the popup menu select
 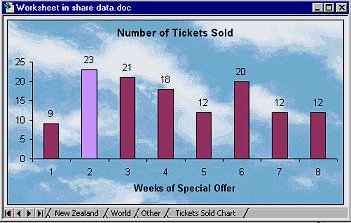 Excel opens and shows a window titled
Worksheet in share data.doc or Chart in share data.doc. You can
edit the chart here.
Excel opens and shows a window titled
Worksheet in share data.doc or Chart in share data.doc. You can
edit the chart here. 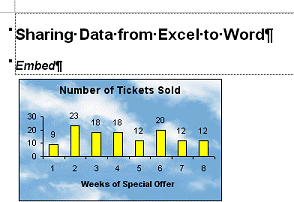 Right click on the chart's bars and choose
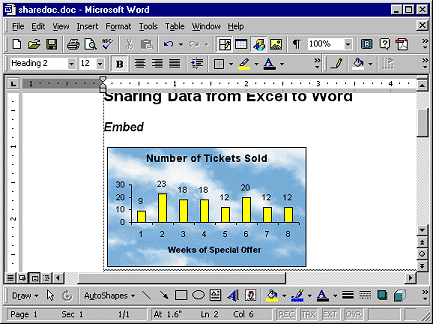
 Format the data series to use
Tan bars.
Format the data series to use
Tan bars.
Cause: Microsoft documents tend to grow beyond the minimum as you work, partly due to Undo and Tracking information. The more changes you make, the bigger the file.
Solution: (Covered later in Document Properties) Save the file with a new name. At this point your file should lose all that extra data and be much smaller.