 |
Step-by-Step: Brochure Back |
 |
What you will learn: |
to add a text box over a text box
to format text inside a text box
to format the text box
|
Start with: 
 ,
brochure-tahiti2.doc
A sample document, images, and replacement text are in your
resources files in the tahiti
folder.
Text Box in a Text Box
You want to put the return address on the back of the brochure for
mailing. The address will run from top to bottom on the page. You
need to put it in a text box so you can change the text direction. So
first you create the small text box that you need.
- From the Drawing toolbar click on
 the Text box button. The pointer changes to
 the
Precise Selection shape.
- In Text Box 2, drag to create a new text box.
- Drag your new text box around the page. At first this new text box
looks like it is contained inside the
old one. Actually it is just on top of it. Leave the box
in the upper right of Text Box 2.
Format Text
- Switch your Zoom to
100% so you can
see the text you are about to type.
- Type in
the new text box the following lines:
World Travel
Inc.
Montevideo
6553
Buenos Aires 1123
Argentina
Phone 54(1)
821-6543
You can resize the text box if necessary.
-
Drag to select the first line of the address, World Travel Inc.
(You won't be able to get to the selection area at the left of
the text like you usually can.)
-
 Format it as :
Font
= Arial Black
Size =
7.5
(For numbers that aren't in
the Size drop list on the Formatting bar, type the number into the Size box and
press ENTER.)
-
 Right click and
choose
If
you don't get that choice, did you click over a green or red squiggle
underline? Check for spelling and grammar errors and fix them. If the
squiggle still remains, right click on it and choose .
- In the Paragraph dialog, set the Space After to 3 pt and click on OK.
- Select the remaining address lines.
-
 Format
as:
Font = Arial
Size = 7
Format the Text Box
-
 Select the text box and select from the menu |
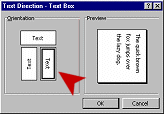
- Click on the icon for text that runs from top to bottom. Click on OK.
- Click on
 the Center button
to center all the text in the text box.
- Resize the
address's text box by dragging one of its handles
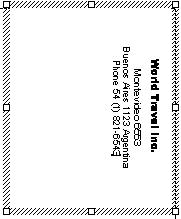
until the whole address and phone
number fits on 4 lines.
- Drag the box to the top right corner of the address's
text box.
-
 With the text box selected, choose from the popup
menu.
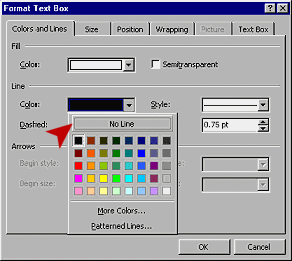
- In the Colors and Lines tab in the Line section, open the Color palette and choose No Line.
-
 Click on OK to apply your choice.
This will look better in print than it does on screen.
Now the back of your brochure is ready for a mailing label.
-
 Save as brochure-tahiti3.doc in the word project3 folder of your Class disk.
 How to handle a full disk
Next you will use an existing document as the source for the
text in Text Box 1 - the brochure flap.

